I hope you excuse my absence. I have a really surprising excuse. I’ve been a victim of mind snatching and in my place a Crafty Cathy has been dabbling. *grin* I’m not sure if she’s some previously unknown dual identity or what, but I’ve been having a lot of fun. LOL
I stumbled upon a really intriguing pin on Pinterest and it honestly sounded too good to be true, especially after the difficulties I had with the melted crayon pin. It couldn’t be that easy and, truly, it’s not always. I’ve had quite a mixture of success and failures, but the best part is that it’s a whole lot of fun and I think I may have finally figured out what’s been going wrong. As you have probably guessed, that always piques my interest way more than success, so I’ve been a bit obsessed. *laugh* The pin (and sister link) lead to the websites: www.lilyshop.com/how-make-colored-mason-jars and www.lilyshop.com/how-make-glitter-mason-jars. Once I started playing with one I had to explore the sister link, and then my crazy mind had to see if both processes play well together. *grin* Basically the first one explains how to “dye” mason jars with mod podge and food coloring. The second is pretty much the same thing except you substitute glitter for the coloring (and the insanely girly side that hides from my typically morbid and dark usual tendencies can’t resist glitter, so it was pretty much a guarantee that I’d be checking that link out. Although I totally realize that although the blogger says that it’s dyeing jars, it’s really just dyeing the glue, I’m going to follow in their footsteps, just because it’s a whole lot more consistent when you read my experience and then the blogger’s tutorials. (Or you can go look now. I’ll wait. Unless I spot some glitter. I can’t be held responsible for any lapses of sanity if that girly part of me spots…Oh! Look at my new box of pretty glitters….*happy sigh*) Ahem. Now that we’re all on the same wave length, let’s continue. *smile*
Here’s where my post is going to get picture heavy. You take a clean jar (I got totally scandalous and branched out to sanitized spaghetti jars and old business jars…*laugh*) and pour a liberal amount of mod podge inside of it. The blog advises quite a bit, but I have only needed that much for a family sized spaghetti sauce jar – the mason jars that I used didn’t need that much. You add a few drops of food coloring, stir it completely into the glue, and then swirl the mixture to coat the entire inside of your jar. Let it sit and drain for an hour or so, then flip it back over and let it finish air drying. That’s what the instructions say. Well….
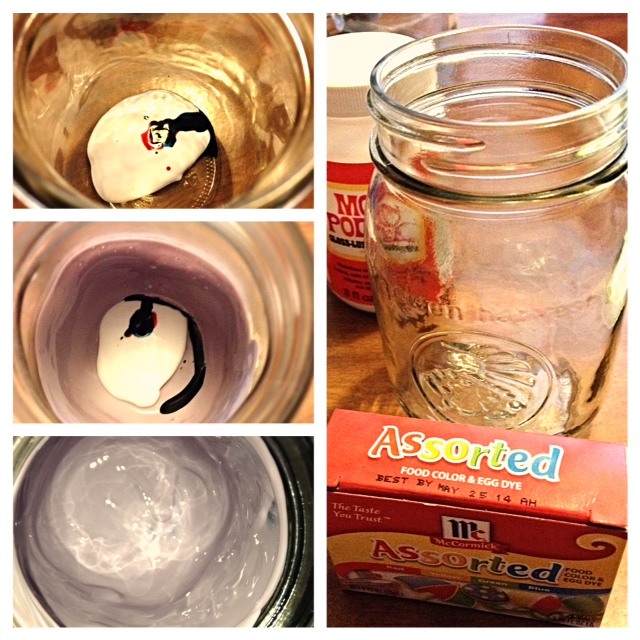

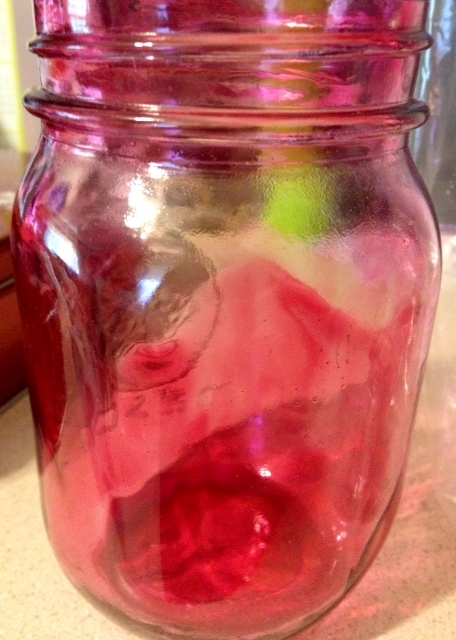
When I started I wanted to test if food coloring would be more effective than my soap dyes, since I have them on hand in more colors and they have such vivid tones in comparison. The compilation of pictures are just that. The lavender shots don’t actually go with the food coloring. Honestly I didn’t want to overwhelm you with a bunch of shots that aren’t overly exciting, so I cropped them in with each other. I wanted to show you the steps though, so if you are nervous while trying this project you can see that everything is progressing normally. The lavender was a third test, using craft paint, while the pink was soap dye, and there will be a dark purple one you’ll catch a glimpse of, which was actually done with the food coloring. (Something that the blogger very accurately notes is to not brush or scrape any of the paint mixture onto the glass. Just swirl it around and let it naturally coat the interior. Any forced application leaves funky textures and really messes up the look. That was tested purely by accident, but a great thing to keep in mind if you do this project. Just be patient and keep swirling!)
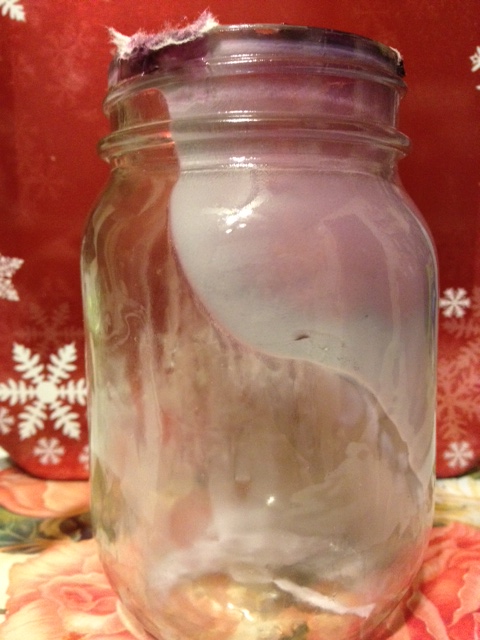
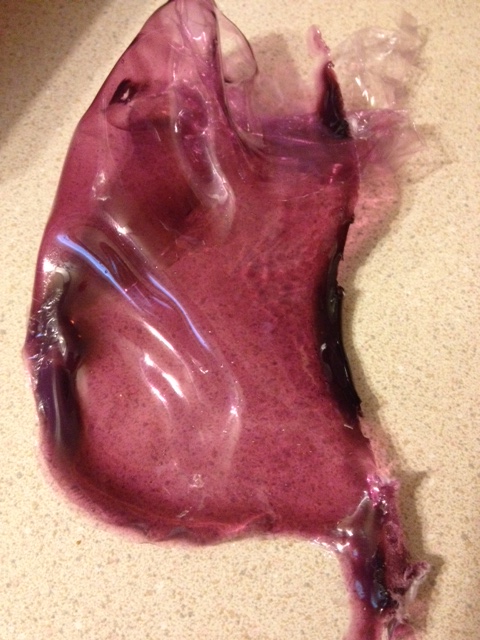
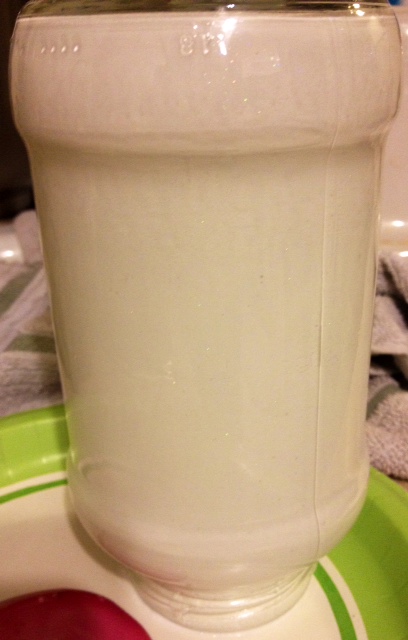
This is what happened with the food coloring. I retested it to see if there was a flaw in the application or process and realized that I had missed the instruction to turn the jar right side up after an hour or so (this was my first jar), so it had dried upside down, although most ran out and pooled at the opening on my paper plate. I don’t have a picture of the retest, but it worked fine when the directions are correctly followed. *grin* I personally don’t care for the colors I achieved with the food dye, so I was more interested in the other paints. Now, here’s the coolest part. If you don’t like your results, fiddle with the coating at the lip of your jar and you can peel the whole shebang out and start over (after rinsing)! How cool is that?! So, you’ll understand why I’ve done these a lot of times, but don’t always have the pictures to back the comments up. *laugh* The second pic is the dyed glue “skin” which is absurdly fun to squish and stretch. I won’t judge you if you don’t judge me. *teasing grin* It’ll be our secret squishy stress reliever.
Now, the above is what happens if you don’t have a consistent heat source and your house is pretty chilly. It starts out just fine, but then…I have incredibly bad timing and we had snow, freezing rain, and below zero temps, and to top it off our wood stove has been off getting repaired, so the house is chillier than usual. I had been setting the jars in front of a heater register in the bathroom, since I could close the door and make that the warmest room, so in theory they’d have the best chance at heating. That would be true if Abby Cat hadn’t decided that she needed some direct heat and laid down between the vent and the jars. *rolling eyes* The streaking also happens if the temperature is just right for the thermostat to not kick the heater on for several hours, so the glue just kind of works with gravity and pulls off of the sides. The blogger noted that she had small bubbles develop from placing them in the oven (by the way, I never found a way to avoid at least a few bubbles, no matter what dye or process I tried. Gentle stirring of the dye into the mod podge helped to reduce the number, but they developed on their own while I worked the mixture around to coat the interiors. If you find a way to stop it, please let me know, but I never developed a whole lot of them, like she described with the oven process. Just a heads up so you don’t think you’ve done something wrong.). The way that worked best for me was to place the jar and paper plate on the floor and surround them with a heating pad, then top that with a light blanket, so it trapped in the heat. I swear I need stock in Sunbeam, because I go through so many heating pads every year (it’s one of the few things that really helps me cope with the pain), so I always have a few handy. For this I used a really long one, although I think a “king” sized one should work just as well. The most flexible one you have. After trying a few different heats I found that medium worked the best with mine. After that first hour or so, once the jars are flipped, I slipped them back into the cocoon (with a bit of wax paper over the lips just because I don’t want to muck up my pad or blanket), and let them keep drying for at least a day. The worst part about this is that most heating pads have that safety turn off feature, so every two hours I had to go and turn it back on. When I slept I just left them in the cocoon and they still stayed warmer than most of my house. *laugh*
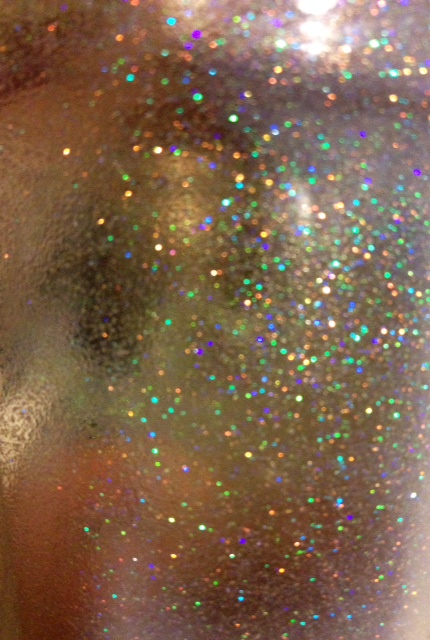
The above is mod podge with super fine iridescent glitter that is rated as safe for cosmetics, which I use in soap. At first it’s white, but then it dried completely clear and look at all of the pretty sparkles!! *cheesing* Yeah, I’ve turned the bend. They’ll probably be coming to size me for my straight jacket soon…(Something else to note is that no matter what color you’re using, it’s going to look like a pastel at first and won’t be anything like what you’re going for. I found that 4 drops of actual dye worked great for vibrant colors and about a teaspoon of craft paint was perfect.
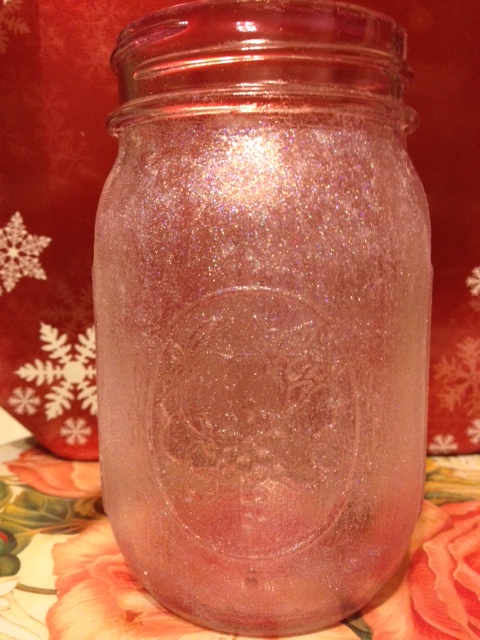
I had a crafting mishap when I tried to make a pretty glitter covered jar weeks back and decided to dye it to see if it would salvage the disaster, and I happen to love how it turned out. *grin* I used Crafter’s Choice (available at Wholesale Supplies Plus, among other online retailers) in Strawberry Red for the dye, while the outside was simply the same iridescent glitter mod podged [I’m not sure if that’s a word, but I’m going with it.] to the exterior in two or three sessions (yeah, looking back that’s a bit extreme, but while it was wet it looked so pretty, so I kept going for it. *sigh* Lesson learned.)
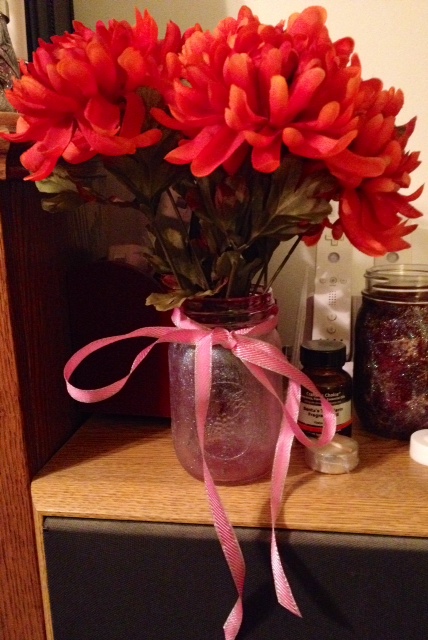
It’s now a permanent fixture on the entertainment center. Although it didn’t photograph well it looks so cute with an LED tea light at the bottom and the fake flowers on top. There’s a slight frosted look, plus a delicate shimmer from the glitter. *happy sigh*
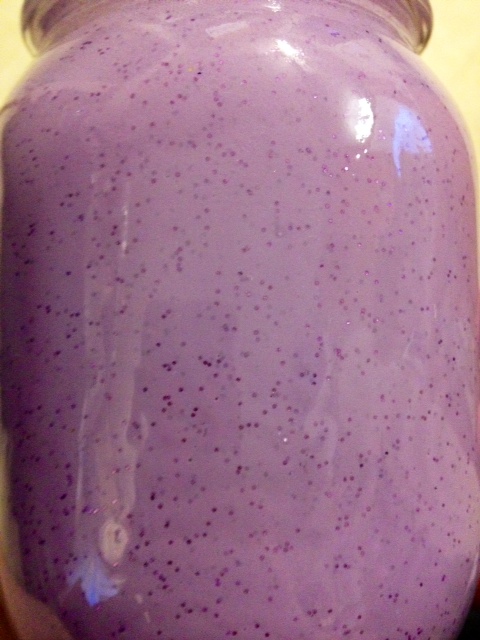
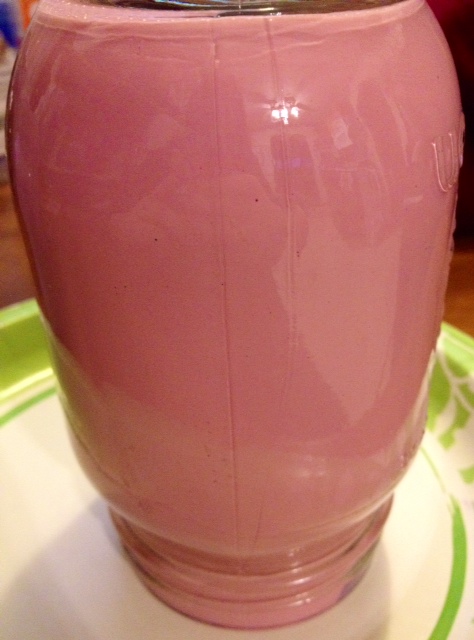
I saved the best for last. This is the lavender (“lilac”) craft paint example from the collage at the beginning with metallic purple small (not fine) craft glitter mixed in. I found that the heavier glitter always sunk, but still looks pretty awesome to me. I swirled like a possessed woman to get enough momentum for the paint to carry some of the glitter toward the top. *grin*
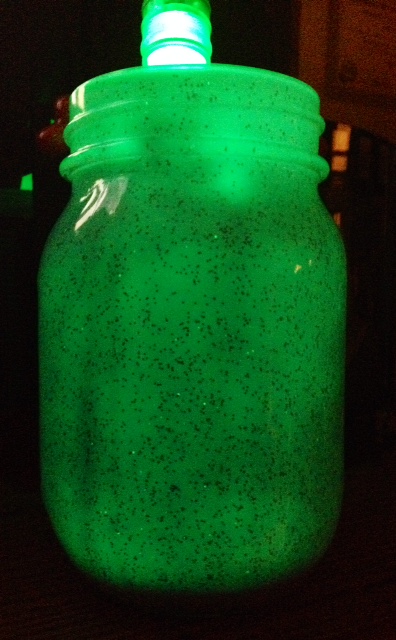
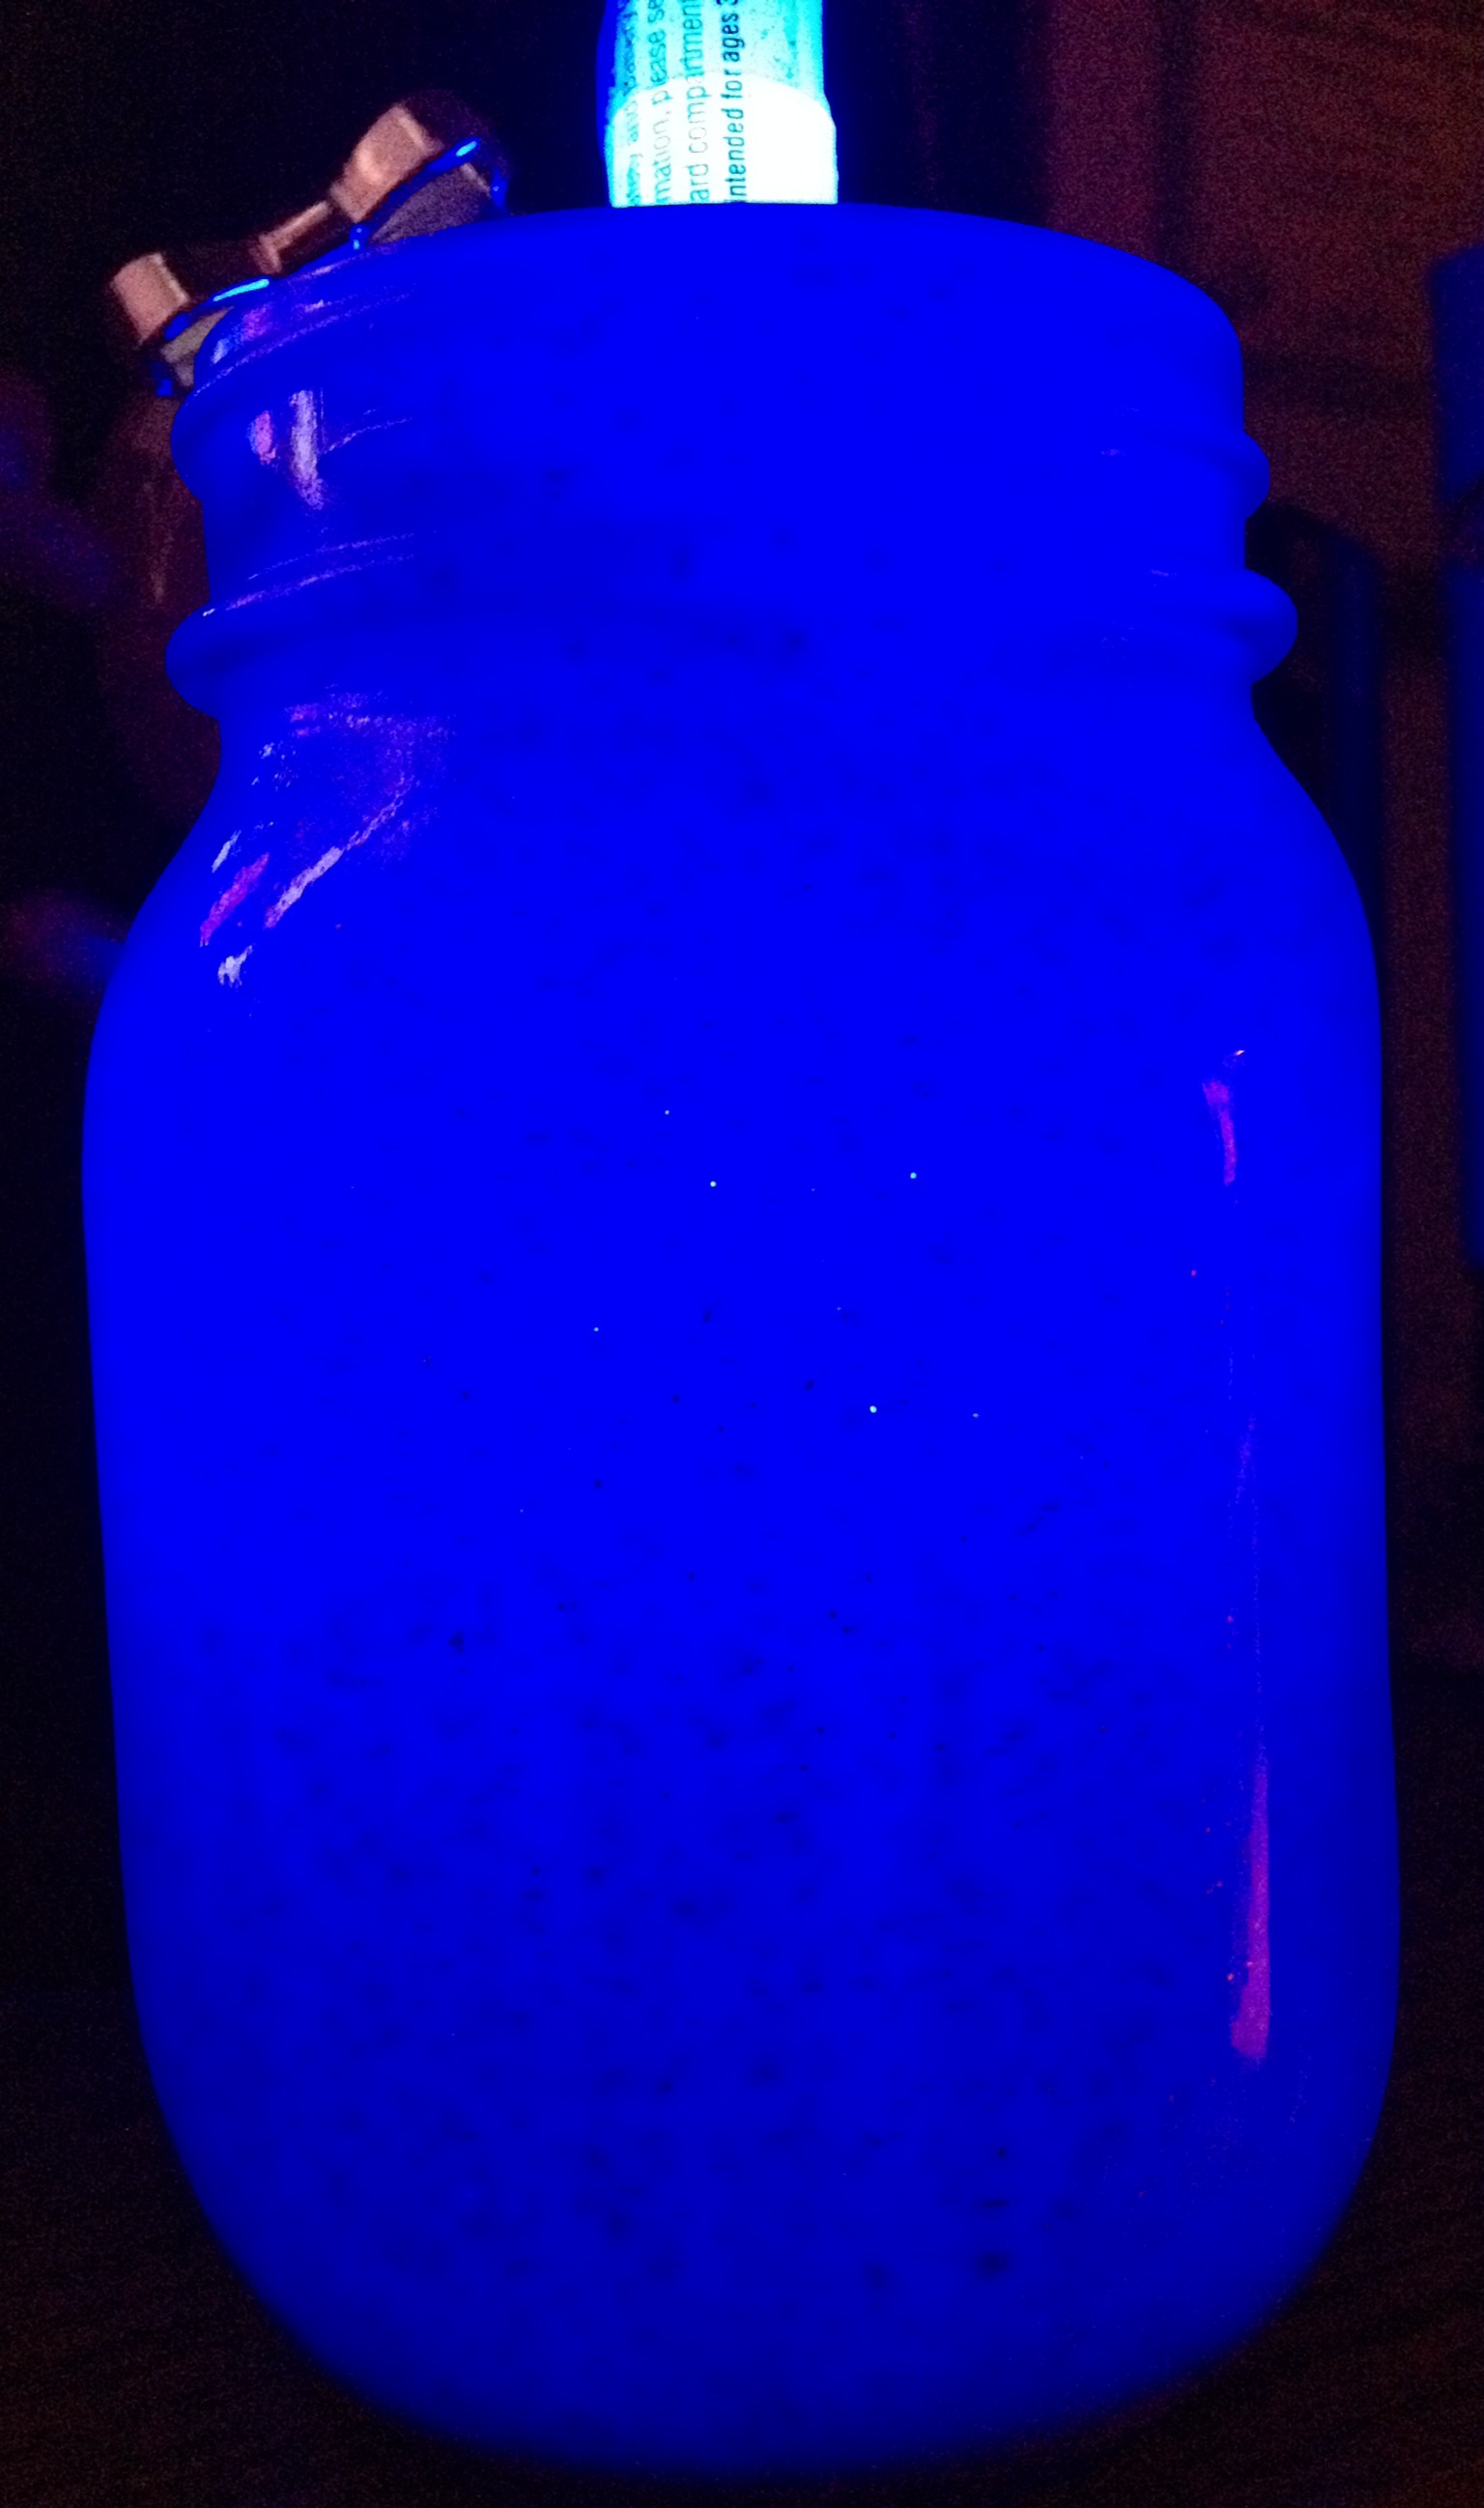
This is what really got us all amped up about the lavender one. Larry came into the room as I was trying out a flickering LED tea light in the jar and said he wanted to try something. He came back with his color changing glow sticks that he uses when he goes riding at the dunes in Oklahoma (safety measure so others know where your vehicle is at night and so it’s easier to judge where your vehicle ends, since it’s dark as can be in the middle of those dunes and you don’t want to clip someone). The above pictures were taken in that lavender jar! I’m not from Jersey, but those are still wicked cool!! Plain and simple. I think this would be awesome for a preteen, too. There are so many glow in the dark craft paints on the market and a ton of different glow sticks, even, so they might not even need a black light. We sure didn’t use one. I never outgrew (nor did Larry) my love of glow in the dark things obviously and would have gone ape over this as a teen. We plan to do some of these jars as luminaries if we get to do a morbid anniversary or Halloween party someday. *crossing fingers* How awesome would these look in a darkened room with a creeping fog from a bowl of dry ice near them?!
In the end I had several that I tore out, but all in all I loved this project. As a matter of fact I bought a bottle of extreme glitter craft paint while grocery shopping today, so I’ll share pictures of that attempt soon. I’m at war with myself over spending the next hour of insomnia watching the new episode of Face Off, which I’ve been eagerly anticipating, or go try out my new paint. *laugh* Since I’ve had limited use of my right arm for the past 36 hours from a small mishap I think the season premiere will win out this time. I really hope you’ve enjoyed seeing my results and experiences, and please share with me your results if you try this. I’d really love to see your creativity. Feel free to link in the comments or email me. It’d totally make my day. *grin* In the meantime, pamper on Garth.
