RSS Feed

Tag Archives: Easy Meal

Tomato Basil Soup and Grilled Cheese Recipe by Leah


My father loves this soup – absolutely loves it.  I cook for my parents a few times a week and every night he’ll thank me for my meal, compliment me on it (Most of the time. He’s become very picky as he’s aged), and then asks me when I’ll be serving “that tomato soup” again.  It’s become something of a joke but I do keep this in my regular rotation.  I keep thinking we’ll get tired of it but every time I serve it my children still greet it with excitement.  It’s rich and creamy with a savory tomato flavor, the Parmesan bringing a salty nuttiness.  It would be delicious with a french or garlic bread but we ALWAYS serve it with a Havarti Basil Grilled Cheese Sandwich.  It doesn’t need a salad, but I try to serve lots of greens, so I’ll add a little baby spinach to the plate and top it with some balsamic vinaigrette.  Perfection!

Tomato Basil Soup with Parmesan

Yield: 3 quarts (about 8 servings)


INGREDIENTS

1 cup carrots, finely diced

1 cup celery, finely diced

1 cup onions, finely diced

1/4 cup vegetable oil

3 cloves garlic, minced

1 tsp dried oregano

1 Tbsp dried basil

1 1/2 tsp salt

1/4 tsp black pepper

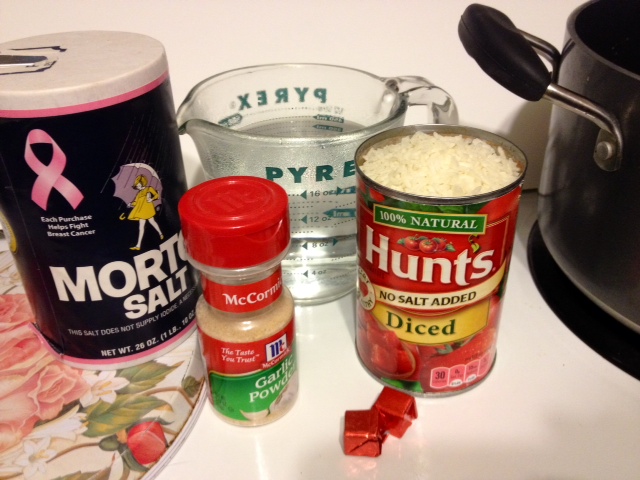
2 (14 oz) cans diced petite tomatoes with juice

4 cups chicken broth

1 bay leaf

1/2 cup flour

1 cup Parmesan cheese, freshly grated

1/2 cup butter

2 cups half and half, warmed

salt and pepper to taste


PREPARATION

  1. In a large soup pot warm oil over medium high heat.  Add carrots, celery and onions.  Stir frequently for about 5 minutes.  When the vegetables soften and the onion becomes more translucent add in the garlic and the oregano, basil, salt and pepper.  Saute for 2 more minutes.
  2. Add the diced tomatoes with juice, chicken broth and bay leaf.  Bring to a simmer and allow to simmer about 15 minutes or until the carrots are tender.
  3. In a large skillet melt the butter over low heat.  Once melted slowly whisk in the flour.  Continue to whisk for 5 minutes.
  4. After the 5 minutes take about 3 cups of the soup and add to the skillet.  Whisk immediately.  Once thickened add the contents of the skillet back into the soup pot.  Stir to combine and your soup will begin to thicken.
  5. Add Parmesan cheese and whisk to blend.  Stir in warmed half and half.
  6. Add salt and pepper to taste.  Simmer over low heat 15-20 minutes, stirring occasionally.  Ladle into serving bowls and serve warm.

Havarti Basil Grilled Cheese Sandwich

INGREDIENTS

good quality wheat bread

Havarti cheese, thinly sliced

vine-ripened tomato, sliced

honey

fresh basil

PREPARATION

Spread a thin layer of honey on each slice of bread.  Top half of the bread slices with cheese, tomato, 2-3 basil leaves, and another slice of cheese.  Place the final slice of bread on top.  Add a thin smear of butter to the outside of the sandwich and heat in a hot skillet or on a griddle.

Leah Recipe Logo

Taco Salad Recipe

Recipes Logo


20180204_170733

Taco Salad


My sweet 10 year old desperately wanted to make dinner for me on my birthday.  Hmmm.  What can I ask her to make that is both tasty enough to give her confidence from her efforts and requires minimal cooking experience?  This is the recipe I pulled out for her.  She did have to ask my husband a couple questions, like how to know when the meat was done, but overall she did wonderfully and gave us all a delicious meal.  She even asked to take some of the leftovers to school for lunch the next day.  That’s what I call a success!


Taco Salad


Yield: 6-8 servings


INGREDIENTS

1 lb ground beef

1 packet taco seasoning

1/3 cup water

1 large head romaine lettuce

15 oz can kidney beans, drained and rinsed

2 cups crushed Nacho Cheese Doritos

1 pint grape tomatoes, halved

1 cup chopped green onions

1 avocado, sliced

3.8 oz can black olives, drained

1 cup shredded cheddar cheese

Bolthouse Salsa Ranch Dressing (or your favorite salsa with a little ranch mixed in)


PREPARATION

  1. Cook the ground beef in a large skillet over medium heat.  Brown the meat and break into small pieces with a wooden spoon.  Stir in the taco seasoing and 1/3 cup water.   Simmer until the water is absorbed, then remove from heat.
  2. Chop the lettuce and place in a large serving bowl.  Pile the taco meat and beans over the top.
  3. Add the crushed Doritos, tomatoes, green onions, avocado slices, olives and cheese.  Top the salad with Salsa Ranch Dressing.


Leah Recipe Logo

Chicken Frito Supreme

Chicken Frito Supreme

Hi there!  In honor of Serve It Sunday I want to share a new recipe that I found on Pinterest that will become part of our regular meal rotation.  The original recipe is at http://www.redaprongirl.com/chicken-frito-supreme/, although mine has a few changes plus a little tip.  This meal comes together without a whole lot of work, especially if you all ready have some trimmed chicken breasts ready.

We used:

2 trimmed chicken breasts, diced

1 cup salsa (due to my sensitivities I used extra mild picante instead, but it’s totally whatever you prefer, and I only had the one cup of salsa, so that’s why I went with some Ro-tel.  If you have a full jar of salsa, then use the original 2.5 cups of salsa and omit the Ro-tel)

1 can mild Ro-tel

1 can of chicken broth

5 tbsp. cornstarch (original calls for 3; if you use a picante or Ro-tel, then you will also need more cornstarch)

Grated cheddar cheese

Fritos chips

2 cups Instant Rice

Sautee the chicken until it’s cooked through (we went with two breasts because we didn’t want it as meaty, while the original recipe calls for 4), and then add the salsa/Ro-tel, broth, and cornstarch to the chicken.

ChickenFrito1 ChickenFrito2

Here’s where I take a detour from the original recipe.  It says to “let simmer while rice cooks”.  Most of the time cornstarch needs some heat to become active, just like when you make gravy, so after I stirred the mixture together (and added the extra cornstarch beyond the original recipe) and let it simmer for a while, I finally realized why the mixture was still thin and increased the heat to medium high just until it came to a boil. I then turned it down and let the mixture simmer, stirring frequently, and it thickened up well.  I cooked the instant rice with hot water as the package indicated.

(My feet have been excruciating for the past few days, so I was sitting on my knees on my walker to cook today.  I stepped down to rinse a measuring cup and when I turned back I discovered that Abby had taken advantage of my walker to check on the meal.  *laugh*  Apparently it smelled good, because she really didn’t want to get back down to the floor! *grin*)

ChickenFrito3

Look how yummy the sauce looks once it thickens:

ChickenFrito4

Once everything is cooked, layer rice, chicken sauce mixture, shredded cheese, and fritos on each person’s plate.

Chicken Frito Supreme

Chicken Frito Supreme

It is SO good and surprisingly hearty.  I only ate half of the plate of food.  We love cheddar, so we were pretty generous with the cheese, and I love how gooey it got after sitting on the hot chicken sauce mixture for a few minutes.  You can change up the chips, but I agree with the original blogger that Fritos really makes this dish pop.  I think it’s because of the corn flavor rounding out the almost Mexican food flavors.  If you like a meatier dish, then you can totally add more chicken.  The two breasts turned out to be the perfect amount for our preference (which is ironic, since Larry is very much a “meat and potatoes” man).  I like that the recipe is a good start that allows for a lot of versatility.  I really want to stress though that if your sauce mixture doesn’t seem to be thickening, then you need to bring it up to a boil and then let the mixture simmer, just like you would with a cornstarch based gravy.  It makes a world of difference.  If you have a really thick and hearty salsa, then I’d start with 2 tablespoons of cornstarch and add as needed, if needed.  We’re going to make this again next week and we’re going to add some sliced black olives when layering.  Mmmm.  I hope you give this recipe a try.  You serve right from the two pans, and no baking needed, so it’s a great meal for a busy day in my opinion.

If you try it, I’d love to hear about your experience and especially any tweaks you made.  Until tomorrow 🙂

Beef Sundaes

In honor of Serve It Sunday I thought I’d go with a savory twist on a sundae.  Now, before you wrinkle your nose and think I’ve gone completely off my rocker, it’s just called that because it’s layered much like a dessert sundae would be.  If you’re familiar with the KFC Chicken Bowls, then this recipe will remind you a lot of them, except this is kind of the hot beefcake cousin of that.  *grin*  This recipe has several names and variations in the Midwest and they’re even served at some fairs, so there’s a good chance that some of you will be familiar with these.  The best part is that we found some shortcuts to make this meal super quick and easy, so we can have a hot meal even on my really bad days when it’s a struggle just to get out of bed.  If you’re one of those people that likes to make everything from scratch, look away now.  *laugh*  This recipe is for those people that watch Sandra Lee’s Semi-Homemade.  😉

See, I told you it was savory

See, I told you it was savory

Are you still with me now that you’ve seen that it truly is a savory dish?  *smile*  You’re going to put a scoop or two of mashed potatoes in the bottom of the bowl, sprinkle some corn over that along with some shredded cheddar cheese, and pour some hot topping (gravy) with roast beef right over the top.  Some people add a small cherry tomato on top to complete the whole sundae thing, but I prefer to not mess with this flavor combination.  *laugh*  We take several shortcuts with this meal.  We make instant mashed potatoes to make this super quick, start with a packaged gravy mix, warm up a bag of freezer steamer corn, and even use thick cut lunch meat.  You can make less dishes for yourself if you use packaged shredded cheddar instead of shredding it yourself, too.

So, start your gravy and your mashed potatoes.  I’m not going to post any pictures of making the potatoes since there’s nothing interesting about that, other than for the two of us (one picky eater and one country boy) plus some leftovers we followed the 3-4 servings instructions.  I am going to put a few of the gravy, though, since I found out that some people have never used a gravy mix before.  We love McCormick’s Brown Gravy Mix so much that I buy it in bulk.

Start that Good Brown Gravy

Start that Good Brown Gravy

Any country fans out there?  Do you have “Good Brown Gravy” in your head now?  lol  Anyway…I wanted to make 3 cups of gravy, so I used 9 tablespoons of McCormick’s Brown Gravy Mix (if you’re using the packets I’d follow the instructions on there and make two packets worth), and added a tiny bit of water to the powdered mix.  I whisked it until it created a paste and then slowly whisked in the remaining 2 1/4 cups of hot water.  Creating the paste and then slowly whisking in the remaining water will ensure that you have a smooth gravy.

After whisking water into the paste

After whisking water into the paste

We then chopped up some leftover thick cut roast beef lunch meat, which was then added into the gravy, and simmered the combo to warm the meat up.

Chopped Roast Beef Lunch Meat

Chopped Roast Beef Lunch Meat

Add Meat to the Gravy

Add Meat to the Gravy

While the meat simmered in a delicious bath I steamed a frozen bag of super sweet corn and drained it.  Once the corn and meat are warmed up, it’s time to build your beef sundae.

IMG_1211 IMG_1212

Pour the meat sauce over and dig in!  I don’t add salt since the gravy mix has a sodium kick to it all ready, but the big guy likes to add salt and pepper to his.  The last key tidbit I’ll give is that you have to try and get all of the layers in each bite for the best flavor profile.

Mmm Hot Beef Sundae

Mmm Hot Beef Sundae

The cheese melts into that meat and gravy, then there’s the creamy mashed potato, and a bright pop of sweet corn…a delightful bite and a super easy meal!  I hope you give this recipe a try and enjoy it.  Although I’m obsessed with this flavor combo you can totally change this up so easily to fit the interests of your family.  This is a great dish to sneak in a bit of veggies into, by the way.  *grin*  I wish you a wonderful week and happy pampering.  🙂

Beef Sundae Recipe

Makes about 3 not-overly-healthy sized portions 🙂

3-4 servings of instant mashed potatoes, prepared per package instructions (which calls for water, milk, margarine, and salt)

9 tbsp. McCormick Brown Gravy Mix

2 1/4 cups of hot water

Leftover roast beef lunch meat (I use about 3 cups worth)

One bag of frozen steamer super sweet corn, steamed and drained

1/4 cup shredded cheddar cheese, to taste

Whisk a tiny bit of water into the gravy mix until it creates a thick paste.  Whisk in remaining hot water and bring to a boil over medium heat while stirring frequently.  Reduce the heat and simmer about 3 minutes.

While gravy is simmering prepare the instant mashed potatoes per package instructions.  Chop leftover roast beef lunch meat into bite sized pieces and add to the gravy after it has simmered.  Continue to simmer the gravy combo until the meat is warmed through (about 3-5 minutes usually).

While gravy is finishing steam and drain the corn.

Once the hot ingredients are all heated through build each sundae in a heat resistant bowl, starting with a scoop (or three, per preference) of mashed potatoes.  Sprinkle a handful of shredded cheese and about a quarter cup of corn over the potatoes.  Ladle the gravy and meat mixture over the top.  Add salt and pepper to taste, optional.  Enjoy!

An Easy Beef Soup

Hi there!  I’ve been a little preoccupied with some medical issues, but I figured I’d get back into the swing of things with an easy recipe.  This is one of those one pot dump soups that utilizes canned items and leftover steak.  Living in the Midwest we have quite a bit of steak or even some grilled flank steak for fajitas that works perfectly in this soup.  You could always cook some bite sized stew meat, too, of course.  I wish I could put this recipe in that handy print format for you, but I have no clue how to do that with this blog.  lol I’ll write up the recipe below the main part, so it’s easier for you to copy and paste.

In a soup pot dump one can of yellow corn with juices (sometimes I even use a steamer bag of frozen sweet corn if I don’t have canned or if I want a little sweeter corn), a can of green beans with juices, and a can of stewed or diced tomatoes.

Beef Soup Beginning

Beef Soup Beginning

Add 2-4 cups of water (you’ll have to play with this recipe to see what your family prefers.  I like mine in between, so I go with three cups), 2-4 beef bouillon cubes (equal to the amount of water you use), and then fill one of your empty veggie cans with instant white rice and add that.  Didn’t expect that, right? *grin*  Add a dash of salt (optional, I tend to add about a teaspoon, although when I’m watching my sodium intake I don’t add any and I use no sodium canned veg too) and about a teaspoon of garlic powder, to taste.  You could add a bit of pepper, too, but I have a sensitivity to pepper, so I just set out the pepper for individuals to season their own bowl to taste.  By the way, you can totally use beef broth instead of the water and bouillon.  I usually have bouillon on hand, though, and have gotten to where I prefer the taste of it this way.

Beef Soup ingredients 2

Beef Soup ingredients 2

Next add your meat.  I had a baggie of leftover flank steak from fajitas, which I dumped right on top and then mixed it all together.

Beef Soup 3

Beef Soup 3

Put the lid on the pot and bring to a low boil on medium.  Once a boil has been reached lower the heat and simmer for 30-45 minutes.  This time frame is so variable because it all depends on the rice.  At 30 minutes try your rice and see if it’s tender.  If it is, then it’s time to dish up!  I’ve noticed that sometimes in the winter when the house is cooler that it can take about 40 minutes.  Here’s how your soup should look when it’s ready.

Easy Beef Soup

Easy Beef Soup

It is so yummy and filling, perfect for a cool day and a great tasting way to get some veggies into your family’s diet (what can I say, I was a very picky eater when I was a kid and my mom started making this *grin*).  One thing that I want to warn you about so you don’t think you’ve done something wrong is that the rice will soak up most of the liquids after it sits a bit.  If you want to have a wetter soup, then add more broth/water and bouillon.  The rice is so plump and juicy from absorbing the broth that I kind of like it when it gets thick.  Here’s what it’ll start to look like.

Beef Soup 5

Beef Soup 5

I just don’t want anyone to worry when they go back for seconds or to warm up leftovers.  Make sure you don’t drain your tomatoes or veggies, though, in order to get the right flavor.

Well, there you have it.  Our secret to a hearty meal with minimal work.  *grin*  Below is the recipe itself for your convenience.  I hope you have a wonderful weekend and happy pampering!

Easy Beef Soup

Makes…plenty of servings? lol I have no clue.

Ingredients:

1 can of green beans, not drained

1 can of yellow corn, not drained (or one bag of frozen steamer sweet corn, with juices)

1 can of stewed or diced tomatoes

1 can of instant white rice (just use one of the empty veggie cans, so no measuring cups to wash!)

2-4 cups of water (to preference)

2-4 beef bouillon (equal to cups of water used)

1 tsp garlic powder, to taste

1 tsp salt, to taste, optional

Leftover steak or diced stew meat (about a cup, but it’s to preference)

Put all ingredients into a soup pot, mix, and cover with a lid.  Bring to a low boil over medium heat, then reduce and simmer 30-45 minutes until rice is tender.

Serve It Sundays – Three Envelope Roast

Did you know that it’s quite easy to torture a nerd? Just take away their wifi. *grin* My modem died days back and I’ve been kicking it 4G in the meantime. It’s amazing how much housework and crocheting gets done when I can’t access SL, Amazon Prime, or my games. Pinterest only works part of the time without the wifi, so I’ve been rather productive. Lol. However, that also means that when I want to blog I have to try and do it through my phone, which has become a bit awkward now. The laptop is a little bit easier for me now, so a few potential posts have been put off until I’m running on full service again. *grin*

In the meantime, I wanted to share a super easy recipe I have been using. I found it on Pinterest, although it hails from www.plainchicken.com originally. If you follow me on Pinterest you’ll find the pin, plus my notes about it and the direct link, on my Successful Pins board.

First off, start with a 3-4 pound bottom round roast (although I’ve done a 4.5 lb. with an extra half hour of cooking and it was still perfect). Trim what you can and put it in your crockpot. In a measuring bowl combine one cup of water, one cup of salsa, one envelope of Italian Dressing powder mix, one envelope of onion soup mix, and one packet of Au Jus mix. (Now, after my first by the book try, I’ve changed out the salsa for an additional cup of water and two beef bullion cubes. I like the flavor and texture better, but this goes to show how easy it is to tailor this recipe to your preferences.) Once you whisk everything together pour the mixture over the roast, cover it, and cook the roast in your crockpot for 8-10 on low. Maybe my roasts are always a bit stubborn, but 10 hours is my sweet spot for some reason, with 10.5 hours for a 4.5 pound roast. You know it’s ready when you can shred it with your fork (or when you try to lift it with your tongs and it falls apart lol).

Now, you can ladle your broth mixture into a saucepan and thicken it into gravy if you’d like, but honestly we love to pour it as is right over some hot rice, and then nibble the roast. If there is any broth left over after our second meal, I keep it and use it over mashed potatoes or we soak it up with some biscuits. It is sooo tasty! The one thing I really want to caution against is adding salt. It’s tempting, since most crockpot meals tend to be a bit bland, but with the packets (and especially if you use bullion), there’s quite a bit of sodium all ready.

The original recipe states that they use the shredded meat on sandwiches, but ours never makes it that far. Truth be told there’s always a chunk missing before dinner time anyway because the last two hours of smelling it throughout the house is pure torture and no one can see me attack it like a rabid bear. *grin*

Here’s a quick look at the yummy dinner. Please forgive me, but the rice and broth were irresistible, so it doesn’t look quite as nice as it did. *grin*

20140727-212259-76979917.jpg

I hope you enjoy it as much as we do. The best part is that it’s so easy that you can make it a go to when you know it’ll be a busy day. There’s maybe 5 minutes of fuss, and that’s if you have a lot of trimming. 🙂 Now that’s something to cheer about!

%d bloggers like this: