RSS Feed

Tag Archives: Beef

Beef Gyros with Tzatziki Sauce – Pressure Cooker Recipe by Leah

Leahs New Logo


Tasty and easy beef gyros are bursting with hearty flavor!  Traditionally, gyro meat is cooked on a vertical spit and shaved off.  Though I’m dying to try making it that way, it’s not really practical in a home kitchen.  It’s also typically made with lamb, but that’s not too practical for my budget. ☺  What is practical is eating tender, mouthwatering beef,  wrapped in a soft pita, dripping in creamy sauce.  What could be better?  That it’s a year-round friendly recipe!  It’s hearty and filling for those cold winter evenings, but perfect for the heat of summer too.  Using your electric pressure cooker means you’re not heating up your house with your oven or stove.  No pressure cooker?  Just grill your roast instead!  Don’t forget to make your Tzatziki sauce ahead of time.


Beef Gyros with Tzatziki Sauce


Beef Gyros with Tzatziki Sauce – Pressure Cooker

yield: 4-6 servings


INGREDIENTS

Beef

2 lb chuck roast

2 Tbsp extra virgin olive oil

2 tsp garlic powder

2 tsp dried oregano

1/4 tsp cumin

1 tsp dried basil

1/2 tsp ground cinnamon

1/2 tsp dill

1/2 tsp marjoram

1/4 tsp thyme

1/4 tsp ground nutmeg

3/4 tsp salt

1/2 tsp pepper

2 Tbsp fresh lemon juice

1/3 cup beef broth

Tzatziki sauce

1 cup English Hothouse Cucumber (about half of one cucumber)

1 Tbsp kosher salt

2 Tbsp fresh dill, minced or 1 Tbsp dried dill

1 garlic clove, grated or minced

4 tsp lemon juice

1 cup plain Greek yogurt

For serving

warmed pocketless pitas

tomatoes, sliced

red onion, sliced

feta crumbles


PREPARATION

Tzatziki sauce

  1. Peel, seed, and cut into large chunks.  Sprinkle with 1 Tbsp salt.  Let sit 30 minutes.  Drain and dry cucumbers by pressing lightly with a paper towel.
  2. In a food processor or blender add cucumbers, dill, garlic, and lemon juice.  Process then stir into the yogurt.
  3. Refrigerate at least 2 hours.  It keeps for a few days in the refrigerator but you will need to drain off any water and stir each time you use it.

Beef

Mix together the spices then rub onto the roast.  Put oil in the bottom of the Instant Pot.  Set the roast in and add lemon juice and beef broth.  Lock the lid and cook for 15 minutes.  Allow to natural release for an additional 15 minutes.  Quick release and remove roast to a cutting board.  Shred or thinly slice your meat and add remaining liquid until the meat is moisted to your desire.

Serving

Lay beef in the center of the pita.  Spread some Tzatziki sauce over the meat and add tomatoes, onions, and feta as desired.


Oklahoma Fried Onion Burgers Recipe by Leah

Oklahoma Fried Onion Burgers


My husband had never had grilled onions on a burger before we met.  He didn’t even know it was an option.  There’s a lot my husband didn’t know about food when we met.  He didn’t even like steak and couldn’t understand why people would pay so much for one at a restaurant.  But that’s a story for another time.  Let’s just say that he came from a home very limited in flavors.

I love a burger with onions.  They’re not complete until they have some in my opinion.  In fact, I have been known to order both grilled and raw onions at the same time when I eat at In & Out.  When I first heard that there was such a thing as Fried Onion Burgers I knew I had to try them.  I really wanted to get a good picture of them for you but it was just too late and too dark and well, we had delicious hot burgers sitting there that needed to be eaten.  So, I suggest googling a picture of Oklahoma Fried Onion Burgers so you can see just how beautiful a juicy burger sitting on top of fried onions can be.


Oklahoma Fried Onion Burgers


Yield: 4 servings


INGREDIENTS

2 large onions (I used yellow), peeled, halved, and thinly sliced

salt and pepper

1 lb ground beef

1 Tbsp butter

1 Tbsp vegetable oil

4 sliced American cheese

mayo, mustard, and pickles for serving

4 hamburger buns, toasted


PREPARATION

  1. Combine the onion slices and 1 tsp of salt in a bowl and toss to combine.  Transfer the onions to a colander and let sit for 30 minutes, tossing occasionally.  Transfer the onions to a clean dish towel, gather the edges together and squeeze out as much liquid as you can from the onions.  Do this over the sink or a large bowl since the onions will have quite a bit of liquid in them.
  2. Divide the onions into 4 separate mounds on a rimmed baking sheet.  Form the beef into 4 lightly packed balls.  Place the beef ballson top of the onions mounds and flatten the beef firmly with your palm so the onions adhere to the beef.  The patties should measure 4 inches in diameter.  Season the beef generously with salt and pepper.
  3. Melt the butter and oil in a 12-inch skillet over medium heat.  Using a large spatula, transfer the patties to the skillet, onion side down.  Cook for 6-8 minutes, until the onions turn a deep golden brown and begin to crisp around the edges.  Flip the burgers, then increase the heat to high and cook until well browned on the second side, about 2 minutes.
  4. Add a slice of cheese to each burger and allow to melt.  Add mayo, mustard and pickles to the top buns, then place each burger on the bottom buns.


Leahs New Logo


Left-Over Pot Roast Stew

Recipes Logo


Roast Beef & Vegetable Soup


My mom called me with a pot roast emergency.  Someone had very kindly brought her and my father dinner but they brought a WHOLE pot roast, 6 potatoes, and about 2 lbs of carrots.  All that for 2 people.  We had a good laugh over it when she called me, but I didn’t understand what the emergency was.  Evidently the roast was on the dry side. She didn’t want to waste it, but neither she nor my father could eat the leftovers.  “Leah, can you do something with it?”  Of course I said I’d love to and picked up my bounty.  

Now, what to do with it?  Well, the obvious answer to me was stew and this is what I came up with.  I took it over to my parents a couple days later and my stew was met with not only their approval, but a request for me to leave all the leftovers.  Now that’s what I call a success!


Left-Over Pot Roast Stew


INGREDIENTS

2 cups barley

2 Tbsp olive oil

1 sweet onion, diced

1/2 a head celery, chopped

4 cloves garlic, minced

2 tsp sea salt

1 tsp pepper

2 tsp dried thyme

1 tsp dried basil

1 tsp dried oregano

8 cups beef broth

1 bay leaf

2-inch piece of parmesan rind, optional but gives great flavor

2 cups gravy (I used McCormick Brown Gravy)

26 oz chopped San Marzano tomatoes

small bag frozen peas

4 roasted potatoes, cut into bite-sized pieces

2 cups roasted carrots

16 oz sliced baby bella mushrooms, sauteed

3-4 cups leftover pot roast, shredded

1/4 cup fresh parsley, chopped


PREPARATION

  1. Bring barley and 3 quarts water to a boil over high heat.  Reduce heat and simmer 30 minutes.  Drain and set aside when barley is tender and cooked through.
  2. In a large soup pot over medium heat, add the oil, onion, and celery.  Cook, stirring occasionally, until onions are translucent and edges begin to brown, about 10 minutes.  Add garlic, salt, pepper, thyme, basil, and oregano.  Continue to cook until garlic is cooked through (adding oil as needed).
  3. Add the broth, bay leaf, and Parmesan rind and bring to a low boil.  Stir in the gravy, tomatoes, peas, potatoes, carrots, mushrooms, roast, and barley.  Bring to a simmer and cook for 30 minutes to meld flavors.  Stir in the Parsley during the last 5 minutes of cooking.  Adjust seasoning to taste.


Leah Recipe Logo

Homemade Sloppy Joes

Homemade Sloppy Joes

Hi there! Did you miss me? I figured y’all could use a little break from my rambling after the whole daily blogging challenge. I couldn’t resist sharing a recipe though, so for Serve It Sunday I’m sharing my homemade sloppy joes. I adapted it from a recipe for Sloppy Joe Casserole that I found on Pinterest, original recipe is here, but after having the original we decided to tailor it more toward our taste. The original recipe was good (although I admittedly omitted two ingredients because I had to), but it had a bread topping that neither of us cared for that soaked up almost all of the sloppy joe mixture. After some experimentation this version was born.

I’ve mentioned before that I have some food sensitivities and sadly canned sloppy joe mixture became off limits due to the spices and additives. I’d honestly never seen homemade sloppy joes before, so when I found out it was this easy AND especially that with a little adjustment it doesn’t make me sick, I was tickled pink. The recipe in an easy to copy format will be at the bottom.

First, on the stovetop you brown some ground beef (I vary the amount of meat depending on the mood honestly lol) over about a medium high heat. I use the 92% lean ground beef and it makes for the least greasy sloppy joes I’ve ever seen.
IMG_2237.JPG

While that’s cooking I found that if I mix the spices into a paste first and then coat the cooked meat with that before adding the tomato products, the flavors distribute much better, so in a small bowl mix brown sugar, Worcestershire Sauce, ground mustard (it’s powdered, found in the spice aisle), and garlic salt. If you gather the cooked meat into a small circle and pour the spice mixture over it, it’s easier to coat the meat. Stir well to coat the meat (second picture).

IMG_2236.JPG

IMG_2238.JPG

Add tomato sauce and ketchup (yep, two tomato based ingredients) to the coated meat, then stir it in and reduce heat to medium. (Don’t put a lid on it unless you like runny sloppy joes.)

IMG_2239.JPG

We’re are some cheese loving folks, so in goes a generous helping of shredded cheddar cheese.

IMG_2240.JPG
After awhile the cheese mixes in and it gets all ooey gooey yummy. It may not look it, but this sloppy joe mixture is so thick that it doesn’t drip through the slats in my wood spoon once the mixture is heated well. *grin* It’s not quite “stand a fork in it” chili thick, but it’s pretty dang hearty.

IMG_2241.JPG

Use whatever bread vessel you prefer or have on hand (this go around I had leftover sub rolls from French Dips).

IMG_2235.JPG
It was so yummy and best of all it’s not overly acidic, so it shouldn’t bother sensitive stomachs! It comes together in about thirty minutes all in one pot, with minimal utensils to wash. Busy weeknight cooks can use the extra time to do a happy dance or kick their feet up. *grin*

Homemade Sloppy Joes (adapted)

1.5 lbs lean ground beef
2 tablespoons brown sugar, packed
1 tablespoon Worcestershire Sauce
2 teaspoons dry ground mustard
1 teaspoon garlic salt
1 (15 oz) can tomato sauce (no salt added can)
3/4 cup ketchup
Optional: grated cheddar cheese, to taste
Preferred type of bread

1. On the stovetop over medium high heat brown ground beef in a large skillet.
2. While meat is cooking, mix the brown sugar, Worcestershire Sauce, mustard, and garlic salt into a paste.
3. Once the meat has cooked gather the meat in the center of the pan and pour the spice mixture over the meat. Stir to coat the meat well.
4. Add tomato sauce and ketchup to the mixture and reduce the heat to medium. Do not cover.
5. If desired, add a generous amount of shredded cheese to the mixture and stir it in.
6. Once the mixture is completely warm it is ready to be served on your preferred bread (I recommend a bun or roll, since regular bread may become soggy and fall apart.)

Note: This is a thick version. If you prefer more liquid, cover the skillet after the fourth step. This should keep a bit more of the moisture in.

I hope you enjoy! 🙂

Beef Sundaes

In honor of Serve It Sunday I thought I’d go with a savory twist on a sundae.  Now, before you wrinkle your nose and think I’ve gone completely off my rocker, it’s just called that because it’s layered much like a dessert sundae would be.  If you’re familiar with the KFC Chicken Bowls, then this recipe will remind you a lot of them, except this is kind of the hot beefcake cousin of that.  *grin*  This recipe has several names and variations in the Midwest and they’re even served at some fairs, so there’s a good chance that some of you will be familiar with these.  The best part is that we found some shortcuts to make this meal super quick and easy, so we can have a hot meal even on my really bad days when it’s a struggle just to get out of bed.  If you’re one of those people that likes to make everything from scratch, look away now.  *laugh*  This recipe is for those people that watch Sandra Lee’s Semi-Homemade.  😉

See, I told you it was savory

See, I told you it was savory

Are you still with me now that you’ve seen that it truly is a savory dish?  *smile*  You’re going to put a scoop or two of mashed potatoes in the bottom of the bowl, sprinkle some corn over that along with some shredded cheddar cheese, and pour some hot topping (gravy) with roast beef right over the top.  Some people add a small cherry tomato on top to complete the whole sundae thing, but I prefer to not mess with this flavor combination.  *laugh*  We take several shortcuts with this meal.  We make instant mashed potatoes to make this super quick, start with a packaged gravy mix, warm up a bag of freezer steamer corn, and even use thick cut lunch meat.  You can make less dishes for yourself if you use packaged shredded cheddar instead of shredding it yourself, too.

So, start your gravy and your mashed potatoes.  I’m not going to post any pictures of making the potatoes since there’s nothing interesting about that, other than for the two of us (one picky eater and one country boy) plus some leftovers we followed the 3-4 servings instructions.  I am going to put a few of the gravy, though, since I found out that some people have never used a gravy mix before.  We love McCormick’s Brown Gravy Mix so much that I buy it in bulk.

Start that Good Brown Gravy

Start that Good Brown Gravy

Any country fans out there?  Do you have “Good Brown Gravy” in your head now?  lol  Anyway…I wanted to make 3 cups of gravy, so I used 9 tablespoons of McCormick’s Brown Gravy Mix (if you’re using the packets I’d follow the instructions on there and make two packets worth), and added a tiny bit of water to the powdered mix.  I whisked it until it created a paste and then slowly whisked in the remaining 2 1/4 cups of hot water.  Creating the paste and then slowly whisking in the remaining water will ensure that you have a smooth gravy.

After whisking water into the paste

After whisking water into the paste

We then chopped up some leftover thick cut roast beef lunch meat, which was then added into the gravy, and simmered the combo to warm the meat up.

Chopped Roast Beef Lunch Meat

Chopped Roast Beef Lunch Meat

Add Meat to the Gravy

Add Meat to the Gravy

While the meat simmered in a delicious bath I steamed a frozen bag of super sweet corn and drained it.  Once the corn and meat are warmed up, it’s time to build your beef sundae.

IMG_1211 IMG_1212

Pour the meat sauce over and dig in!  I don’t add salt since the gravy mix has a sodium kick to it all ready, but the big guy likes to add salt and pepper to his.  The last key tidbit I’ll give is that you have to try and get all of the layers in each bite for the best flavor profile.

Mmm Hot Beef Sundae

Mmm Hot Beef Sundae

The cheese melts into that meat and gravy, then there’s the creamy mashed potato, and a bright pop of sweet corn…a delightful bite and a super easy meal!  I hope you give this recipe a try and enjoy it.  Although I’m obsessed with this flavor combo you can totally change this up so easily to fit the interests of your family.  This is a great dish to sneak in a bit of veggies into, by the way.  *grin*  I wish you a wonderful week and happy pampering.  🙂

Beef Sundae Recipe

Makes about 3 not-overly-healthy sized portions 🙂

3-4 servings of instant mashed potatoes, prepared per package instructions (which calls for water, milk, margarine, and salt)

9 tbsp. McCormick Brown Gravy Mix

2 1/4 cups of hot water

Leftover roast beef lunch meat (I use about 3 cups worth)

One bag of frozen steamer super sweet corn, steamed and drained

1/4 cup shredded cheddar cheese, to taste

Whisk a tiny bit of water into the gravy mix until it creates a thick paste.  Whisk in remaining hot water and bring to a boil over medium heat while stirring frequently.  Reduce the heat and simmer about 3 minutes.

While gravy is simmering prepare the instant mashed potatoes per package instructions.  Chop leftover roast beef lunch meat into bite sized pieces and add to the gravy after it has simmered.  Continue to simmer the gravy combo until the meat is warmed through (about 3-5 minutes usually).

While gravy is finishing steam and drain the corn.

Once the hot ingredients are all heated through build each sundae in a heat resistant bowl, starting with a scoop (or three, per preference) of mashed potatoes.  Sprinkle a handful of shredded cheese and about a quarter cup of corn over the potatoes.  Ladle the gravy and meat mixture over the top.  Add salt and pepper to taste, optional.  Enjoy!

An Easy Beef Soup

Hi there!  I’ve been a little preoccupied with some medical issues, but I figured I’d get back into the swing of things with an easy recipe.  This is one of those one pot dump soups that utilizes canned items and leftover steak.  Living in the Midwest we have quite a bit of steak or even some grilled flank steak for fajitas that works perfectly in this soup.  You could always cook some bite sized stew meat, too, of course.  I wish I could put this recipe in that handy print format for you, but I have no clue how to do that with this blog.  lol I’ll write up the recipe below the main part, so it’s easier for you to copy and paste.

In a soup pot dump one can of yellow corn with juices (sometimes I even use a steamer bag of frozen sweet corn if I don’t have canned or if I want a little sweeter corn), a can of green beans with juices, and a can of stewed or diced tomatoes.

Beef Soup Beginning

Beef Soup Beginning

Add 2-4 cups of water (you’ll have to play with this recipe to see what your family prefers.  I like mine in between, so I go with three cups), 2-4 beef bouillon cubes (equal to the amount of water you use), and then fill one of your empty veggie cans with instant white rice and add that.  Didn’t expect that, right? *grin*  Add a dash of salt (optional, I tend to add about a teaspoon, although when I’m watching my sodium intake I don’t add any and I use no sodium canned veg too) and about a teaspoon of garlic powder, to taste.  You could add a bit of pepper, too, but I have a sensitivity to pepper, so I just set out the pepper for individuals to season their own bowl to taste.  By the way, you can totally use beef broth instead of the water and bouillon.  I usually have bouillon on hand, though, and have gotten to where I prefer the taste of it this way.

Beef Soup ingredients 2

Beef Soup ingredients 2

Next add your meat.  I had a baggie of leftover flank steak from fajitas, which I dumped right on top and then mixed it all together.

Beef Soup 3

Beef Soup 3

Put the lid on the pot and bring to a low boil on medium.  Once a boil has been reached lower the heat and simmer for 30-45 minutes.  This time frame is so variable because it all depends on the rice.  At 30 minutes try your rice and see if it’s tender.  If it is, then it’s time to dish up!  I’ve noticed that sometimes in the winter when the house is cooler that it can take about 40 minutes.  Here’s how your soup should look when it’s ready.

Easy Beef Soup

Easy Beef Soup

It is so yummy and filling, perfect for a cool day and a great tasting way to get some veggies into your family’s diet (what can I say, I was a very picky eater when I was a kid and my mom started making this *grin*).  One thing that I want to warn you about so you don’t think you’ve done something wrong is that the rice will soak up most of the liquids after it sits a bit.  If you want to have a wetter soup, then add more broth/water and bouillon.  The rice is so plump and juicy from absorbing the broth that I kind of like it when it gets thick.  Here’s what it’ll start to look like.

Beef Soup 5

Beef Soup 5

I just don’t want anyone to worry when they go back for seconds or to warm up leftovers.  Make sure you don’t drain your tomatoes or veggies, though, in order to get the right flavor.

Well, there you have it.  Our secret to a hearty meal with minimal work.  *grin*  Below is the recipe itself for your convenience.  I hope you have a wonderful weekend and happy pampering!

Easy Beef Soup

Makes…plenty of servings? lol I have no clue.

Ingredients:

1 can of green beans, not drained

1 can of yellow corn, not drained (or one bag of frozen steamer sweet corn, with juices)

1 can of stewed or diced tomatoes

1 can of instant white rice (just use one of the empty veggie cans, so no measuring cups to wash!)

2-4 cups of water (to preference)

2-4 beef bouillon (equal to cups of water used)

1 tsp garlic powder, to taste

1 tsp salt, to taste, optional

Leftover steak or diced stew meat (about a cup, but it’s to preference)

Put all ingredients into a soup pot, mix, and cover with a lid.  Bring to a low boil over medium heat, then reduce and simmer 30-45 minutes until rice is tender.

Two Handy Tips


First off, I hope you had a wonderful Valentine’s or Anti-Valentine’s, whichever you celebrate.  *grin*  While most people were dwelling in the land of love, roses, and mushy stuff (not that there’s anything wrong with that, Larry just doesn’t care for this holiday), I was testing a couple of things from the internet and they turned out so well that I’ve written this post a few times in my head. 

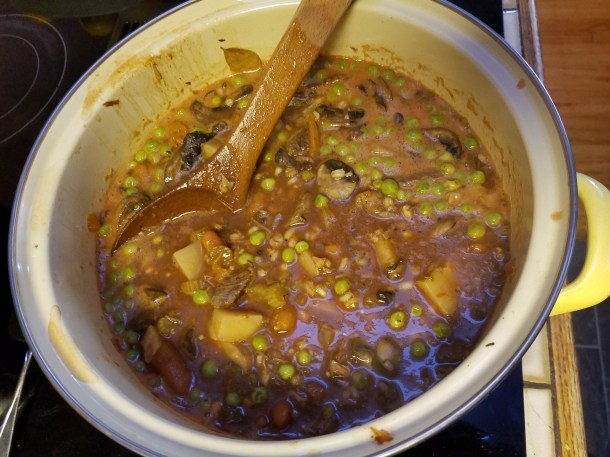
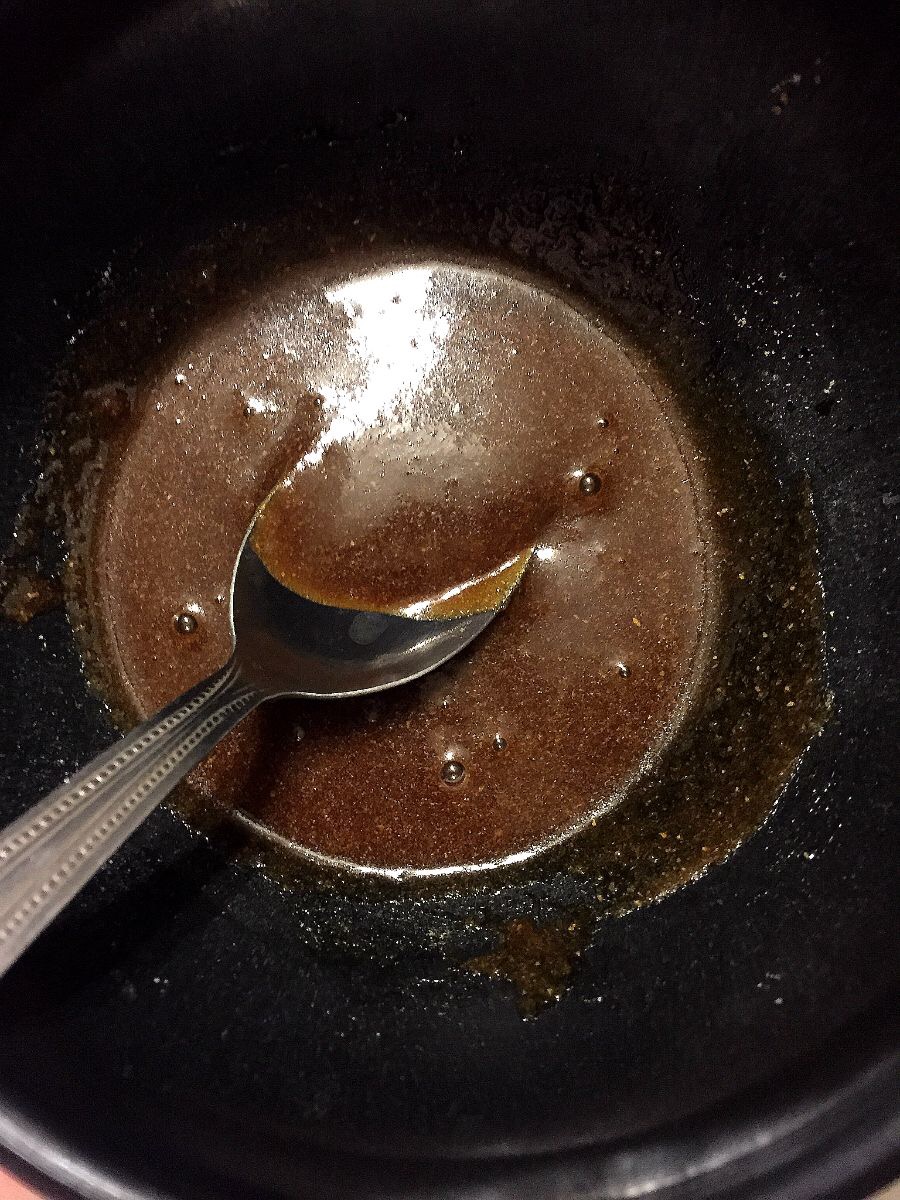
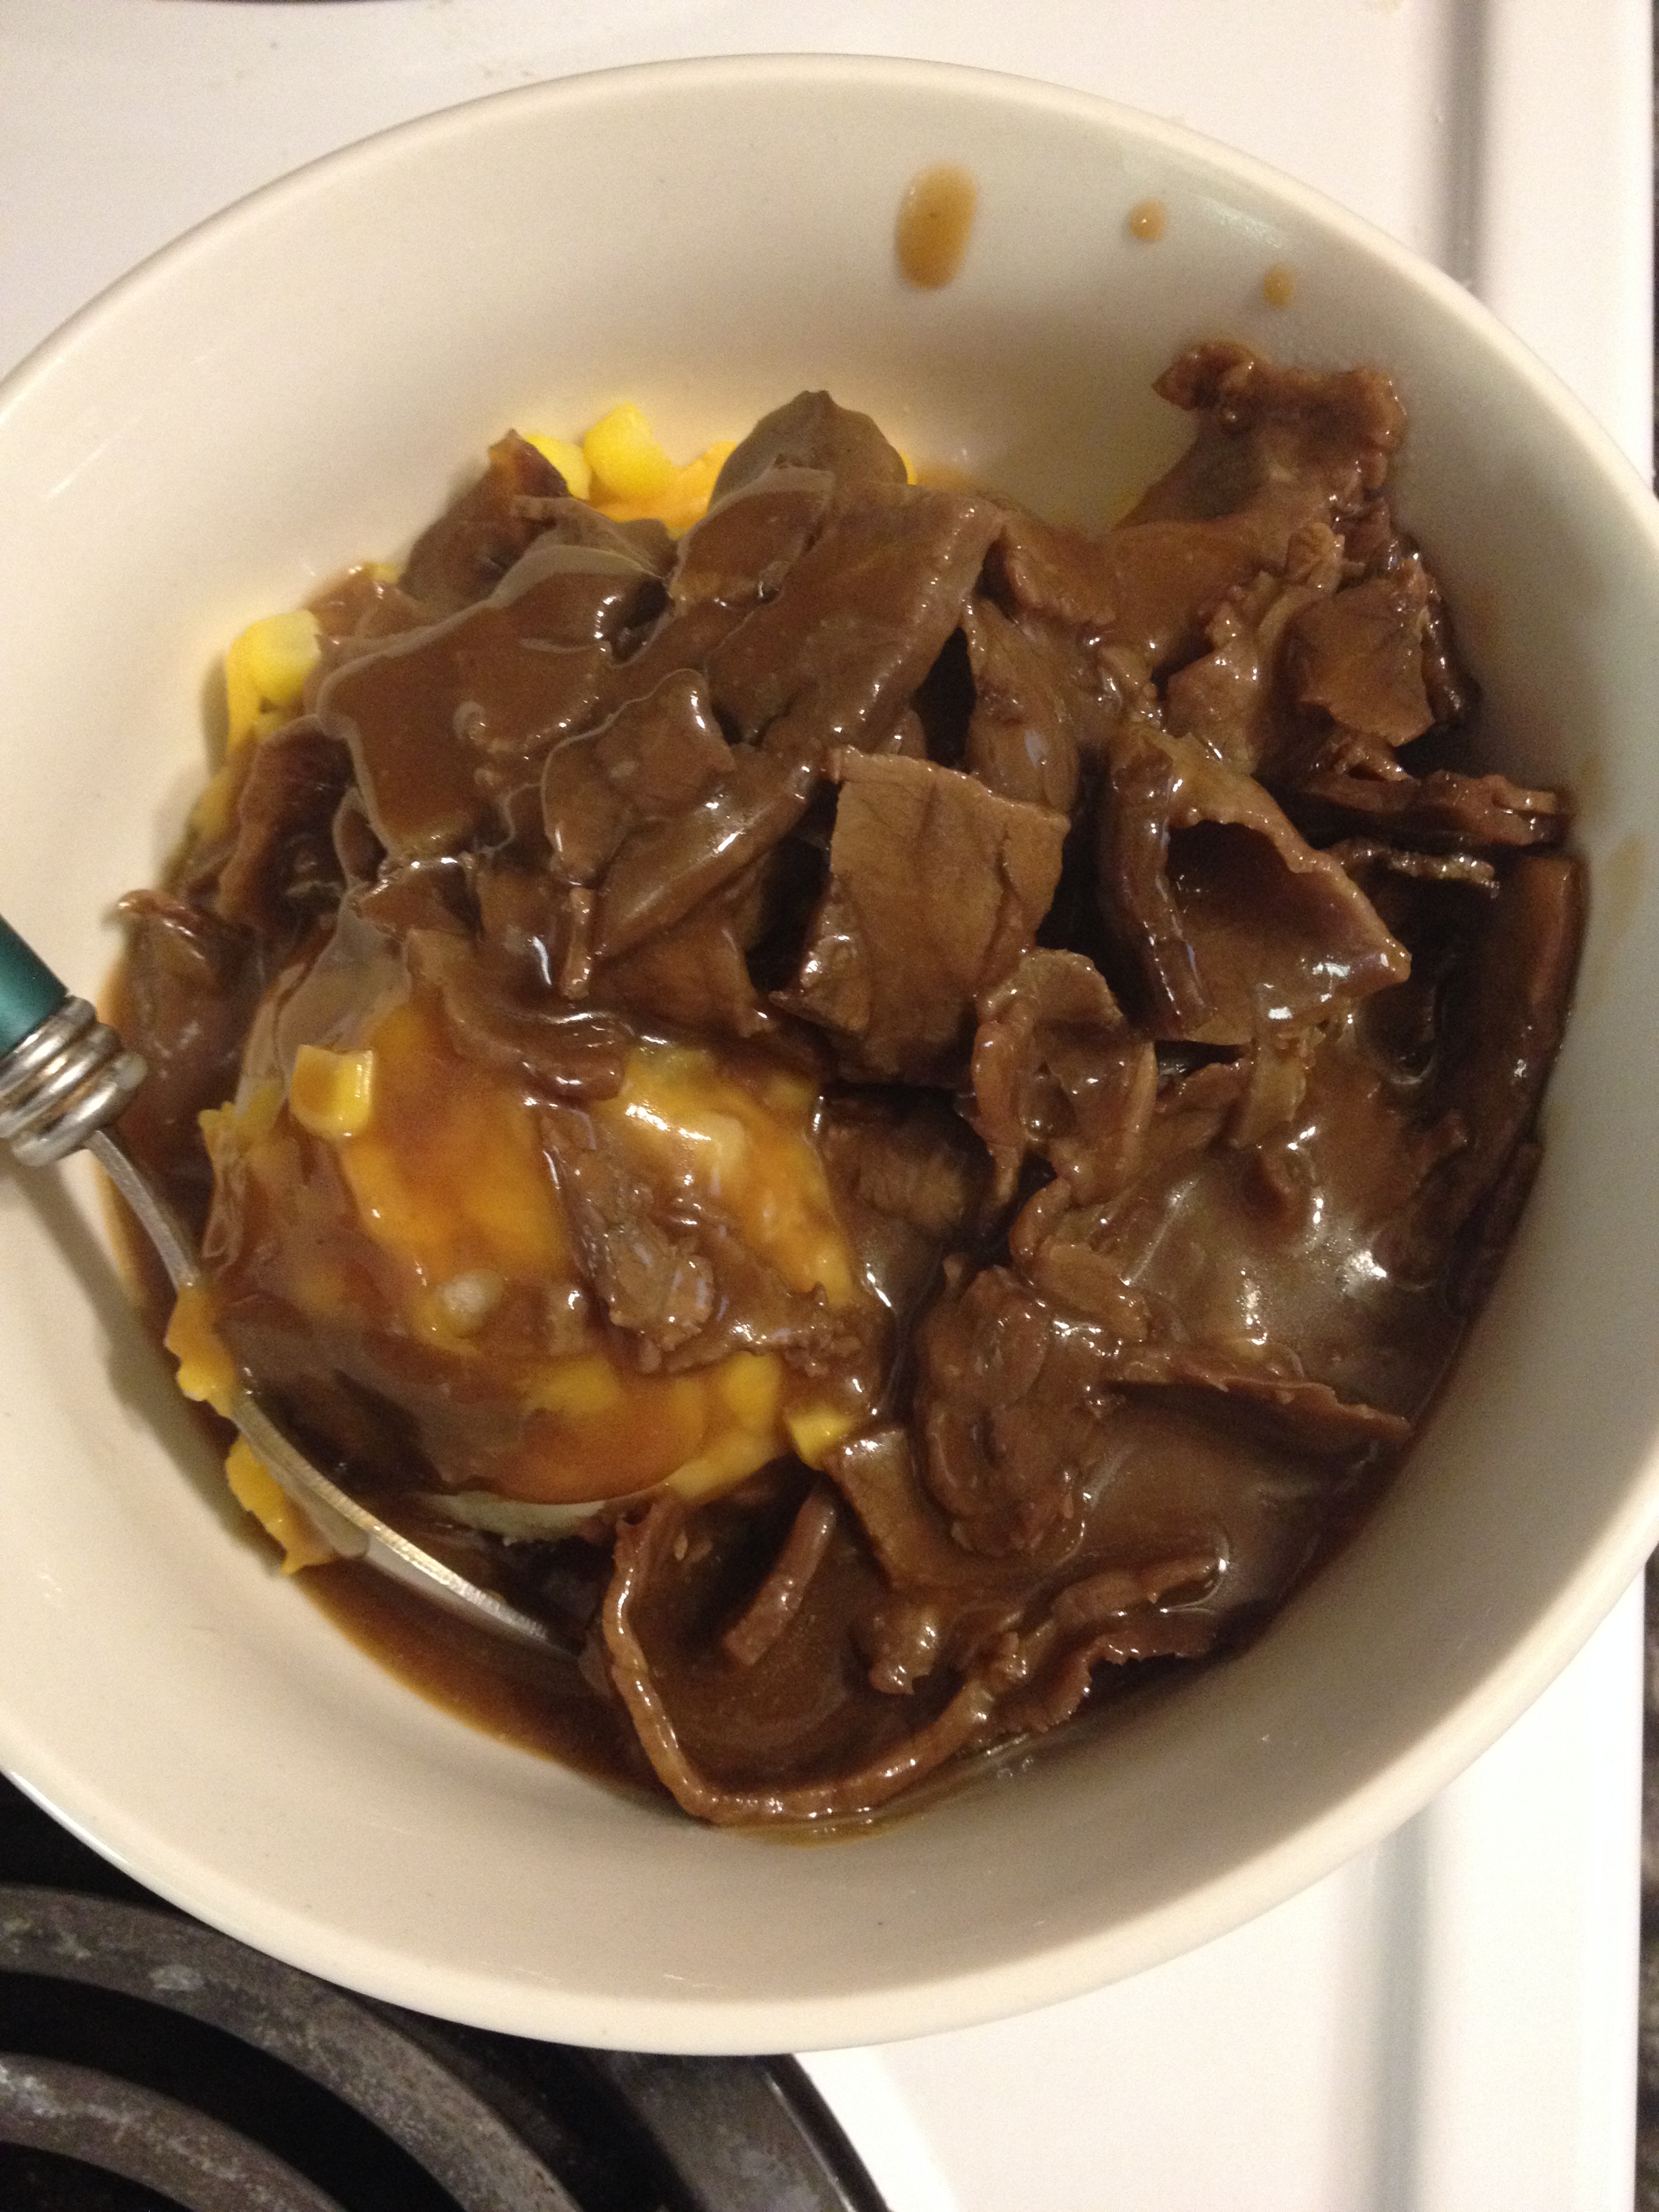
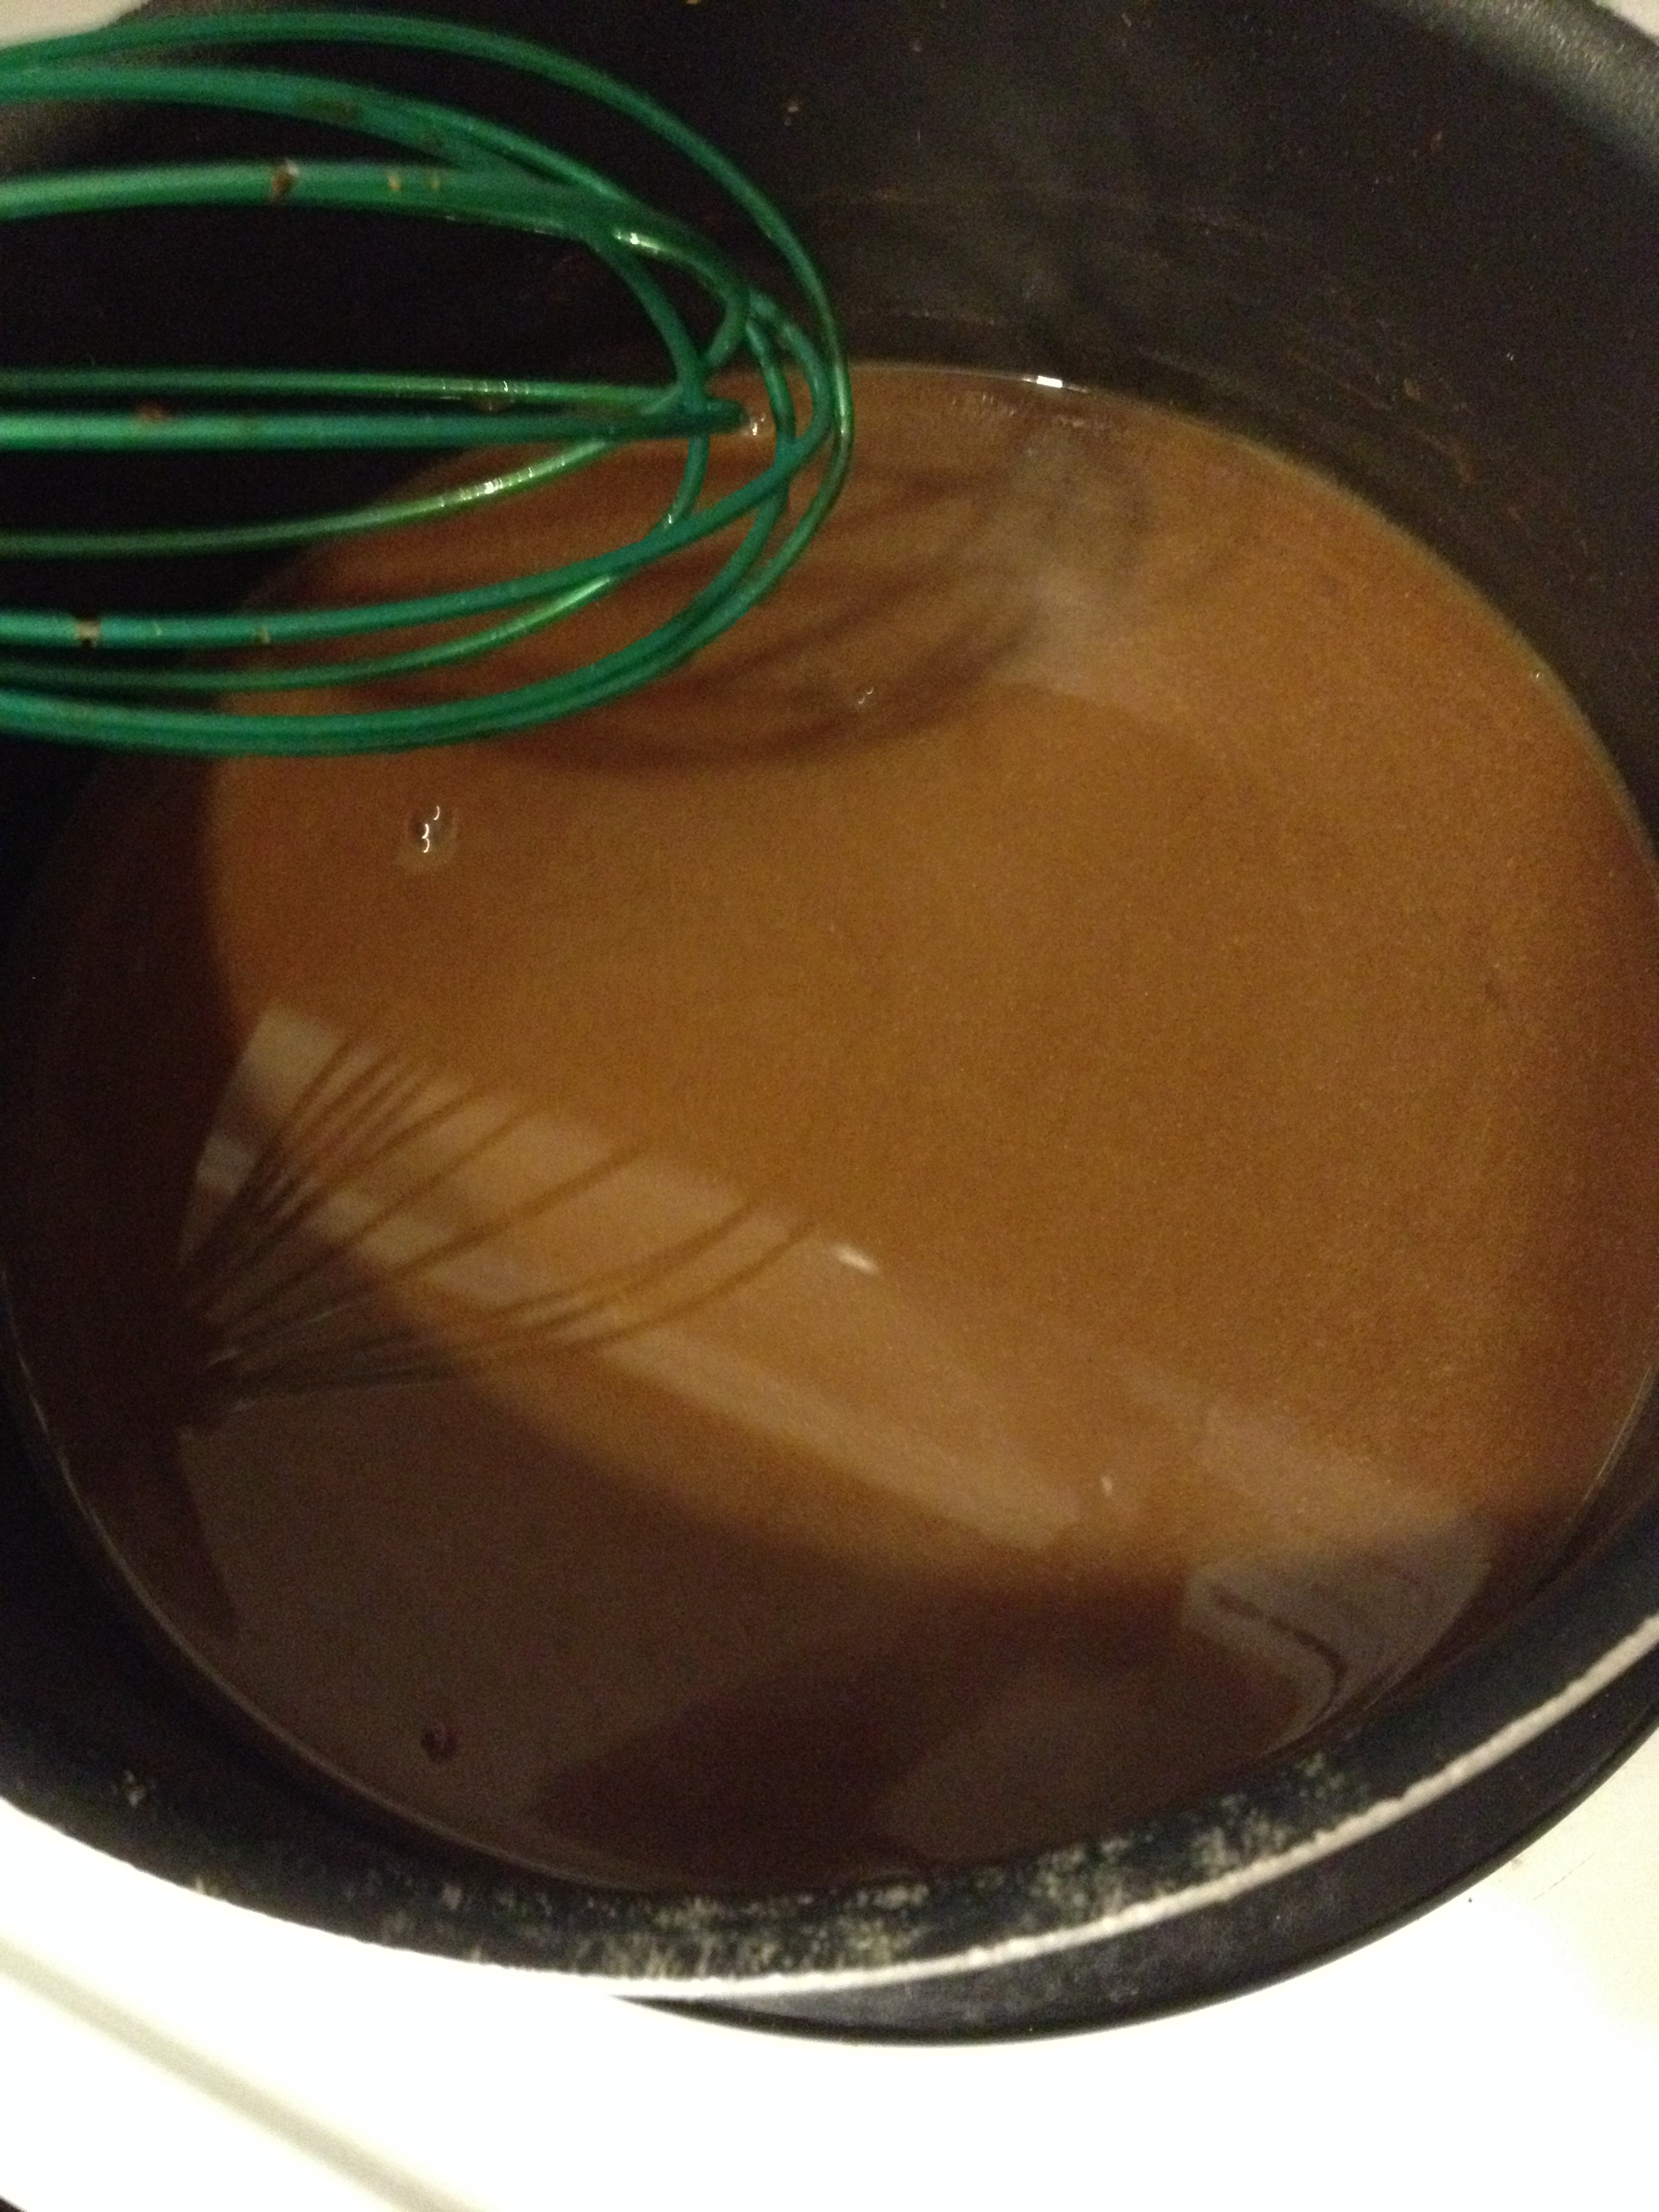
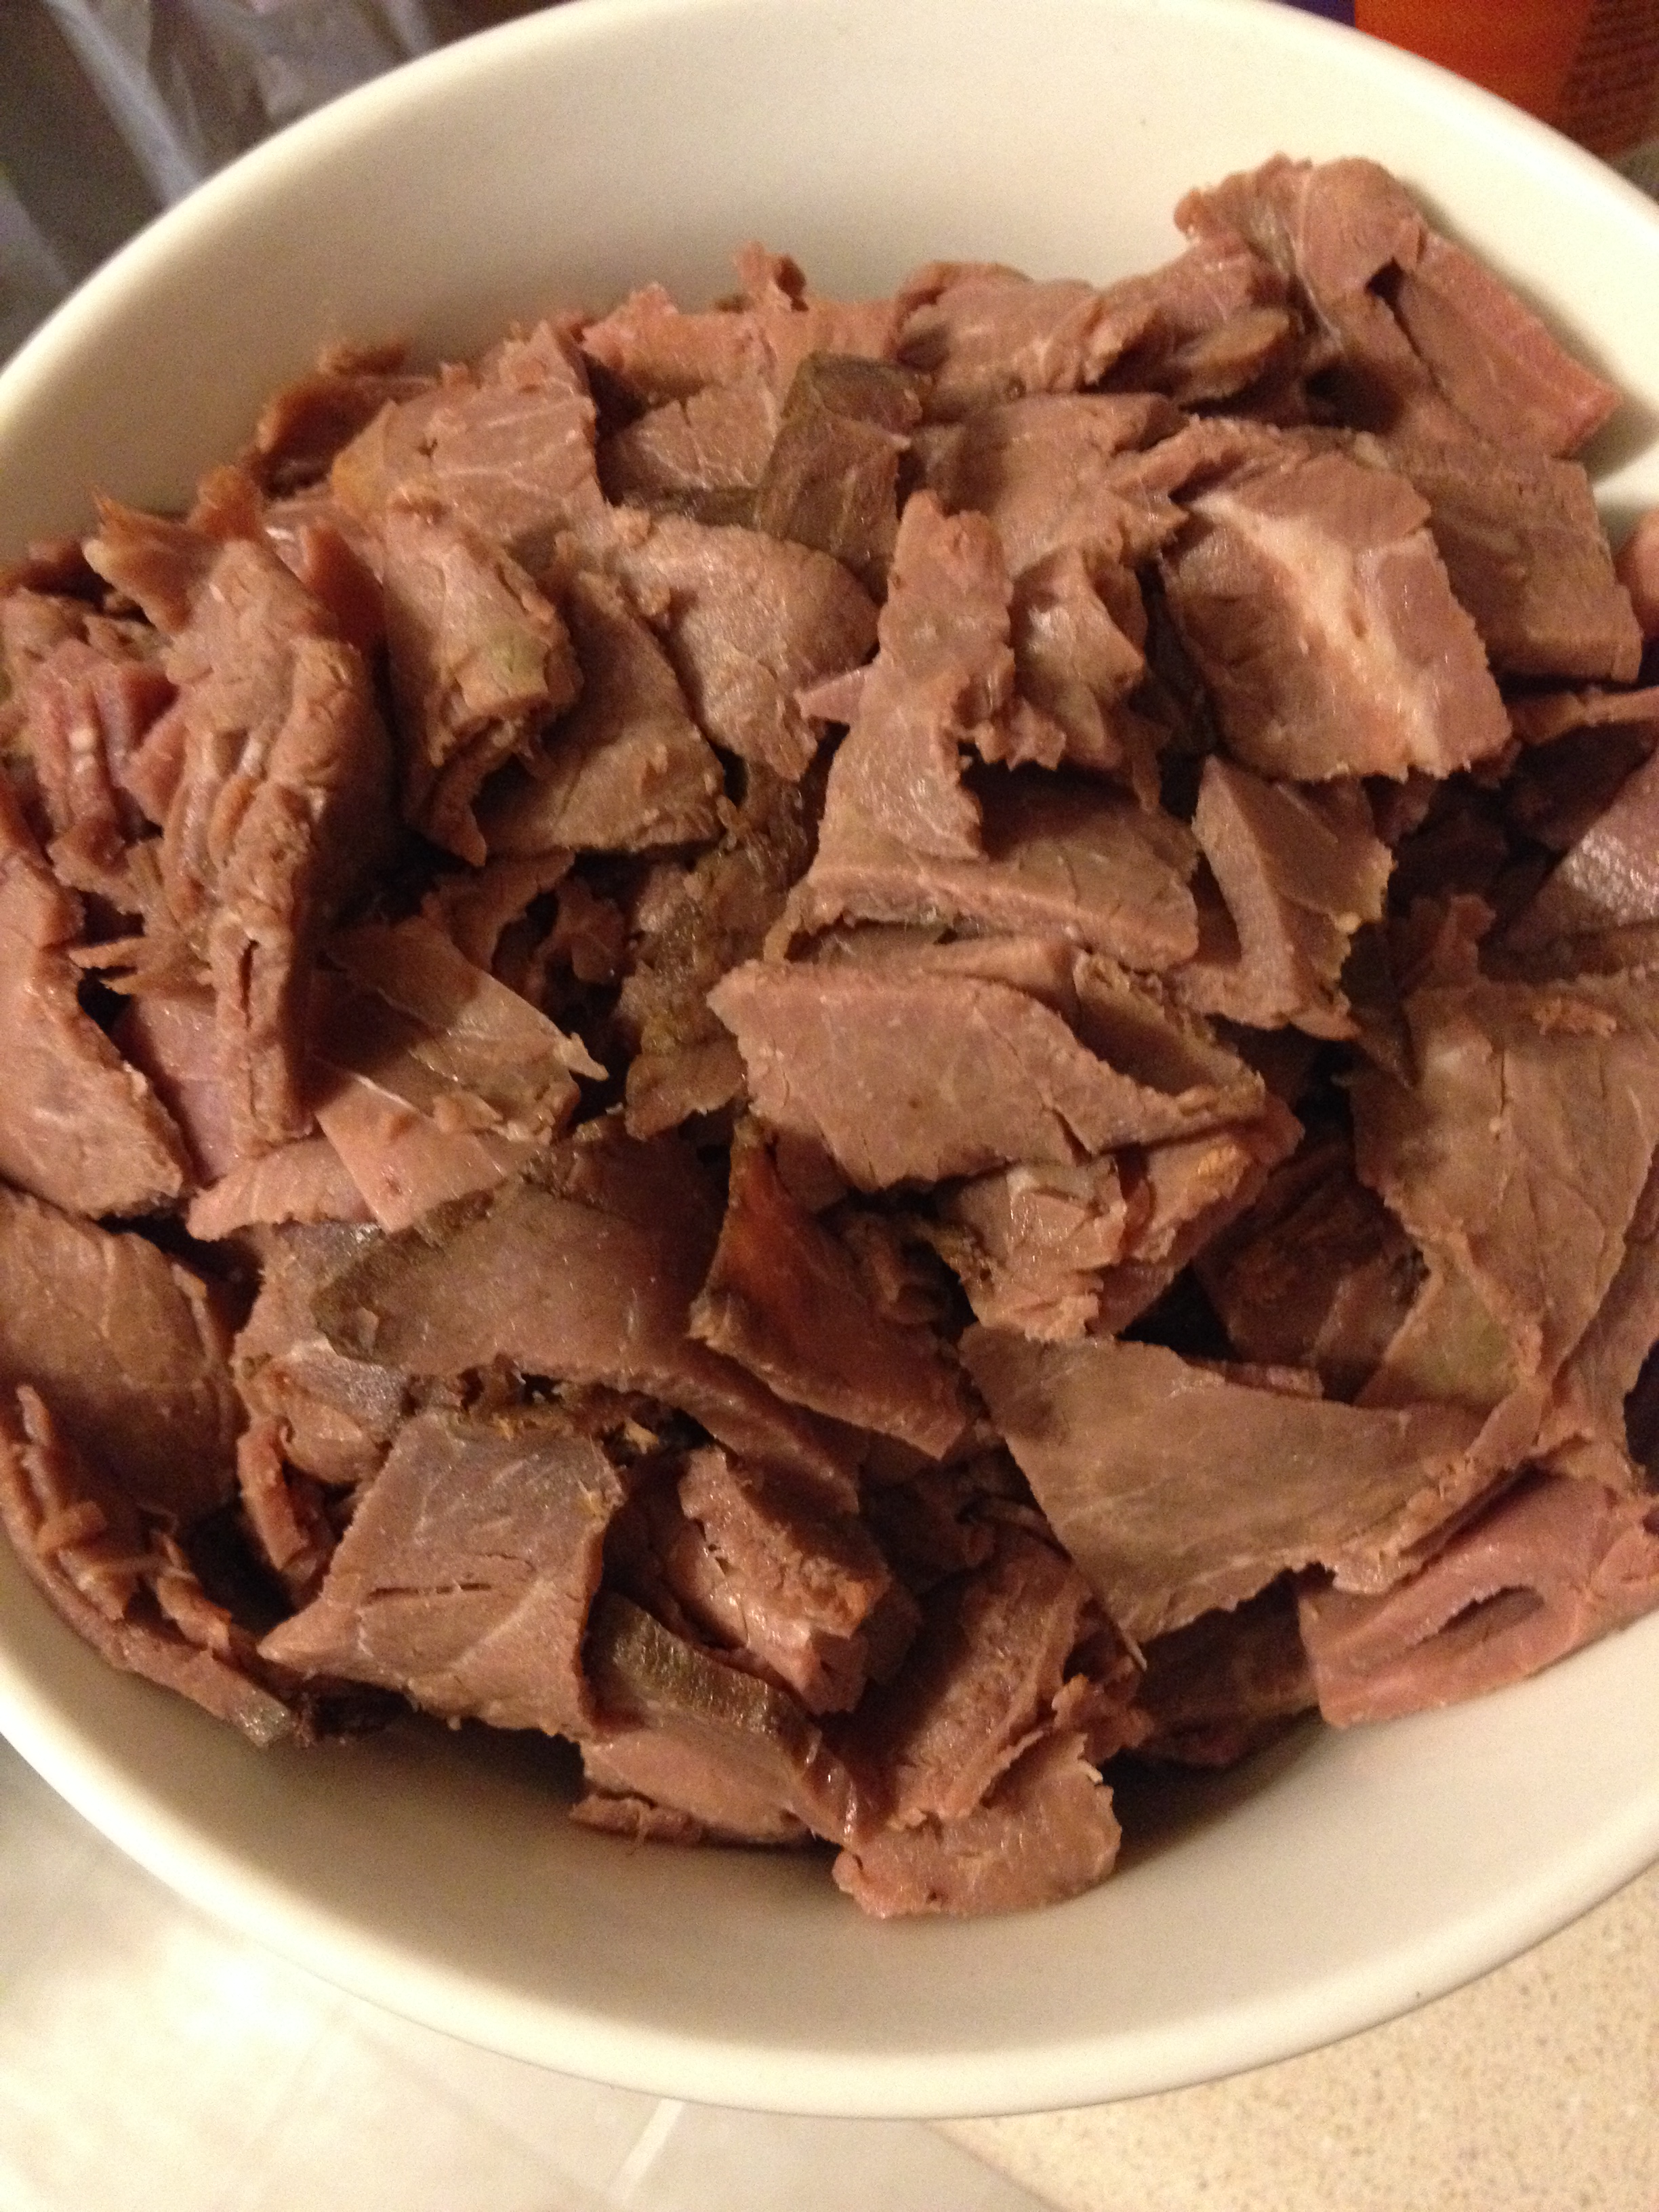
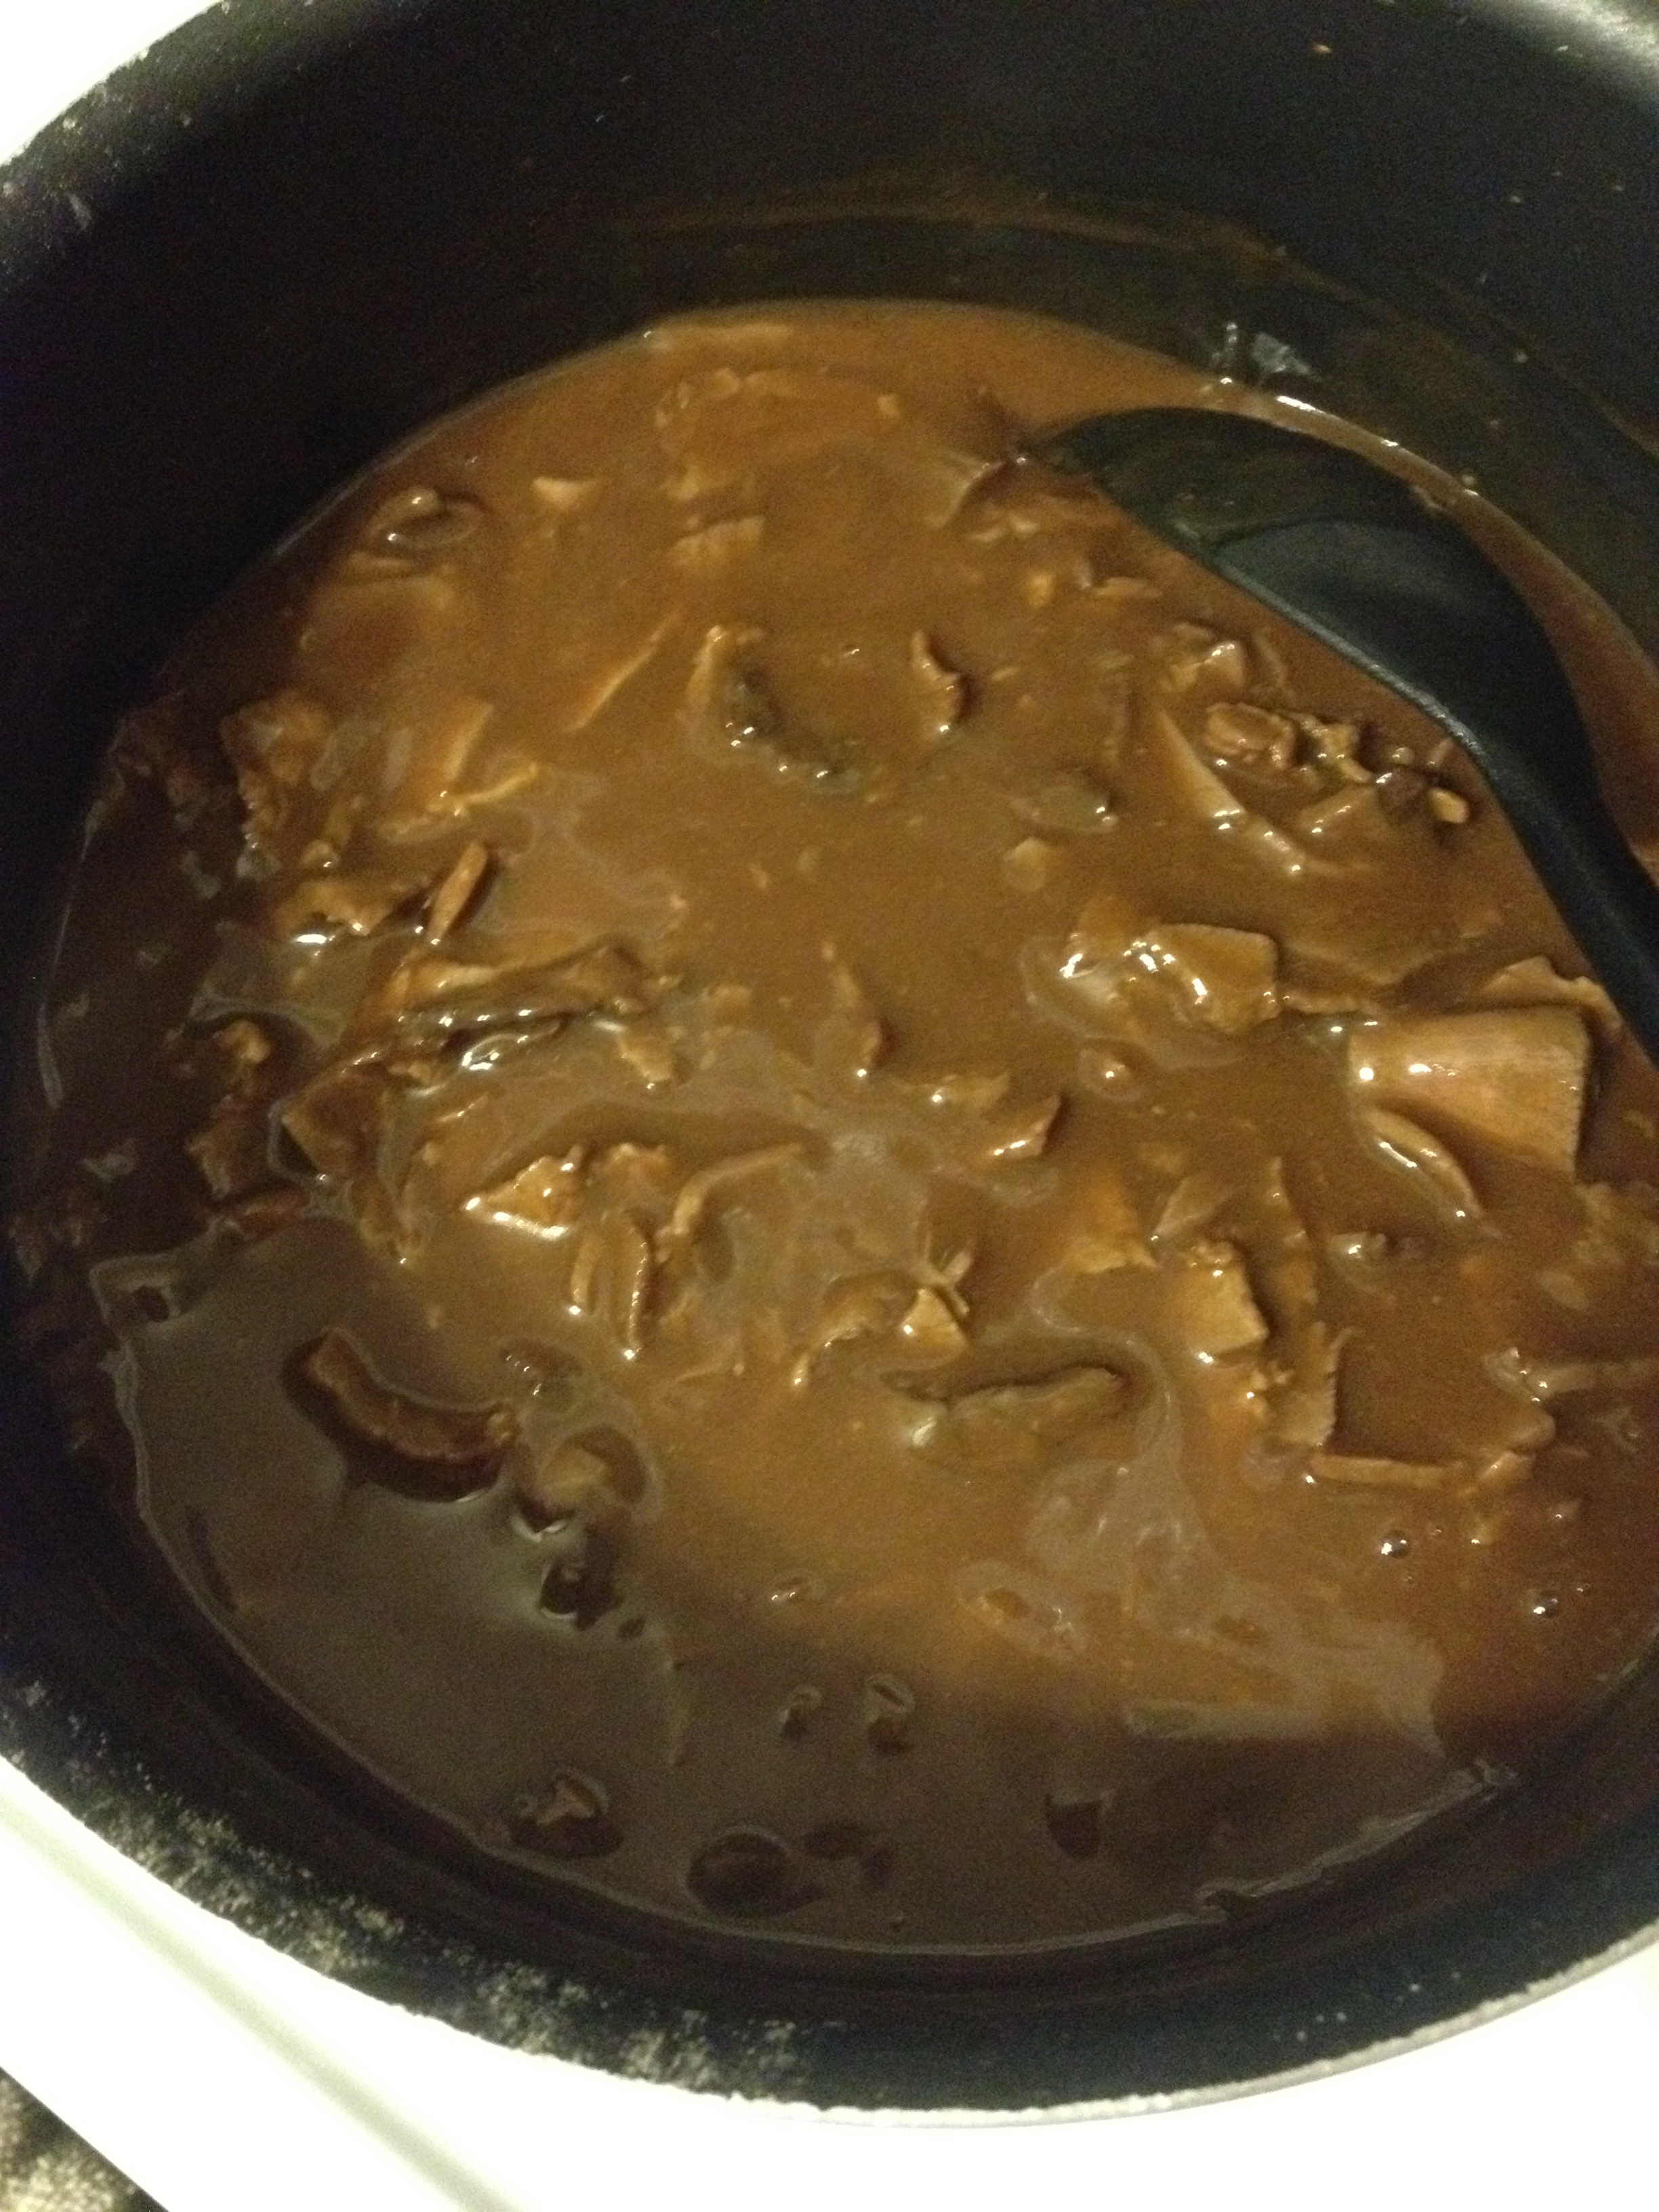
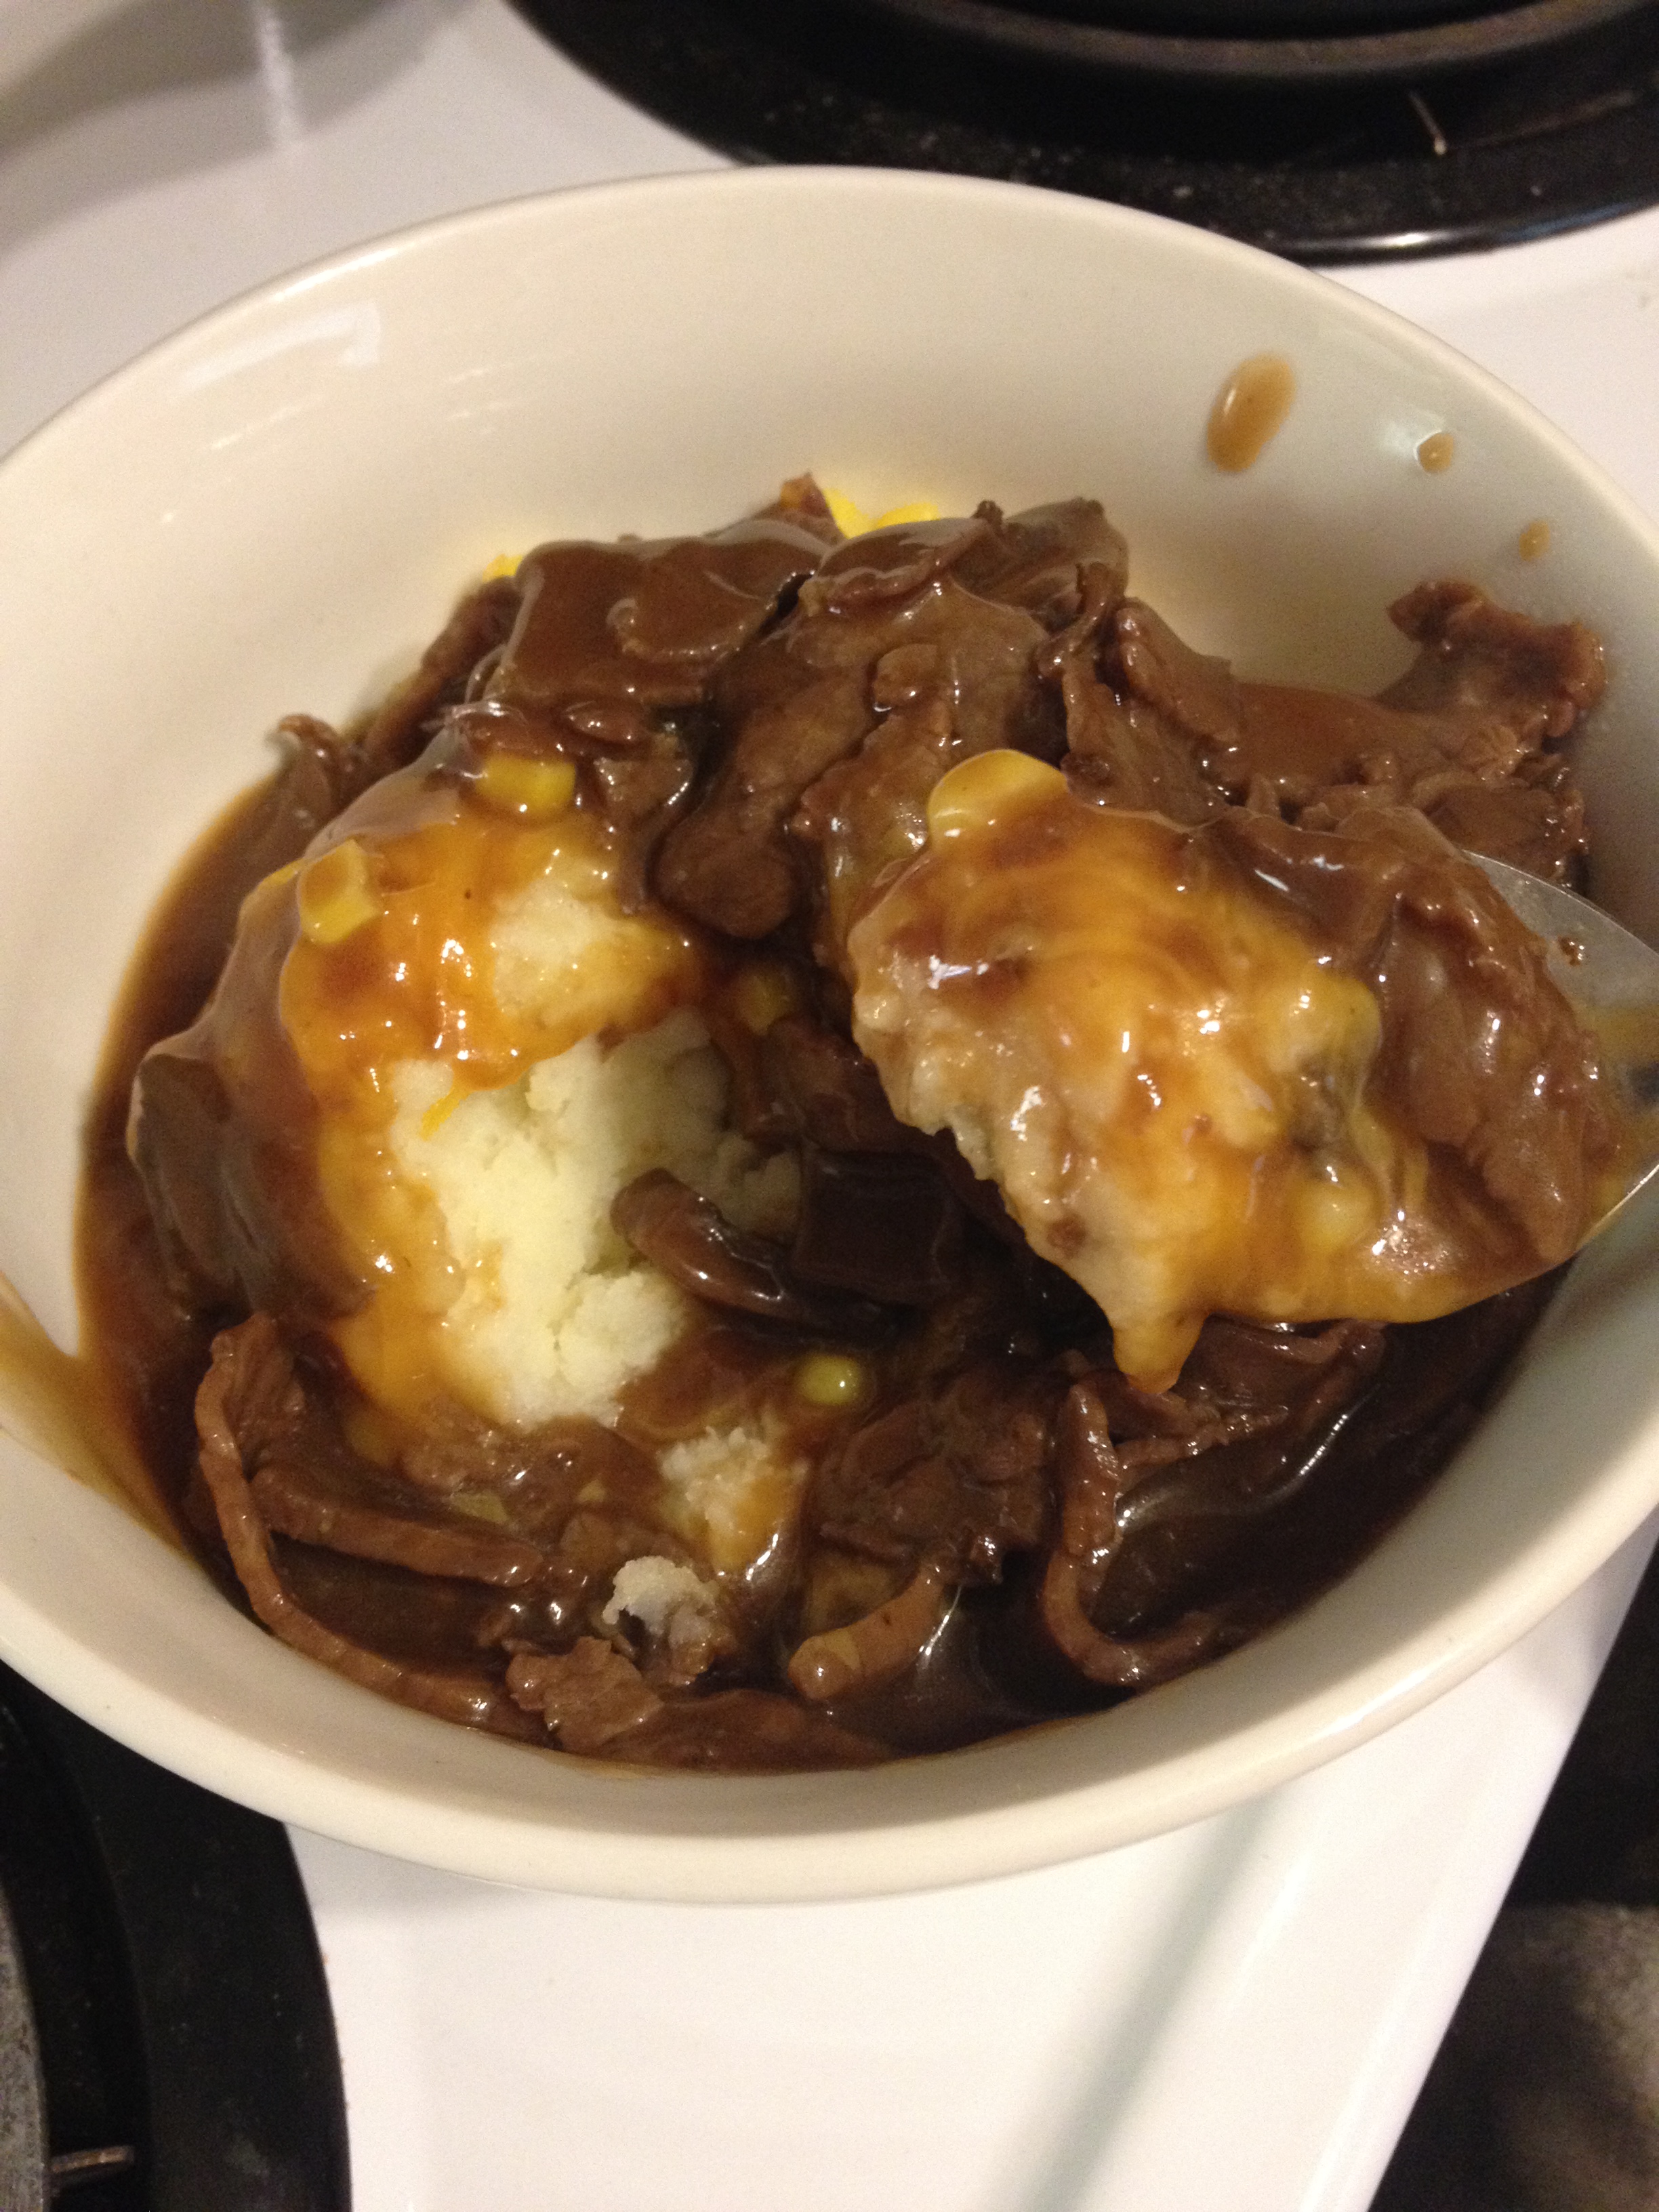
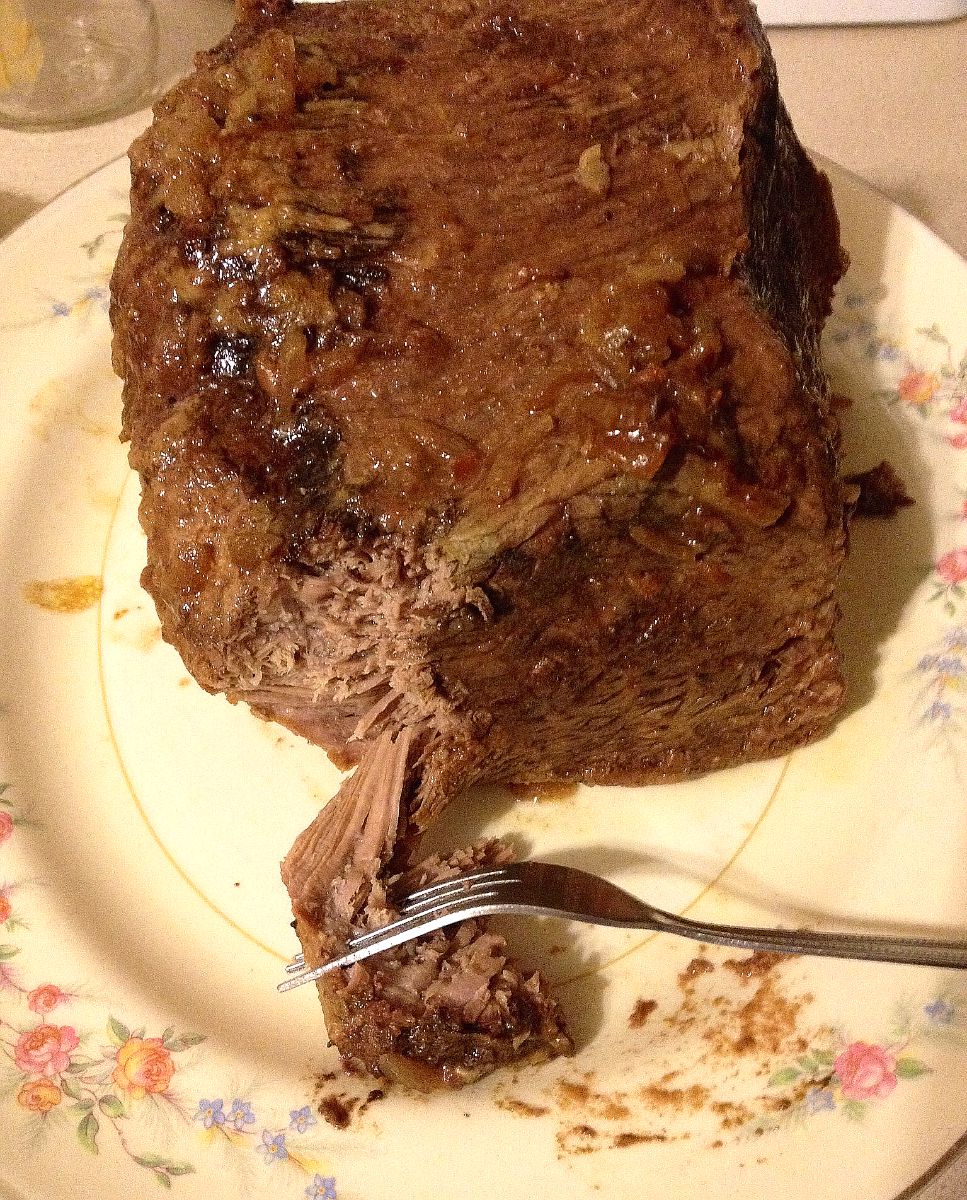
Up first is a beef recipe that I hope you’ll try. I ran across it on Pinterest, but here’s the link.  It’s for a Three Envelope Pot Roast.  It took me 10.5 hours for a 4.5 LB bottom round roast to be fork tender.  The big thing is the incredible flavor of the juices!  Please, please make a gravy from these juices if you try this recipe.  I just ladled out the juices into a saucepan and warmed it on the stove, then added a water and cornstarch roux to the mixture, and stirred until the gravy was the consistency that we like.  I’m not a huge gravy fan just because the flavor doesn’t usually add much in my opinion to the food, but as you can tell in the first picture it was lip smacking, smothering everything in it, good.  *grin*

Image

Image

You can barely see the mashed potatoes.  LOL  I ended up saving all of the juices to make more gravy and tomorrow night we’re having egg noodles with this gravy for dinner.  I may just freeze any extra too.  *grin* 

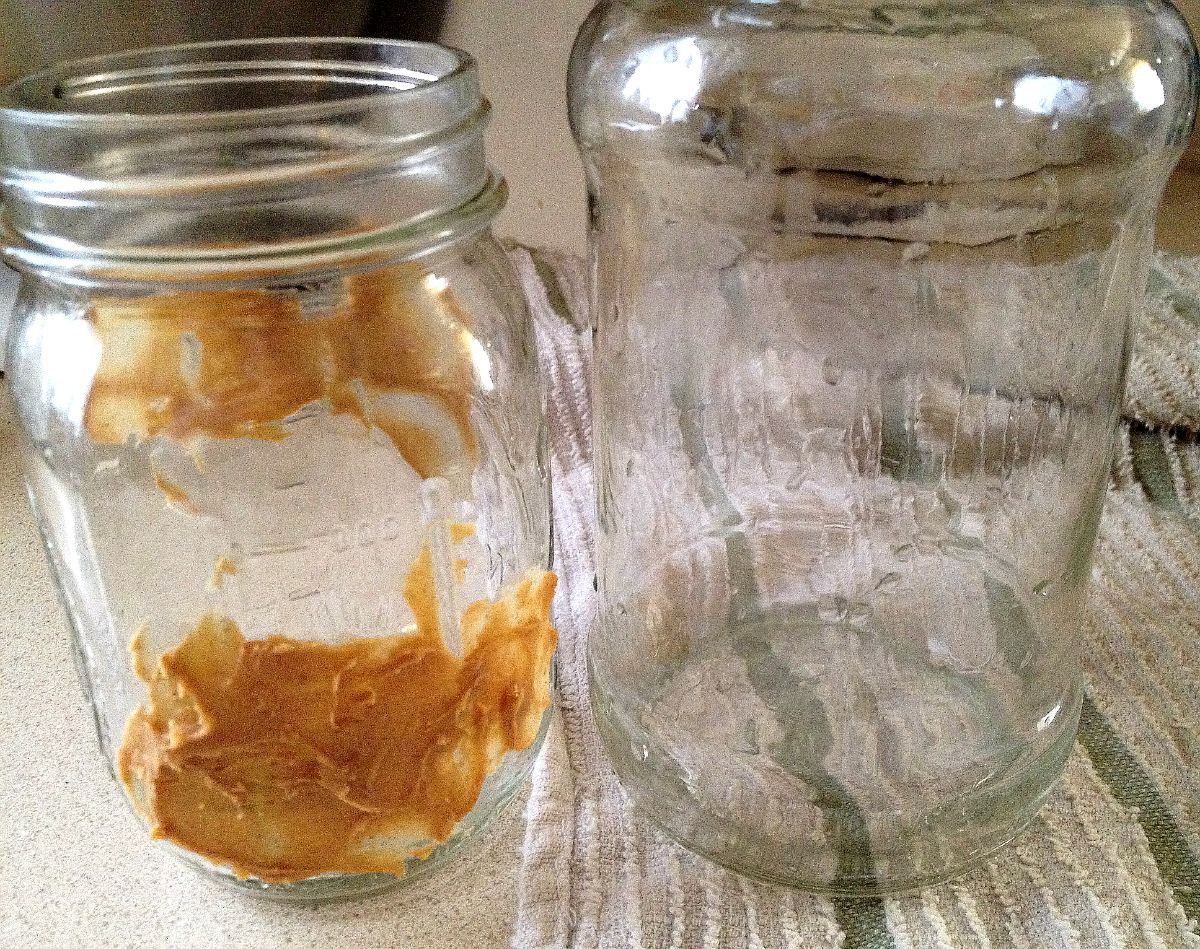
Next I wanted to let you in on a super easy and handy tip.  If you’ve been following for a while you’ll remember that I did a few experiments with removing labels and residue from glass and plastic jars, so that I can reuse them or go all crafty on them.  I’ve done the soaking in vinegar mixture, lathering up in oil in two ways, and even the lather in mayo version, but none were super easy and pretty quick.  I was reading online on a blog about reusing jars and about fifty comments in someone wrote that they didn’t remember where they’d heard it, but that peanut butter is a great way to remove labels and residue (“plus it’s fun to play with your food” *laugh*).  I decided to give that a try.  A few months back we had bought some PB at Sam’s Club and forgot to remove it from the grocery list, so we got another double pack on the next trip.  Even with Bo, the PB fiend dog, and holiday baking, we couldn’t go through four big jars of it before the expiration date, so I had been trying to figure out what to use it on or suck it up and toss it.  What perfect timing to find this little comment buried on a random blog.  First, proof positive that it actually works.  I lathered both jars up and after cleaning the first one off I took a picture.

Image

Now, here comes the helpful info from my experiences, since you ought to expect it from me by now.  *teasing smile*  It will help remove labels for you, but the PB is a one trick pony, so either you remove labels or you remove residue.  I recommend trying to get the label off as much as possible before you trowel the PB on, but if you have a stubborn one (a Minute Maid jug and a marinara jar come to mind), then put the PB on it and after it has soaked into the label, you’ll be able to push that label off.  Just lather the residue up and give it another rest. 

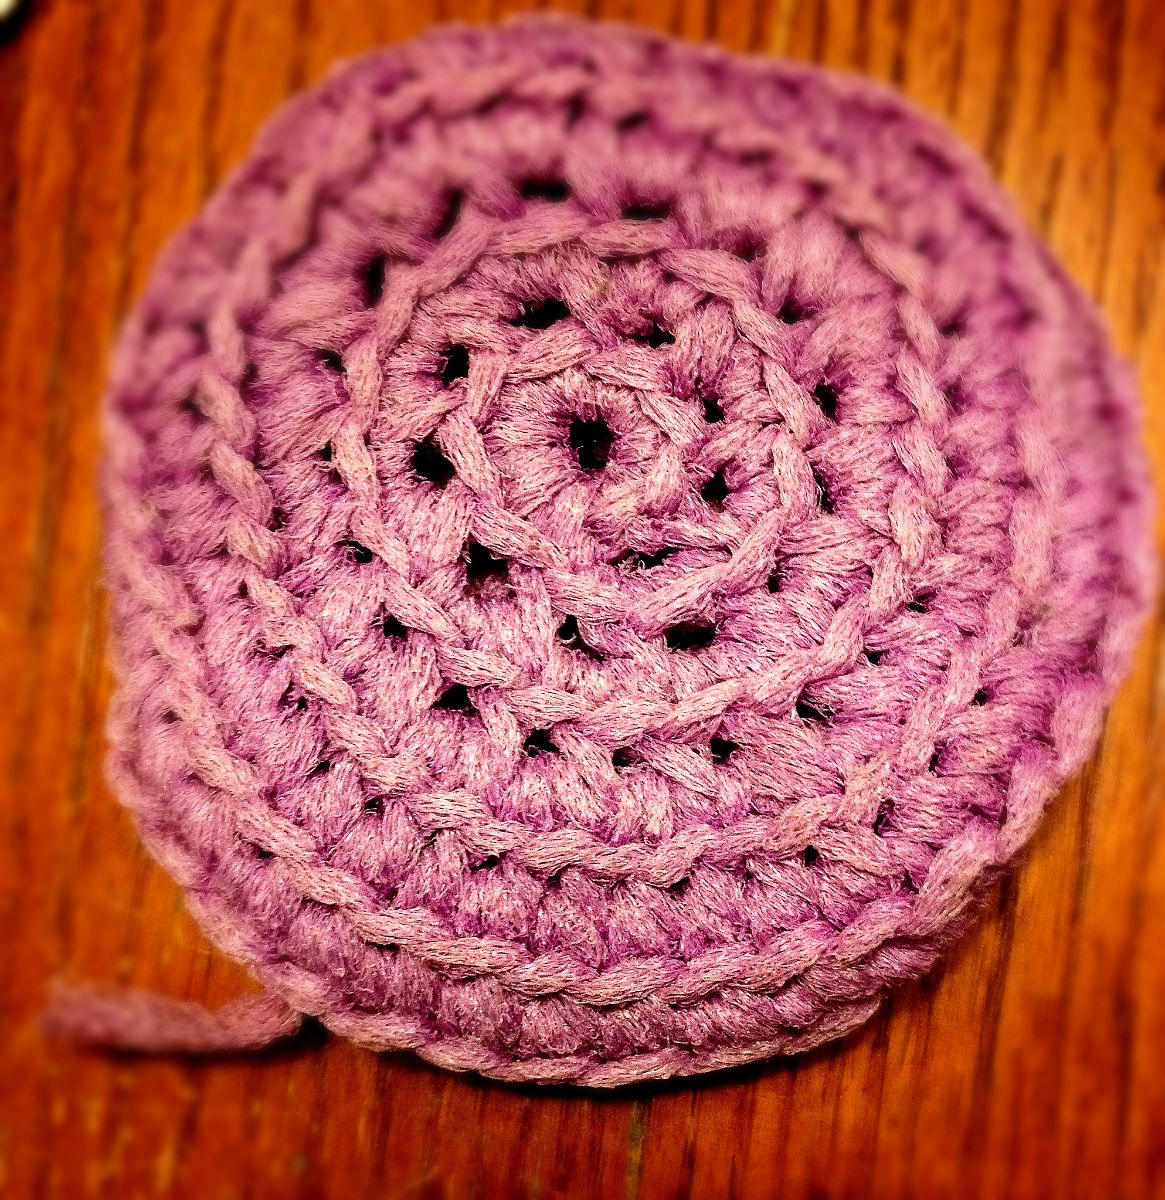
On a glass jar with just the residue put the PB on somewhat thick (I just used the side of a butter knife) and let sit overnight.  I took a pan scraper and scraped the PB off the next day, and then using a little water and my knit scrubber (picture to follow) I rubbed in a circular pattern with no muscle behind it.  There will be a residue left behind, since really this is a play on the oil concept (instead of having to try to soak rags in oil you’re using an oil based product that likes to stick where it lands, if you think about it), so just use a little degreasing dish soap like Dawn and you have a fresh jar. 

Image

If you don’t have one (or five) of these, get one.  I buy handfuls at every craft fair I go to and use them all of the time.  They hold up for a long time, they don’t scratch most surfaces, and they can go in the wash (I just set them on top of the dryer to dry instead of putting them inside, so it’ll last longer) so you can keep them sanitized.  It’s the most frugal sponge and scrubber that I’ve found that actually works.  I use certain colors to designate for business use (since I don’t want any bath oils transferring to a food pan if the scrubber is drying on the side of the sink while I’m trying to cook and clean up my latest business experiment), kitchen, and bathroom.   

Back to the jars…if you’re doing a stubborn glass jar put a thick layer of PB over the label and let sit overnight.  Scrape a bit off that next day (I kept it on the scraper, since sometimes the labels haven’t released and I don’t see a point in using new PB when what I scraped off will still work) and see if you can remove the label.  I found that I often had to use the scraper or my nail to get the labels off, but on glass usually my nail would work just fine.  Just keep letting the PB work some magic if the label is holding firm.  Once the label comes off you can try to do the whole soap and scrubber bit, but so far it never worked for me on that first round if I was also removing labels.  *smile*  I always had to reapply PB (you can definitely use the PB you just scraped off from the label unless it has label bits and adhesive in it) and let it sit around 12 hours or so.  I tried a few different methods, just because I’m that annoying kind of person that has to test everything, and rubbing the scrubber in a circular motion seriously worked the best on the residue.  If you get a little bit of residue that’s being stubborn and you’ve removed it everywhere else, just put a little of the scraped off PB on your scrubber and use it like a paste.  Works perfectly!

Now, plastic jars and jugs require more umph usually, especially if the labels are completely glued down, as most of mine were.  These were the only containers that I had to use some actual muscle on.  If the label can peel off for the most part, then use the same trick for glass.  (Amusingly enough the peanut butter jar was the easiest plastic to remove everything from.)  I found that most plastic, especially the bigger containers, glued the entire labels down and the straight PB soak did squat.  If you run into this and you stubbornly want that gallon jug (you all ready paid for the stupid jug, not just the ingredients, you  know, so you should definitely reuse it if you want to, IMO!), then fill your sink with a mixture of blue (Original) Dawn, the hottest water from your tap, and enough plain white vinegar to make your nose wrinkle.  I didn’t measure the vinegar, so I’d say for a sink full I used about half a cup or so.  Then fill your container to the tippy top with that hot top water and immerse in the hot bath.  Let the containers soak for an hour or so (as long as the water stays warm) and while everything is still warm, but no longer hot, you should be able to work on those labels.  I found my dollar square plastic pan scraper worked great at getting the edges up so I could peel the labels off.  If this doesn’t work, I’d give it another bath.  I was able to remove the labels off of ALL of my plastic containers after this bath and hope you’ll have the same results.  Lather the residue with some PB and let sit, and use the same technique as before. 

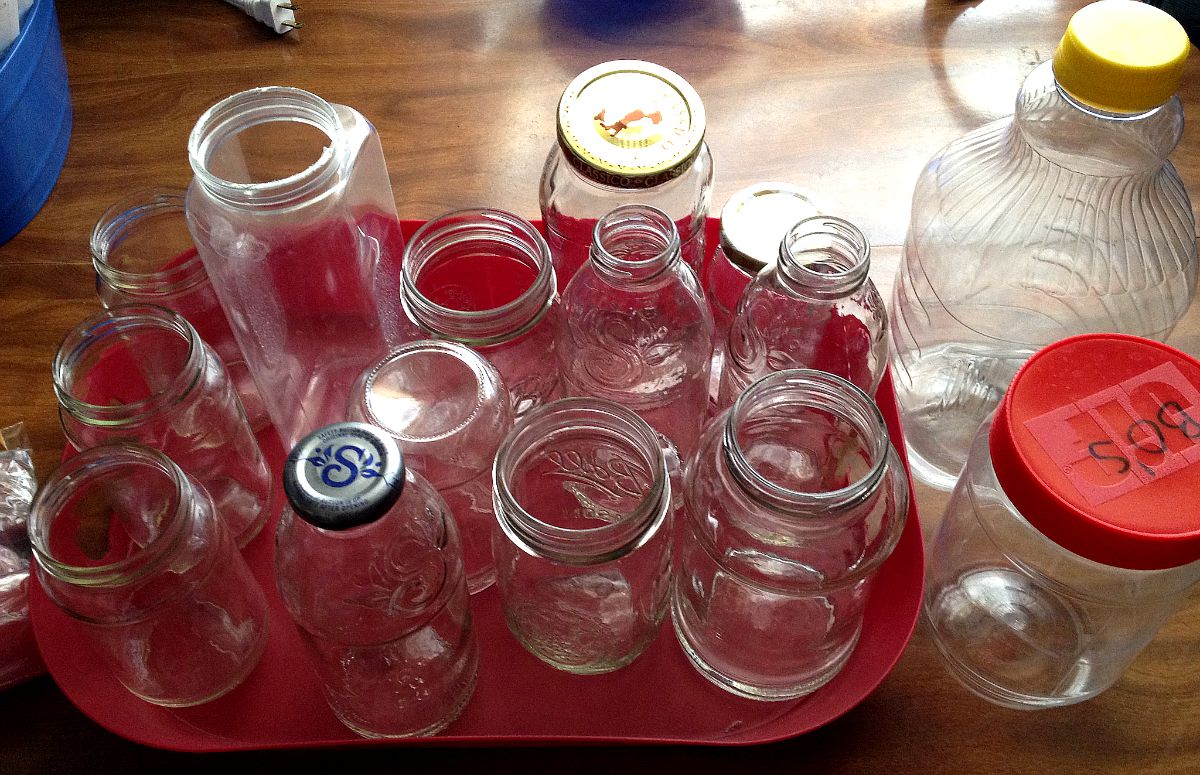
One container, a Minute Maid OJ jug, is relaxing under a second PB treatment right now, but otherwise all of my containers are now done.  Look at all of these lovely little jars waiting to be used to hold a new batch of homemade simple syrup for tea (yeah, Apple Juice jug, I’ve assigned you a new position in this house little soldier), just waiting to get dyed or painted, or get all glittered up (*squealing with delight now that I’ve accepted that I’ve become a complete glitter whore*).  Luminaries, hardware jars, vases, and hair clip holders galore.  I suddenly have the urge to start singing “Part of your World” from The Little Mermaid…

Image


*shaking head to clear it*  Anyway, hopefully I’ve addressed any problems you might run across and you’ve found this post useful.  I’m so tickled to have found techniques that work on both types and don’t gross me out, either. Bo wasn’t overly happy since he kept smelling the PB and looking for his favorite Kong to be filled and waiting in his treat spot (I have no idea why, but Bo picked a specific spot to take all of his treats to, so now I save him the effort, and the carpet any accidental drops, and just take his goodies to his spot.  LOL).  Poor Bo got a little new PB, but seemed pretty let down that I was slinging so much of the good stuff into the trash.  *grin*  Btw, sorry about the pictures distorting a bit in this post.  After six adjustments and saves I figure they’re probably good enough.  *smile*

I hope you get to sleep in and enjoy your holiday if you have tomorrow off.  I never got it off when I was working, so if you don’t, I feel your pain and hope it’s a light day for you.  I’m off to snuggle with Bo and a few heating pads and watch some Ballykissangel.  Happy pampering.  🙂


Crazy Lady’s Beef Fajitas

Image

Crazy Lady’s Beef Fajitas


An awesome friend of mine, the one that actually encouraged me to start this blog, asked me to post my recipe for the fajitas we make.  Everyone my husband and I have made these for raved and now make them too.  Yep, they’re that good.  *grin*  So, bear with me since there isn’t really a true recipe, but there are several little tips.  The recipe is definitely not sponsored by any vendors, although that would save us a lot of money on marinades.  *laugh*

We usually get our flank steak at Sam’s Club, since they usually have the best marbling, the steaks are pretty big, and the price often can’t be beat.  I thoroughly trim the fat off and then put it in a trusty gallon sized zip bag.  Here comes the crucial ingredients…I add about an ounce of Allegro Original Marinade (found at most grocery stores, like Walmart and Dillons [if you’re in the Midwest]) and four shakes of Original Flavor Daddy Hinkle’s Marinade.  The Hinkle’s has a reducer top, so I literally just do four shakes into the other marinade.  Between the two your steak should have a nice amount of marinade on it.  We let it marinade at least overnight, but often about 30 or so hours.  I set it out to rest for ten minutes before it’s time to grill.  (Note: Daddy Hinkle’s is often sold in a combo pack at the grocery store [we usually have to go to Dillon’s or Hy-Vee to find Hinkle in any flavor, so you’ll want to go to whatever store you know often has hard to find items].  The other piece in the combo is a container of dry spices.  If you like more spice, then when you set the meat out to rest sprinkle your dry spice over the steak.  It usually makes my stomach upset, so I can’t use it, but Larry loved when we used to be able to add it.  Otherwise, that powder spice is great in breading!)

Larry is king of the grill, so on the gas grill he grills the steak 7 minutes per side, unless the steak is thick and then he will check the temperature and add time if needed.  He found that 7 minutes per side is the sweet spot to reach medium doneness on the grills he has used.  When it’s done we let it sit and rest for 10 minutes on the counter, and then he slices it into really thin slices.  While he’s doing that I’ll cut 2-3 green bell peppers into strips.  (For those that hate cutting bell peppers, there’s actually a less fuss method.  Just start a centimeter or so from the ring around the stem and cut along the contour of the curve down to the bottom.  If you do this the whole way around, the whole center will stay intact and you don’t have to deal with cleaning seeds off of anything.  Then just slice up your strips of pepper.)  In a large frying pan I sauté the peppers with one packet of Swanson’s Beef Flavor Boost and about a quarter cup of water.  If things seem to get dry, then just add a bit more water. I sauté them until they start to turn a pale green and are pretty soft.  You could always cook them less, but I found that there’s a lot less indigestion when they’re cooked down further than the restaurants do.  Once they peppers are all cooked we add the sliced grilled flank steak and any of the yummy juices that come out during the cutting.  *grin*  That gives the peppers even more of a beef flavor.  Once the steak is in I’ll put a splatter screen over the pan and put 2-4 tortillas right on top of the screen.  Why let that steam go to waste?  Let it soften up your tortillas and save you a few extra steps.  Once the steak is warmed back up (we try not to let the meat cook very long, so it stays tender), it’s time to serve. 

We usually put shredded cheddar cheese, ranch dressing, and some of the juice from the pan in our tortilla with the meat and peppers (plus salt and pepper to taste, although usually we leave it alone).  We’ve tried a variety of other things, but that combination has made it to finally being the standard for us, and those juices really set these apart.  Even family members that usually load their fajitas up with lots of toppings come to the dark side after they try it our way.  We’ve tried red and yellow peppers (although everyone says they taste the same, my super senses can’t handle either of them usually, so we stick with green now), sour cream, diced tomatoes, lettuce, salsa, and jack cheese.  Change things up and see what works for your family, but this is what works for us.  With just the two of us eating the picture is all that was left after having it for lunch today.  That pan was full to start with!  *laugh* 

Hopefully you’ll like our take on fajitas.  Now back to your regular programming… 😉

%d bloggers like this: