RSS Feed

Author Archives: Georgia's Pampering

A nerd, shampoo, and a redneck. What the…?

I’ve actually gotten a lot done while recovering from the beginning stage of iron toxicity and there was only one crisis. I’m either improving or the universe finally decided that I had enough to deal with. *laugh* I’ll hope for both, but figure it was merely a karmic oversight.

I did a ton of paperwork (although I still can’t find a few missing papers. Doh!) and updated a lot of recipes. As much as the nerdy side of me loves figuring up recipes I’m tired of guidelines changing and my having to redo the calculations. I also found an (oops – nerd flag raising here) app that lets me make a to do list plus show if I made anything, how long it took, and even to separate tasks and projects, then link the tasks to the project. *pushes glasses back up my nose and sighs happily* I can feel better about not killing a bunch of trees for my lists and I can easily track my progress with all of my projects. If you have an iPhone and love lists, then rush to the App Store for “Weave”, brought to the masses by the trusted Intuit brand. By the way, one project only has two more tasks left before it’s completed. Booyah! *grin*

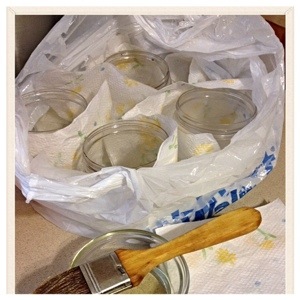
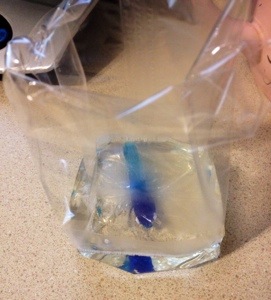
I’ve completed at least one task per day until today (although I might add writing a blog post as a task just so that I can feel that I accomplished something instead of just being proud that I got out of pajamas. Hmmmm.). I made several varieties of bubble washes, evening primrose lotions, goat’s milk lotions, and some massage oils. That small crisis actually popped up twice, although I only realized it yesterday. While the bubble wash simmered to the proper temp to accept scent (and I had fished the lively candy thermometer out of the bubble muck that it kept trying to take a full dive into a few times) I decided to make the oils on my holiday list.

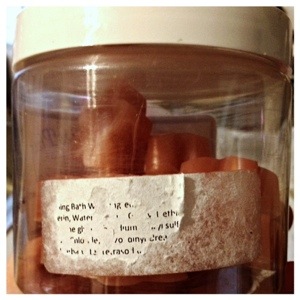
See, my first mistake was trying to actually accomplish more than one task. Let that teach me to not get greedy. Lol. Anywho! I decided to do these in a 1:1 ratio of almond and coconut oils. I weighed out and poured the coconut oil, then added the total FO I’d need for the blend. I don’t know why, but something made me look at the label on my almond oil jug. Is your spidey sense tingling yet? Instead of almond oil it was a gallon jug of shampoo base. Granted they are the exact same color and in the same shaped jug, so it was easy to mistake, but I didn’t order shampoo. It doesn’t work so well in massage oils, and they’re not in the same area of the wholesaler’s website even, so I know I didn’t pick it. Lol. I’m just glad I looked at the label this time when I always go by the color usually. Nothing else in my cabinet (well, until this) looks like the almond oil jug with a lightly yellow oil inside. (It’s not an overly appealing thought that the shampoo starts out yellow, right?!) I decided to splurge on the oils and just go full coconut oil for them. I realized that the oils I had experimented with last week obviously are mostly shampoo and are awaiting labeling as a massage oil (Miss Ash is returning this week to help during the holiday season, so I have held off on labeling, since that’s one of her favorite tasks). I pulled those bottles out of the collection and in having a dramatic emoticon texting meltdown to my other half he smarted off about having some fancy shampoo. *cue the lightbulb above my head lighting up* So not only did I just adjust and make straight coconut massage oils, but I’ll add these messes up bottles to more shampoo base and try out some coconut oil shampoo. Shoot, maybe it’ll be impressive and help break that pesky fear of adapting. *grin* If not I’m still impressed that I adjusted and switched to the straight oil so easily. I’m still marking those brownie points down. And my brownie points actually add up to allowing me to have a brownie, so double win.

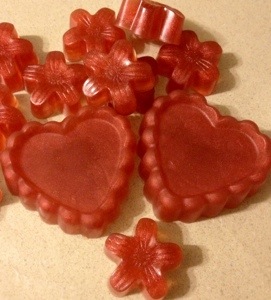
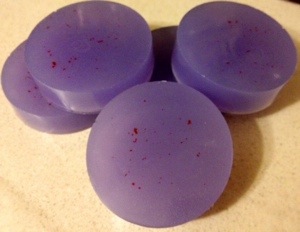
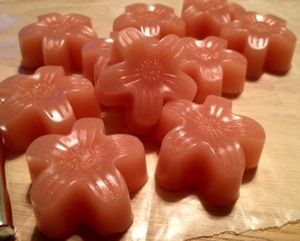
As my usual disasters go this was definitely one of the easiest to handle and a lesson in adaptation was due anyway. Plus, a quarter of the items in my to do list got checked off. To top it all off I came up with a combo that’s still cracking me up – the redneck combo. (Since I’m a redneck in a family of rednecks I’m not mocking the culture, just using it as a way to have some fun and catch the eye.) I’m going to make “Saturday Night Date Wash”, “Beard Be Gone Shaving Soap”, and probably “City Slicker Soap”. We’ve thrown around names for a lotion, but they tend to sound perverted, so I keep veering back to the safe realm of soap. Lol. I’m having a lot of fun with this idea and they’ll be products I normally sell (or hope to) anyway, just with a different name. Otherwise I’m part way done with new versions of the Christmas Sweet Treats Basket, the Spa Basket, and the Kids Tin, with the new Men’s Combo being almost ready to show you.

More details to come later, but I finally got over my embarrassment and am laughing, so it was time to share. I hope you have a great night planning out your Black Friday goals (don’t leave my nerd flag hanging alone…I can’t be the only one on the bf app!). Happy pampering. 🙂

Bring On the Egg Nog

I finally made a batch of lotion with the Cozy Christmas FO I bought a while back. Since I really like the Evening Primrose lotion I decided to use it for experimenting with the FO. I wish they had figured out “smellivision” so you could at least smell these jars.

I think the sweet, Christmassy scent pairs perfectly with such a soothing and light lotion. Larry and I actually agree (I’m just as surprised! Lol) that it smells like spiked egg nog straight out of the bottle (cream, sugar, spice, and rum), then mellows to mostly sugar, cinnamon, and nutmeg once on the skin. I know it’s kind of odd, but I’m finding the sweet notes incredibly comforting and uplifting. Although it’s such a Christmassy scent I’m really tempted to make this in several mediums and sell it year round. Yeah, I like it that much. *grin*

Any input for the off season name? I haven’t decided if I want to play with the Cozy Christmas name for the holiday time or if I’ll just leave it alone. (I may have lost my cheat sheet that reminds me of the names that don’t correspond well to the FO names, so I had to remove several descriptions from my website while I track the info back down, which makes me a little gun shy now. *embarrassed grin*) Come to think of it some rum in my egg nog always makes me a little more cozy, so it kind of fits.

As tickled as I am with this I have about twenty things on my to do app to get done soon, so I look forward to my helper visiting in the next week. Hopefully I’ll have lots of new tidbits to share soon. In the meantime I’m going to head off and email the manager of my favorite grocery store to see about getting some egg nog. I think a spiked egg nog while soaking in some Cozy Christmas bubble wash sounds divine. 🙂

Adhesive Be Gone

I haven’t been overly *cough to cover the muttering of my “good” shoulder angel about fibbing* productive lately, but I have actually gotten a lot of non-business things done. *smile* I thought I’d share one of my projects with you, since I’m pretty happy about it and think it’d be handy for everyone to know.

During that cleaning frenzy I unearthed a bagful of plastic jars that I have saved to reuse (not for sale, just for storing stuff or putting test product in so I’m not using up the good stuff), but there were sticky partial labels all over the place and several jars literally stuck to the stupid bag. You know how you think patiently peeling that label will get it all off and you’ll be rewarded with a clean jar? That never works on plastic. At least, not for me! I hit Pinterest for the crafty tips from the home pros and several talked about the ease of removing left behind adhesive with oil, and if you use vegetable oil overnight, then you don’t even have to try to remove the label. Since I had varying examples of label peeling OCD in the bag I thought the variety would be a smart test for this method. I don’t have a specific link to share with you because I honestly ended up combining techniques from several posts/pins that I read. I’ll just give the total process and my additional tips as I go.

20131111-164830.jpg
At the beginning

First, you’ll want to cover your counter or table with something disposable. Newspaper, paper towels over a bed of dish towels, whatever. I found it really handy and a LOT less messy to move the project into a plastic bag on top of the bed of towels. (I truly tried the straight forward approach, but still got oil all over until I had a stroke of genius with the bag.) Pour some of your oil into a shallow glass bowl (plastic will be pretty difficult to cover up unless you have a lid, but I had Saran Wrap, so glass moved from my second choice to the smart choice *grin*, and I promise that it’s much easier to brush the oil on than try to lightly douse a napkin straight from the bottle without a mess. I’m all for moisturizing my skin, but DUDE! Just trust me. Lol.). I used my middle of the road paint brush that I typically use for egg washes. And I can’t stress this enough: have a partial box of disposable gloves on hand. Oiled plastic will slip out of oily hands like a sudsy bar of soap. It’s a pain in the snicker doodle and you might end up with the oily and sticky mess stuck to your hoodie. Really. Anyway…also keep a stack of napkins in easy reach.

20131111-164940.jpg

(Put your gloves on now! *grin*) Take your plastic jar and coat all labels and adhesive with oil using circular brushes; working over the opening to the bag. Straight brushing didn’t work nearly as well. Coat it liberally; as in, nearly dripping off. Then slap a napkin over the area. It took a few rounds before I discovered that this step is more effective if you also brush the oil over the napkin that is covering the treated spots. I did a few different amounts, but saturation cuts several hours out of this process. Put the wrapped jar into your bag and continue the process with all of your plastic jars. I found that butting wet areas together worked better, because they weren’t as apt to dry and stop working then.

20131111-165137.jpg All oiled up and no tanning bed in sight

Now, let them soak in the oil bath overnight (12 hours seemed best). I could be all quaint like the posts I read and tell you that they might be ready to clean right off now, but I won’t. I’ll be honest. Only the lightly gunked ones will be ready now (or else they forgot to mention where they got the industrial strength oil or fairy dust, because following the instructions only worked on the cleanest of the group!). Take the cleanest one and rub lightly with the oily napkin that had been covering the area. If the adhesive starts to slip off with the circular rubbing, then you get a brownie button! Hehe. Couldn’t resist. Ahem. Awesome for you! Just keep it up until the goo is all rubbed off. Now, if your jars are more like mine, then there’ll be a little bit of cleaning around the edges, but the napkin might be sticking to the adhesive at the point. Flipping it off won’t work, so don’t bother. I tried. *wink* Just brush some more oil over the napkin and it should release. Liberally swirl more oil onto the labels and adhesives (although all of the labels came off at the this point for me, leaving just the adhesive), and repeat with all of the jars. Now, I haven’t ran the experiment a second time to get a different view on the times with the improved methods, so I can only recommend that you check them every few hours. Following the combination of instructions and then finding my own improvements the whole process took three solid days, but the more liberal application with the swirling movement made a huge difference, so I will plan on 2 days next time. If the oil dries, then you basically just need to give them a bit more attention and reapply oil every hour or so. Otherwise, I aimed for every two hours.

You should notice that a bit more comes off each time you reapply after the 16 hour mark. If you want completely scratch free jars, then you might want to try a soft cloth instead of the napkins, because I noticed after I started doing the 2 hour check ups that the surfaces started to look pretty scuffed. Since I just wanted them clean I got rather ruthless and started using some elbow grease on the third day. With my gloves on I slowly scraped my nail at the edges of the adhesive and began to push the adhesive up. Every few pushes I’d add a little oil, since the lubrication makes a huge difference when you’re rushing the process apparently. *grin* I swiped off the balled up adhesive with a napkin and within about half an hour all of my jars were free of adhesive.

20131111-165949.jpg See my pretty jar!

There is one stumbling block that I have no real advice for and that’s how to get the oil easily off of your jars. It took me three very soapy washes with the heavy duty degreasing version of Dawn before all of the oil was gone. I swore after an extensive washing the first time, complete with a sponge bath, that they were spotless. They sure looked that way until they finished drying. As soon as the water evaporated I noticed beads of oil left behind inside of the jars. A few more really soapy washes later and they are squeaky clean to the touch. *big grin*

All in all, this is a pretty easy cleaning technique. I just covered my oil between treatments and will actually use what’s left the next time I have to do this. I actually used maybe an ounce of oil throughout all of this. (We won’t discuss how much I overestimated that I would need…) It takes some time and frequent checking, but I’d much rather do this technique than fuss with a razor or label scraper. If you’re as dedicated as me about keeping your fingers intact, I’d definitely recommend this technique to you. *grin* There’s very little cost and a simple clean up since you can bundle up all of the mess right in the bag; although you’ll still have a few paper towels from outside the bag to toss that caught drips, but maybe you’re neater than me. Good luck with that! Lol. One last note, this wasn’t nearly as effective on glass as the vinegar soak is that I previously posted about. I tried this first attempt on 5 jars and a glass bottle. The label peeled off the jar after the overnight, but it took until the end of the second day before any of the adhesive came loose, whereas it took only a couple of hours in the vinegar bath for a sink full of glass to come clean.

With the holidays I thought this might be handy for those that like to reuse, reduce, and all that happy stuff. Or you might just be frugal like me. *grin* Whatever you are, I hope this helps you and don’t hesitate to ask a question if you have one.

An Easy Tip

Things have been a bit off kilter lately, so I haven’t been able to check off as many items on my to do list as desired. However, I found a handy bit of info that I want to share. Yet again I’ll be praising the ol’ bottle of plain vinegar once again.

I did a massive cleaning of my supplies cabinet recently and found a bunch of jars that were waiting for me to find homes and purposes for. Some had residue from temporarily holding batches of bath teas and such to be packaged into their bags, while others had started looking weird before I got around to using them to hold product, and I’m ashamed to admit that I had a sink full of these jars when I finished the cabinet. I decided that I wanted to get what labels I could off of them and then try my hand at some mod podge over tissue paper. (Drat you Pinterest for making me feel all crafty and creative. I have enough things that need to be done all ready! I really need to focus on the big things instead of sprucing up some jars. That will make them pretty jars though. Let’s pin that to try out later…) *grin* Since I’m so picky and a (*cough* retentive) perfectionist, I knew I’d get irritated over the residue that I inevitably still have after scrubbing and peeling labels, so I hit Pinterest for some tips from the crafty folks.

Unfortunately I was a little skeptical and didn’t plan to be so excited that I’d blog about this, so I don’t have before pictures. You’re imaginative, so I’m sure you can picture dusty, sticky, and oily jars. Lol. The little jars also had a really weird look to them now, like they had started to brown and develop imperfections in the glass, and it didn’t wash off.

I read several pins that talked about removing labels and gunk off of glass jars, although admittedly I focused more on the natural ingredient ones, mostly because I’ll toss my cookies if I smell bleach and my nails will break off if I play with acetone.

I found three that all talked about soaking jars in really hot water with your preferred standard dish soap (don’t use your “good” stuff that moisturizes your hands and all that stuff. We’re talking about using a plain old degreasing formula here.) and then add some vinegar. Of course the ratios varied impressively (it’s kind of funny how I find trivial things so impressive, but such a difference in opinion gets me all wound up, I guess. *grin*), so I decided to use the grand “whew, we’re starting to smell like I’m pickling, so I think that’s enough” measurement. (Maybe I should be embarrassed by my measuring technique. Hmmm. Nope. Lol.) I used the Bleach Alternative Dawn and probably a cup of vinegar to a sink full of jars and hot water. Then I decided that if it might work in twenty minutes, as most of every version I read did, then I could play on the computer for two hours safely. (I work hard to justify my escapes from reality. Just go with it. *teasing wink*)

Although the bubbles had dissolved and the water was cool, I saw the remains of the labels still stuck on the jars, so I decided to poke at one to see how disappointed I should be. Umm…the tip of my finger, not my nail mind you, pushed the label completely off without any force. Dude. Okay, I was impressed all ready, but figured I wasn’t going to do a happy dance because the usual residue was probably just waiting for me to touch and get all grossed out by. When I rubbed my finger across the spot and nothing happened I’m pretty sure my eyebrow nearly climbed into my hair line. No joke, every label rubbed off with absolutely no force and the few spots that looked like leftover adhesive rubbed right off. After an extra light wash with dish soap I set them to air dry and was astonished by how nice they looked. Somehow this little bath with a mild, natural, acid and my normal dish soap made these jars shine better than they had when I bought them! I mean, look how nice these look…

20131103-032839.jpg

20131103-032854.jpg

If you have an embarrassing collection of “I’ll get to it later” jars I recommend trying out this super easy method. I’ve been using vinegar for the base in my household cleaner for weeks now, plus am still enjoying it as a fabric softener, and now I’m tickled to have found yet another way for it to make things easier. So put away the rubber gloves and close that window, because we can now pamper ourselves naturally by having a lot less work. 😉

Put the Lime in the Coconut

Oh. My. I have been testing some fractionated coconut oil and although I expected it to make a nice body and massage oil, I was surprised by just how well it has done. The quick and easy explanation of fractionated is that it’s a process to make the oil have a better an longer shelf life. Aside from that, coconut oil itself is used in lots of applications.

As you know I’m quite a fan of sweet almond oil (SAO) for my body oils since it moisturizes for so long, applies beautifully, and leaves the skin so silky. I decided to start with a 50/50 blend of SAO and the coconut oil (CO). Since I hadn’t used CO before I didn’t want to jump in fully. The blend dried much quicker and didn’t leave such a wet feeling like straight SAO does, which makes it better for when I need to dress quickly or I’m having one of those “Ew, if anything sits long I’ll feel icky”. (Yeah, I have some weird moments. *grin*) The really impressive part is how well it has worked on a few stubborn dry patches that are pretty much unaffected by all of my lotions, as well as the store bought ones I’ve tried. It literally worked on all of my patches for a solid week before they started to act up again. Wow!

I’ll experiment with a 25/75 blend next and will use it again on several skin zones. Admittedly the 50 blend would probably be incredibly effective when used daily, but I want to do the extreme tests first. Plus, you know me. I like to have, and give, lots of options, not to mention I love the challenge of experimentation. *grin*

I’m pretty excited to have new options to offer and this might be the perfect product for other skin ailments, especially for others who have failed with other traditional treatments. Plus, it’s a lot of fun to have an excuse to sing the “(Put the Lime in the) Coconut” song. 😉

I’m Flushing This Fish

I had a very rare burst of energy that stayed for three days. I can’t even remember the last full day that I had energy, let alone more than one, since I got sick, so I took advantage of the energy. I made six batches of soaps, all of them experiments, and some were real flops.

First, I finally gave the whole “fair prize goldfish” soap a try. I was pretty excited at first. To start with I did a pour in a cello bag that I had balanced in a coffee mug so it wouldn’t collapse as I poured soap into it, then added the toy goldfish into the soap and kept it balanced with a Popsicle stick until it partially set.

20131024-011641.jpg Unfortunately there was a slight bit of oil on it from handling it a bit too much as I tried to get it down into the soap without plopping upside down, so the soap clouded a bit. After a partial set I added another 2.5 oz of soap “water” to finish it off. It was then that I discovered that I had experienced a brain fart after the first pour and forgot to do a light spritz with alcohol to break the surface bubbles. As you can see in the following picture there is a straight line of bubbles clearly marking the top of the first layer.

20131024-011604.jpg
Ugh. To top it all off I had to hold the bag in a slightly scrunched and rounded position until the second layer of soap partially set so that it looked more realistic, like how a bag with water in it would look. Between the extra labor (I won’t go into how hard it is to try to keep a top heavy item upright with a stick when you have a tremor. Lol.) and the mishaps, I don’t think I’ll be revisiting this soap concept for a little while. *grin*

The second mishap I admit I am still a bit miffed over. It was actually suppose to be a simple Christmassy bar soap. I poured a layer of dark green soap in bar molds and after a partial set I poured a layer of dark red, both layers in the new Christmas Eve Cookies scent. The colors massively changed after they set and then when you see the soap from overhead it has the oddest color; definitely not Christmassy.

20131024-012106.jpg I think I’ll try the next batch with a solid base, so there aren’t jewel tones that allow you to see the other color. I hoped jewel tones would work out though, since you can get deeper, richer colors in a clear soap. At least they smell great, so I’ll cut them up, melt them, and give them a new life. Not a total flop.

I totally like how the other four batches turned out, thankfully. *grin* I decided to experiment with the super rouge powdered pigment with some additional iridescent sparkles. When the light is just right the soaps look like Dorothy’s red shoes, fitting since I live in KS, and I loved the look so much that I did a second mold with the color. *laugh* I made a batch of small flowers to embed into other soaps, like my glitter bars from earlier this year, and then a few big hearts that I think would be really neat in a girl’s Christmas pampering basket.

20131024-012716.jpg

I decided to shake things up, still thinking of the girl’s basket, and did bubblegum guest rounds, but sprinkled some hot pink powdered pigment in there since I loved the look of it when I accidentally did that in some stars a few months back. Simple, but with a little pizzaz.

20131024-012927.jpg

Lastly I went back to the Christmas Eve Cookies (can’t tell I started to really like it, can you? *laugh*) and made another batch of flower embeds for the girl’s basket or for individual glitter bars in holiday scents to sell. I decided to add some white soap to the clear, which gave the embeds a really neat look that I love. Not a color that is a traditional holidays variety, but a mellow hue that can be enjoyed or displayed after the Christmas tree has been packed up.

20131024-013232.jpg

To top it all off I did a seriously overdue in depth cleaning of my supply shelves. It was hard, but I made myself part with scents that I really don’t like or that had expired, and organized all of the scents into categories to make it a lot easier to find the FOs/EOs I’m looking for. It turned into a 12 hour project, but I’m so proud of myself, and I feel all pumped up to keep chipping away at my holiday business to do list. (Shush now – I didn’t make a spreadsheet this time. I kept the nerd flag at half mast and stuck with a list. *sassy grin*) All in all it felt great to get to experiment with the new pigments and FO. I have that euphoria in my veins from getting to be all creative and artistic. *happy sigh* If this sticks around I will be able to get some new products out of my brain and available in time for the holidays. Warning – I am putting you on high alert now. If I can keep this up and make the new extra pampering line, then I will ask you to join me in a hearty round of the happy dance. *grin* Although no twerking allowed! *laugh* We’ll stick to a platonic jig, okay? 🙂

Homemade Fabric Softener

I’m going a little off format while my soaps are setting up, because I’m so excited about a little item you might like to try out. If you’ve ever taken a peek at my Pinterest I don’t pin very many DIY items other than gift baskets. I prefer to actually try them out as I run across them to see if I actually want to recommend them to others.

One such pin I was skeptical about was homemade fabric softener, especially since it is essentially just vinegar. I’ve compared several of these pins and decided to try the most basic version with terrific results. I decided to cut down the measurements a bit. In a 16 ounce bottle (I actually used a food service bottle that I had on hand, plus I wanted to avoid any possible contamination by using a recycled bottle) I put 16 ounces of straight distilled vinegar with .5 ML of Christmas Eve Cookies FO. Most recipes call for EOs, but I had made 3 batches of soaps with the FO and was in the mood to keep working with it. Lol. I mean, how nice would it be to snuggle into a freshly laundered hoodie that smells like cookies?!

After I mixed the two liquids I dug out my old Downy ball from the dark recesses of the laundry room cabinets since I didn’t want to try to catch the proper cycle to add the mixture directly. (Yeah, I’m lazy, but I’m doing the laundry, so that’s enough work all ready in my opinion. *grin*) I subbed the vinegar in the exact same portions as I used to put in the Downy ball.

I admit that I was skeptical that the laundry would turn out scent free. From all of my use of vinegar around the house I knew that it would get my laundry extra clean, but I can always smell the traces of vinegar. I’m tickled to report that even straight out of the washer the clean laundry didn’t have the slightest hint of vinegar. Now that’s impressive considering my odd superhero sense of smell. *grin* Unfortunately I couldn’t smell the slightest bit of cookies though, so I’ll have to keep experimenting with measurements.

The best part is how soft the laundry was once it was dry!! Admittedly I also had an unscented dryer sheet in there, although I usually use one unscented and one scented sheet. (When you have a flare of a pain condition even scratchy clothing can be incredibly painful, so it becomes habit to go as soft as possible.) I like that I don’t have to use a scented dryer sheet now, especially since it’s one of my triggers for random rashes when I’m sick, plus that’s one less sheet of softener to clog my lint trap. (In case you never heard about it, wash your lint trap screen with soap periodically because the softeners coat the screen and make it less effective. Let dry and when you put it back in it will catch a lot more lint for you.)

I decided to do the ultimate test for my laundry. I used the vinegar in a gentle cycle on my jersey sheets. Gentle cycle isn’t well known for playing well with detergents in our house. Lol. Hopefully it’s that way for others and not just that we have a possessed washing machine that hates me, but that’s a disturbing thought I’ll dwell on later. *grin* After sleeping in the remade bed I can honestly say that this is the softest the sheets have been in a long time. I love jersey sheets because of their softness, but even with the dryer sheets they don’t usually come out as soft as when they joined our household.

A key thing to note is no matter what tips you read about adding the vinegar to the bleach compartment, so you can skip catching the proper cycle, please don’t do it. Vinegar and bleach create toxic fumes when combined. Commercial companies have incredibly smart people wearing lots of protective gear to handle that chemical reaction, so let’s leave that to them. The great part about this is that you may decide you can retire that jug of bleach if you like how to vinegar works on your laundry. I’m delighted to do that since I can’t handle the smell and I know that the vinegar sanitized everything just as well as that bleach would have. Another great feature is that you can now customize the scent to what works well for your household. You may just have to experiment and adjust, but what a great problem to have! To top it off, you don’t have to try and get rid of smells anymore!

Bring on the Sweets

I’ve been sniffing my new FOs for a couple of days now and almost put off this post, because I’m still on the fence on a few of them. I’m seriously tickled with the add ins I got for the baskets, at least.

Almost every one of the new FOs I decided to try out smell either like Vanilla/Buttercream or Butterscotch, it seems. *laugh* That’s why I keep sniffing them. I keep thinking that the next sniff I might suddenly smell a different set of notes that would make a few of these make sense, but no luck yet. *grin* First off, Marshmallow does not smell anything like I expected. Granted, I’m totally fine with the packaged little pillows of sugar, but in my experience the fresh ones are just a little more flavorful with stronger vanilla, but the FO is so different. There’s a strong buttercream note, but also butterscotch. Huh?! I was looking forward to making some interesting blends if it smelled like I had expected. The butterscotch is really throwing me off. *grin* Christmas Eve Cookies was a little different too, with the expected buttercream as the dominant note, but the spices were a lot mellowed than the description implied. It smells like a rich, crumbly, buttery, shortbread cookie at least. Hot Buttered Rum smells good, although it’s straight up butterscotch to me. *laugh* I think it’ll be nice as a massage oil or bath salt, but I don’t think I’ll be going with it for lotion. I am really happy with Madagascar Black Pepper, which has no surprises. It’s straight up peppery, which I think will give some umph to florals, the unisex cologne scents, and I want to try blending it with my old Jacob’s blend. Mmm mmm mmm.

I am so happy with the two bath sponges/poufs! The first is such a pretty color and the second is so different with strings at each end. Perfect for a man’s basket, I think.

First the spa pouf

20131018-020927.jpg

Next is the more unique one

20131018-021016.jpg

To add to the spa basket I also got some of those cool eye masks (not descriptive, they’re literally cool because you refrigerate them, I mean *grin*). Usually I get blue or teal ones, but I found these clear ones on surplus, so that’ll help cut a few dollars down to then spend on lotions and whatnot for people who are building their own baskets.

20131018-021258.jpg

Finally, the item I’m most excited about. Ground luffa (loofah)! (Yeah, it’s kind of pathetic to get so excited over this, but I guess that’s what makes this the ramblings of someone mad, right? *sassy grin*) I admit that I thought it would seem more dense, but I think it’s going to be a perfect change to the Men’s Scrub still. Being lighter might work out a lot better in the shower than the heavy seeds, too, which will be a huge win. *crossing fingers* I really like the look of it for some reason.

20131018-021633.jpg

I also got a little wild. I qualified for a free soap color sample and went waaaay out of my normal range. I haven’t decided what mold that would utilize this color well, but I’m really excited to give it a whirl. Apparently there’s still a glitter loving little girl underneath the sarcasm and slight morbid [no snickering you in the back!] tendencies. *grin* Check out this shimmery gold.

20131018-021955.jpg

I wish it photographed a little better, but at least the company picture did a much better job at capturing the sparkle than I could do. *laugh* Reviewing my attempts kept bringing to mind a few unfortunate viewings inside of diapers, so I was really glad that I could grab the pics from the wholesaler’s site. *grin*

I am crossing my fingers that I’ll have a very productive day in my near future and get to experiment a bit. There is some coconut oil and even primrose oil that I am itching to test. And apparently I’m unknowingly in the mood to test a few variations of vanilla and butterscotch. *raising an eyebrow while trying not to laugh* “Fifty Shades of Vanilla” might just be my next blend. 🙂

Homemade Cleaner

I wanted to share a homemade cleaner recipe that I’ve altered from Pinterest.  A lot of people would like to go more natural lately and there are others, like me, that have some sensitivities that make commercial products a little dicey at times.  I’ve developed a chemical sensitivity to bleach and similar strong cleaners, so I had to look for some alternatives.  I found the following recipe by Frugal Foodie Mama named “Homemade Kitchen Lemon Cleaner” and I’ll discuss a few other options after the instructions/recipe.

“Ingredients

1 tsp baking soda

1 squirt of your favorite dishwashing liquid

1/2 cup distilled white vinegar

water

2-3 drops doTerra Lemon Essential Oil

16 Oz plastic or glass spray bottle (bottle can be larger than 16 oz)


Add the baking soda, dishwashing liquid, & vinegar to the spray bottle.  Without capping the bottle, give it a few swirls to mix.  **I would suggest mixing this in your sink.  There is a possibility of a foamy “volcano” forming because of the reaction of the baking soda with the vinegar and soap.  Never shake the bottle to mix to keep the chances of this happening down. 

Fill the bottle with lukewarm water to the 14 oz line on your bottle.  Add the 2-3 drops of lemon essential oil, and swirl it around a few more times to mix well.”


This is a pretty easy recipe to recreate and I found an easy way to deal with that chemical reaction.  When it starts to foam just swirl a long straw in the solution and it won’t foam over.  It also helps if you add the water slowly and pause every so often.  Now, although it seems like it would mix better if you added the EO before the water the reason that you do it afterward is that you might lose the valuable EO if the solution does foam over, so make sure to follow the instructions. 


I used my favorite brand of EO, Crafter’s Choice, and it doesn’t change the recipe one bit, so don’t worry about scouring the internet for that brand.  I admit that I added a ML of lemon EO because one, I don’t have an orifice reducer on my bottle, two, I prefer to be able to do exact measurements with a pipette, and three, it didn’t have nearly enough scent for my taste.  Even with all of that I wanted more kick, so I added .50 ML of Meyer Lemon FO (fragrance oil) to the solution and stirred with my long straw.  (Nice thing is that this is a cleaning solution, so a quick rinse and the straw is all clean.  Lol.)  Now, my second bottle isn’t so close to the original recipe.  *grin*  I can’t let my other scents sit quietly when they can freshen my house up for me.  I decided to play with other antibacterial EOs (essential oils) that play nicely with my favorite FOs.  I mixed a bit of Peppermint EO, Eucalyptus EO, Wintergreen EO, and then a bit of Santa’s Tree Farm FO in place of the lemons.  It’s a bit more uplifting with a lot more aromatherapy benefits, plus they cover the smell of the vinegar a bit better for my super sniffer.  Just like in cooking a product recipe is just a starting point.


To save you some time having to research EOs the following ones are thought to have antibacterial/antiseptic properties: Oregano, Cinnamon, Rosemary, Clove, Tea Tree, Eucalyptus, Orange, and Lemon.  Of course scientists can never agree, so some others believe that Peppermint, Wintergreen, Juniper, Black Pepper, Geranium, Lavender, Pine, Camphor, Cardamom, Cedarwood, Citronella, Clary Sage, Frankincense (although I warn you this one is super expensive!), Rose, and Ylang Ylang.  There are tons of options, tons of disagreement, and a wide range of costs.  The great thing is if you don’t want to get too in depth with homemade natural cleaners and aromatherapy, then you can find some of the basics even at Hobby Lobby, like Eucalyptus and Peppermint.  Now, please note that these are all EOs, not FOs, since the essentials are the natural workers.  Never ever, despite temptation, use an EO straight out of the bottle on skin, please!  They need what is called a carrier, since they’re so concentrated and can be very harmful and toxic when concentrated. 


We’ve had a bit of a bug here after a cute Boy Scouts Honors event, so that’s why I picked the second blend that I made.  Peppermint and Eucalyptus are great for clearing the sinuses (think the gooey Vicks Rub that your mom used to rub into your chest) while also fighting the good fight against the bug.  I figure that I’m smelling it as I clean anyway, so it needs to do some double duty for me.  *grin*  Wintergreen has health benefits too, but it also reminds me of my grandpa’s wintergreen chew.  I remember sitting on his lap in his rocking chair and having the scent of wintergreen hug me as snug as his arms.  I usually dislike anything tobacco, but it’s one of the few childhood memories that I always have even when my illness fogs my mind and I can’t remember even my address.  The pine and balsam FO blend in Santa’s Tree Farm leaves that clean and fresh scent trace.  We don’t pick Pine-Sol for the color, after all.  *teasing wink*


Now, this isn’t the super cleanser that works miracles, but it does a great job as a regular cleaner.  I used it to clean my stove surface (it wasn’t a heavy duty job, but worked great on the little bit that had gotten away while making pizza), all of my kitchen counters (even got some Kool-Aid out of the surface that my husband had missed, which impressed me), door knobs, and it worked really well against pet slobber.  *cracking up*  The big test for me was my big mirror and the front door, since I seldom can do them because I usually can’t be around commercial window cleaner.  Plus, Bo, my dog, has super snot and slobber that sticks as well as those stupid sticky hands I had as a kid that I threw onto walls and stuff.  *shudder*  It’s weird to think I loved those things and the thought of it now grosses me out so much I think I’m developing a wrinkle from scrunching my nose right now.  Lol.  Anyway…with just a little elbow grease (and I mean little, since my muscle weakness keeps me from having much umph, so for a “normal”, it should work doubly well for you) I was able to remove all traces of slobber, snot, bird droppings (I don’t know how that bird aimed at the storm door, but kudos, although it needs a little less fiber I think), dirt, a light skin of woodstove smoke (*embarrassed look* yeah, I missed that whole Spring Cleaning thing and am just now cleaning Winter off the inside of the storm door…doh!), and even a smooshed mosquito.  It didn’t remove the tiny bit of sap that has been on the door for the ten years we’ve lived here (I don’t know what the previous owners were into since there’s sap on the door, glow in the dark nail polish spots on the carpet, and weird packaged mac & cheese-like bright orange-yellow stains on the linoleum, but whatever), however this is the cleanest the storm door has EVER been, even when I was healthier and able to clean more.  This definitely passed the test for me.  The vinegar is seriously amazing (kills germs, bacteria, and mold!), so I’m tickled that I found this simple blend.  *On a side note, I’ve been bragging on vinegar for a few years now, and I’m not sure if I mentioned it before, but even if I did, it’s worth mentioning again.  Vinegar is awesome at sterilizing your cutting board.  You don’t think about it, but those tiny cuts in the board love to hold nasties that you can’t see and think you got out when you washed the board.  After you scrub and rinse your board,  pour some plain white vinegar over the board, give a light rub (preferably not with a rag or sponge that you just contaminated, so go for a second one), and rinse.  The vinegar will keep working and help keep those nasties from contaminating your next meal or even cabinet.  You’ll notice that it’ll smell fresher too, since the stinky bacteria is dead.  You can go ahead and do a happy dance once you’ve tried this.  It rocks that much, so I understand. 


I hope you give this a whirl and that you have as much success as me.  If you have any questions or whatnot, please feel free to comment.  If you look me up on Pinterest the original pin should be under “Useful tips” if I remember right.  Happy pampering! 🙂

A Marshmallow World

I thought a little Dean would start this post off right. I know it’s a bit early to have Christmas on the brain, but the couple of months leading to the holidays are a big deal for crafters.

As I always do when I have insomnia I start mapping out ideas about products or researching things, and this week has been no different. I decided that this year I want a different holiday sugar scrub, so I figured it was about time to put in a supply order. *happy sigh* If you’ve been reading my posts, then you know I have a scent hoarding issue and can’t resist getting at least one new scent to try whenever I order supplies. My bank account cries, but I get all giddy, so the universe evens out. *grin*

Now here’s the tie in to the title. I am finally getting my hands on the Marshmallow FO that I’ve been wanting ever since I read about it. Most people love smelling something sweet and comforting, and marshmallows are great year round, so it’s not really too seasonal of a scent. S’mores, cherry chiffon, and hot cocoa…Marshmallow dominant foods really should be their own food group. *a goofy smile takes over as I daydream about the sugary pillows of delight* Oh yeah, I’m supposed to be writing something halfway intelligent about bath and body products. (You’re welcome to do Homer’s signature “doh” there. I’ll allow it this time. Maybe not next time, so I advise that you take advantage. *laugh*)

To add some depth to a few scents I splurged on the Madagascar Black Pepper FO, too. In regular situations pepper makes me sneeze and whatnot, but when it’s a lower note in a complex scent blend, boy howdy! Suddenly my eyebrow lifts, I get a little sassy smile, and see Gerard Butler smiling at me in my mind’s eye. (Got me why, but I just know he has a complex and masculine scent to go with that smile, those abs, and that bad boy vibe. Pepper and a hint of leather. I just can’t decide if he’s more of a crisp Black Tie FO or the woodsy notes of Twilight Woods for the dominant notes. I could totally suffer through either. You know, do my part and all. I’m a giving person like that.) Anywho! I’m excited to get to experiment with that and hopefully add an interesting note to some scents that haven’t really done the elusive “it” for me yet.

While trolling new seasonal scents I landed on Christmas Cookies and managed to justify ordering it since it was fifty cents off. Lol. Yeah, I can justify almost anything if I really want it. *grin* It’s supposed to have dominant notes of buttery shortbread with a bit of vanilla and spice. I’m really hoping that it smells as yummy as it looks, because this is what I hope to use for a “sweet treats” sugar scrub instead of gingersnaps.

To finish my splurging I added Hot Buttered Rum to the mix. Several users commented that it smelled like butterscotch, so I think it’ll make an interesting FO to play with. If I smell more of a rum note then it might just have to mingle with the Egg Nog FO I got on sale a little bit back. A spiked egg nog bubble bath might be pretty sigh inducing come holiday time. Well, especially if I have a glass of the real deal in hand while I’m relaxing.

I also got a few items to amp up the pampering power (suddenly I heard “puppy power” in my head when writing that. Ah, Scrappy, I’ve missed you.). I’m getting tired of rinsing poppy and flax seeds out of the bath tub from Larry using the Men’s Scrub every day, so I decided to experiment with powdered luffa in the scrub. The improved scrub has worked great for him and still gets most of the gunk from Goodyear off of him, but for the sake of less nagging about rinsing the bath out after a shower, I figure it’s worth experimenting with a replacement for the seeds. The luffa soaps never hold up long for him, but he likes them, so I thought maybe a miracle can happen. ‘Tis the season coming up and all that jazz. If it works, then he’s getting a few buckets of it in his Christmas stocking. *grin* If a product can hold up to his intense use without nagging, then it’s a winner. I also ordered two kinds of body puffs; one is regular, but the other is a long and less frilly one, so I think that might be good in a men’s Christmas basket. *crossing my fingers* I added some spa eye masks since I haven’t done a play on the original spa baskets yet, and then a few samples of new colors.

I’m hoping the new items will strike me with some inspiration and that I’ll be doing a little better by the time I receive them, so I can make even half of what is on the new master list. At least I’ll have some sweetness for my oil burners while I pop my earbuds in and secretly listen to Dean and Bing singing about the wonders of the holidays. If only that dreamy snow didn’t make huge drifts in the driveway and make the path to the wood pile seem a mile long. At least a girl can dream when she’s listening to the happy crooners. I hope you get to enjoy “A Marshmallow World” in your dreams tonight.