RSS Feed

Crockpot Peanut Clusters

Crockpot Peanut Clusters

I actually found the original recipe on Pinterest (I may have an addiction *laugh*), and the original printable recipe is here, but there weren’t any pictures of the process and there were a couple of hard learned tips that will make your experience much better, so I thought I’d share the recipe. I am not claiming any credit, it belongs to the original blogger. I simply want to share an easy recipe that is truly easy when you don’t make the mistakes I did. *grin*

First off, you need a 5 quart crockpot, a sturdy spoon or spatula, parchment paper, cookie sheets, a scoop, and a little over two hours.

For ingredients you will need 34.5 oz of honey roasted dry roasted peanuts (**My note: Larry said that he doesn’t like the flavor of the honey roasted in the peanut clusters, so I’ll definitely be using plain dry roasted from now on), 32 ounces of vanilla flavored almond bark (in the baking supply aisle and contrary to the name doesn’t have any nuts), 12 ounces semisweet chocolate chips, and 4 ounces Baker’s German Chocolate bar (found near the almond bark and the bar itself is the full 4 ounces).

Now, I’m going to admit that this is where things started going wrong. We were trying to make the peanut clusters and another candy at the same time, and ditched the other one because so much was going wrong, but found that there was a snafu with this one too. It was the first time I had bought or used almond bark, so silly me didn’t pay attention to the size and notice that the recipe would need part of a second package, so instead I compensated for the missing eight ounces of almond bark by adding that much more of semisweet chips. I liked the results, so I’m not sure that I’ll do it the correct way the next time I make this, but I want to be honest about what went on in case you have the same problem or want to go that way.

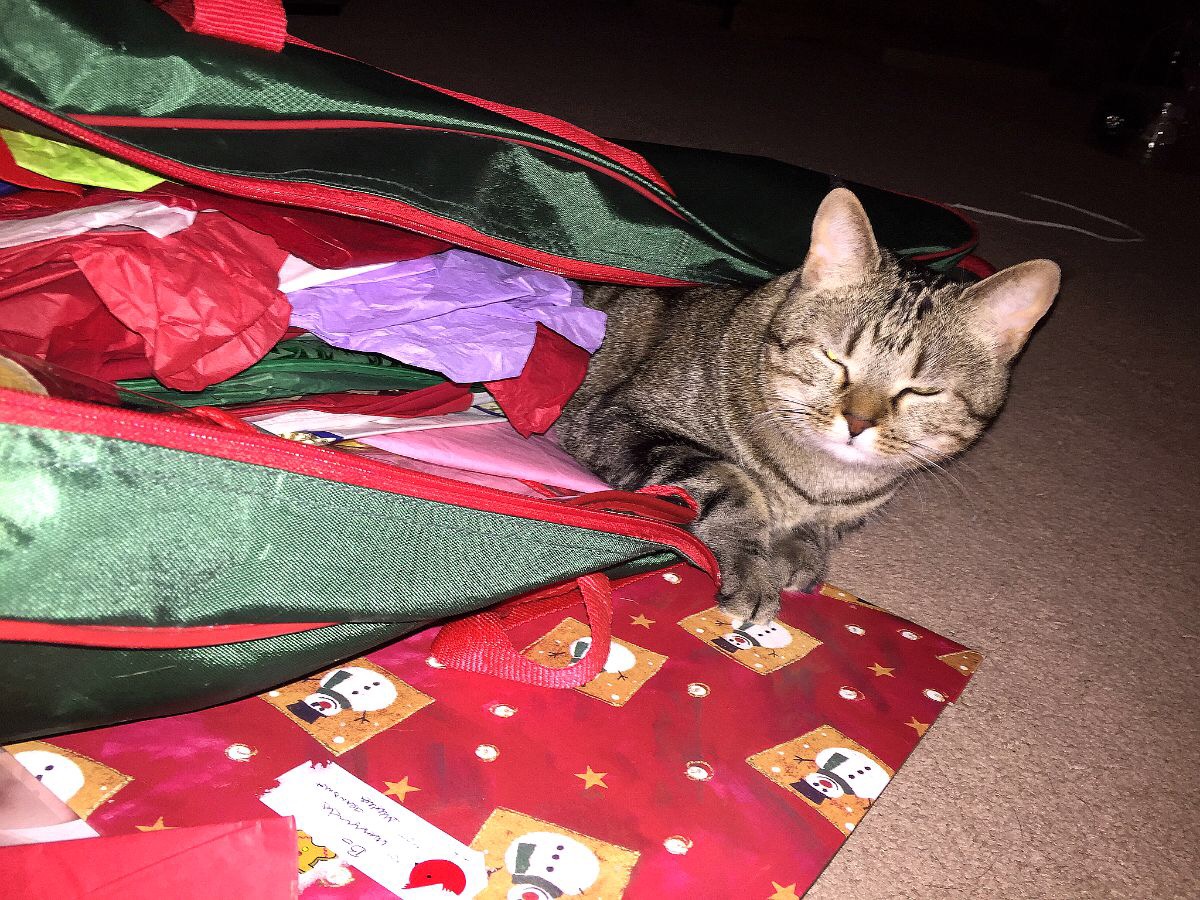
Pour the peanuts into the crockpot – it will seem like there’s an insane amount of peanuts in there, but I assure you, you’re doing it right. Next is one key tip that the original didn’t mention. Before layering the almond bark over the peanuts cut that bar up!! I can vouch that the blob of almond bark may soften, but won’t fully melt in the allotted time, so cut it on those scored lines please. You will have a very hard clump that you’ll have to pull out of the pot, chop up, and put back in, all while trying not to make a huge mess, which is nearly impossible, if you don’t chop it at the beginning. *sigh* Anyway, lay the bits of almond bark over your peanuts, and then scatter the chocolate chips over that. Next is the Baker’s bar, which will melt just fine without cutting (it isn’t nearly as bulky as that bark *grin*). Put the lid on it, turn the crockpot to low, and walk away for one whole hour. Don’t stir, don’t lift the lid to peek, nada. Dance around that Christmas tree, pull the cat out of the said Christmas tree, or fall into the black hole of Facebook until your alarm goes off. Whatever floats your boat, but hands off!

Now you can stir and look how yummy it all ready looks!

/home/wpcom/public_html/wp-content/blogs.dir/622/26625504/files/2014/12/img_2321.jpg

Put the lid back on, set the alarm for fifteen minutes, and stir the mixture every fifteen minutes for an hour. It won’t be the prettiest girl at the prom, but it’ll be the one with all of the personality, so don’t worry if the sides look a bit icky like mine.

After the hour of stirring intervals it’s time to scoop. The original recipe just calls for laying out parchment paper, but I don’t have a very big kitchen with tons of cabinet space, so we lined cookie sheets and swapped them out. I tried one batch without a cookie sheet and it was pure misery with some of the candies oozing together into big blobs when I tried to move them a little, so I strongly recommend cookie sheets. The flat AirBake sheets worked best for us. Now, I have no idea what makes parchment better than wax paper for these, but I didn’t want to risk trouble by experimenting to figure it out. Parchment paper it is. *grin* Don’t forget to turn off the crock pot! If it’s really cool in your kitchen you can keep it at warm, but you’ll have a little trouble with the mixture staying runny once you get to the bottom. That’s better than a solid mass though, so I’d definitely do it if I felt it was necessary. You just don’t want to keep it on low the whole time you’re scooping.

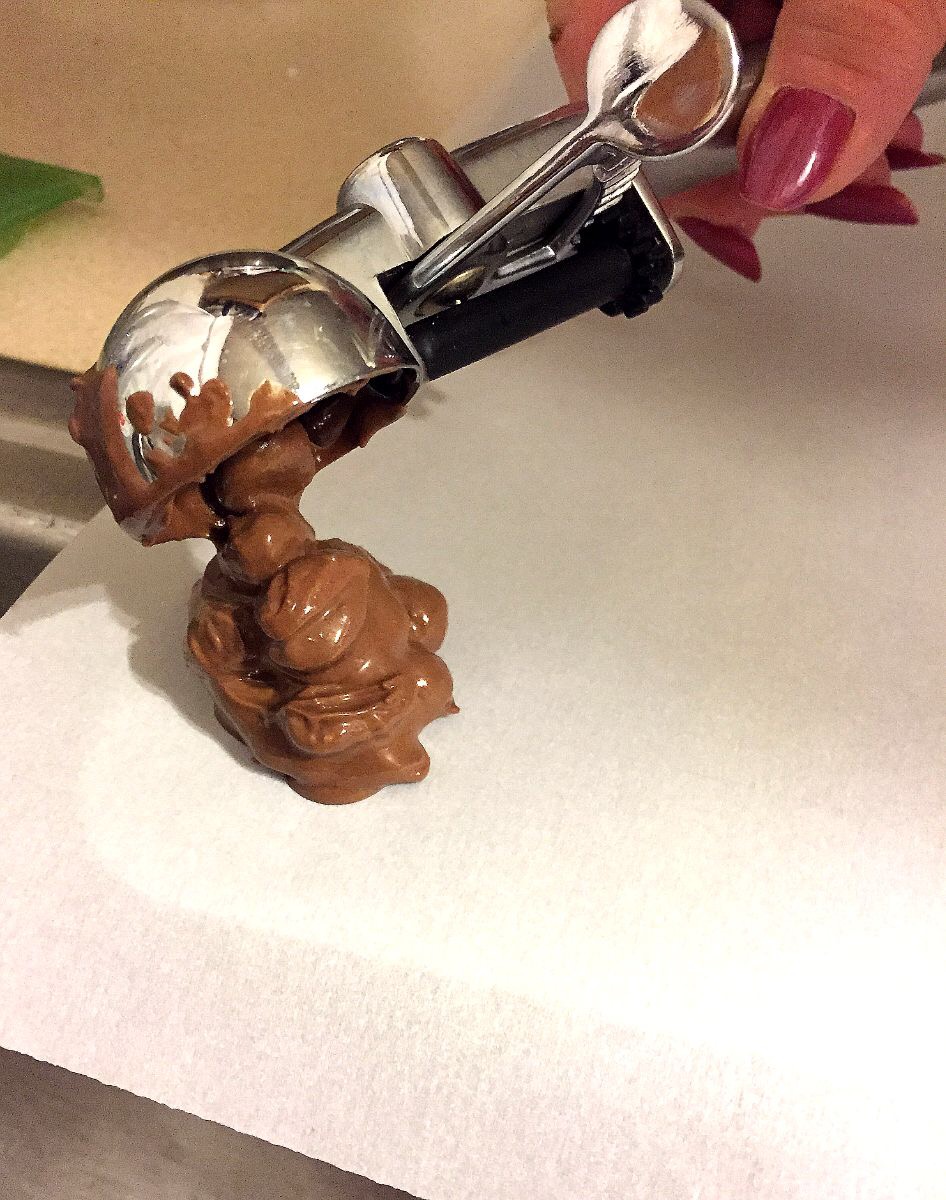
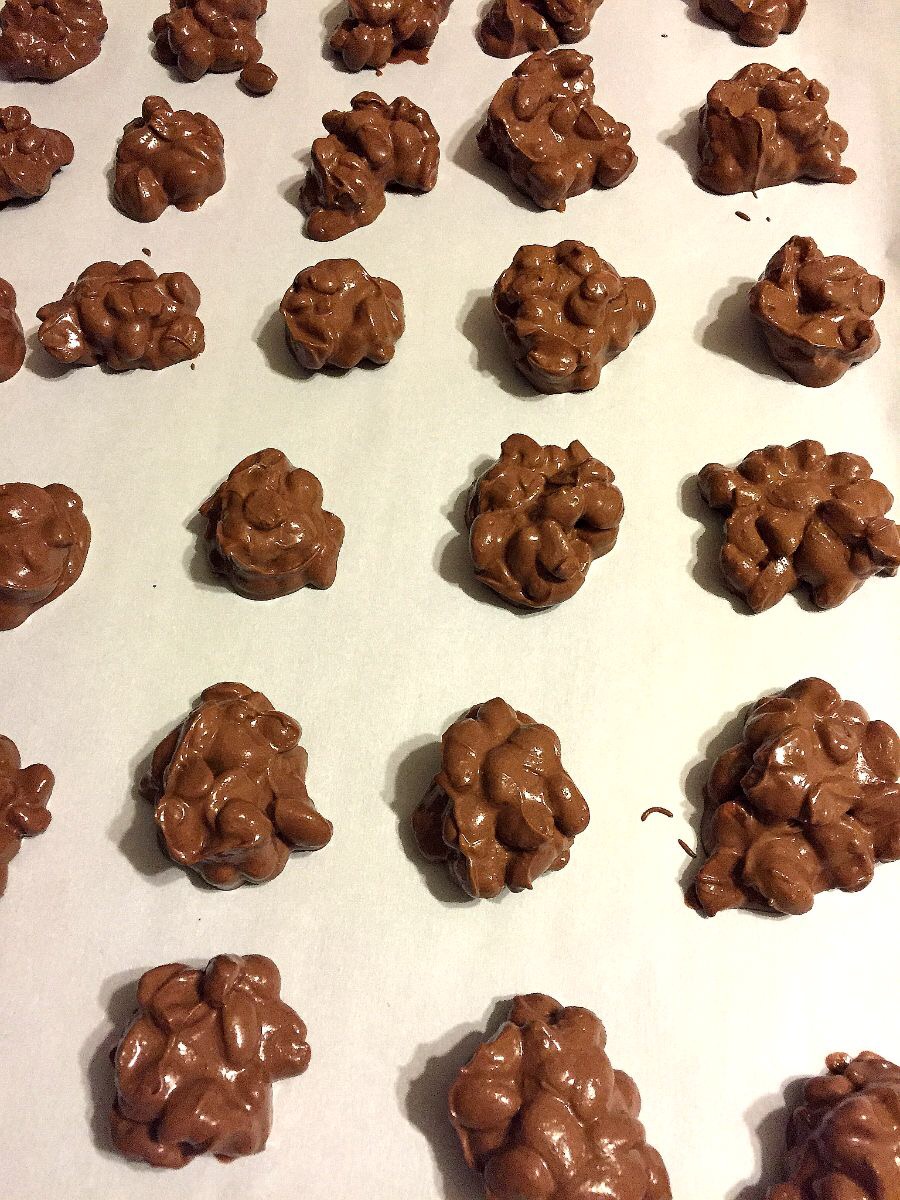
We used a tiny cookie scoop for scooping the peanut clusters. While the mixture was fresh and hot, it was more runny and didn’t need the little sweeper arm. As the mixture set up a little more the little arm was quite useful. Make sure to drop the scoops apart from one another.

/home/wpcom/public_html/wp-content/blogs.dir/622/26625504/files/2014/12/img_2320.jpg

/home/wpcom/public_html/wp-content/blogs.dir/622/26625504/files/2014/12/img_2322.jpg

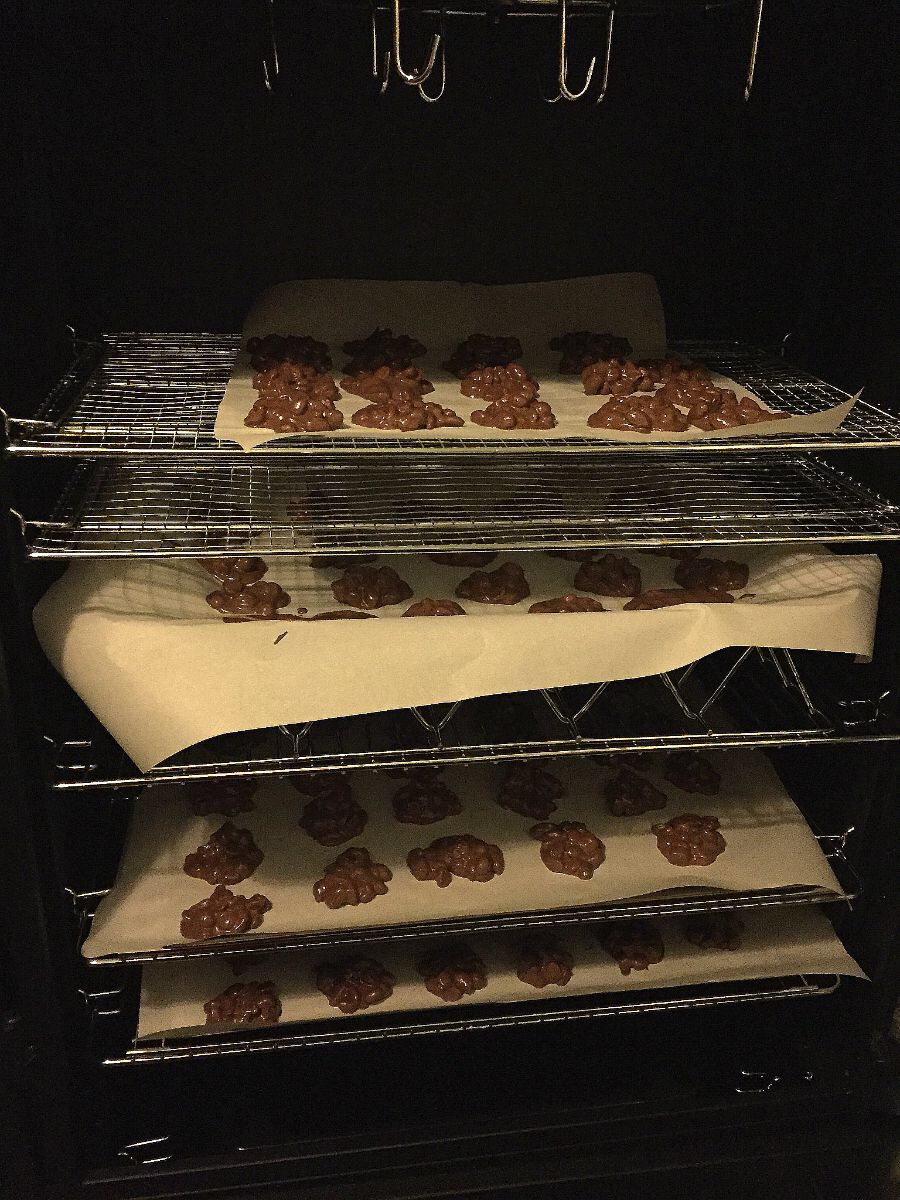
Once we had scooped it all (and licked the spoons *grin*) I noticed that the chocolate wasn’t setting up and realized that my house was too warm for them to set up. I must have accidentally grabbed a log of hedge when I loaded the woodstove, so it was nearly as hot as the face of the sun, while it was 30 degrees outside. *laugh* Some creative thinking resulted with utilizing our standing smoker as a refrigerator. Let my amusing substitution show you that if your refrigerator is full of Christmas meal prep, you just need to think outside of the box. Literally. *smirk*

/home/wpcom/public_html/wp-content/blogs.dir/622/26625504/files/2014/12/img_2323.jpg

I left them to cool for about four hours and then brought them in.

/home/wpcom/public_html/wp-content/blogs.dir/622/26625504/files/2014/12/img_2324.jpg
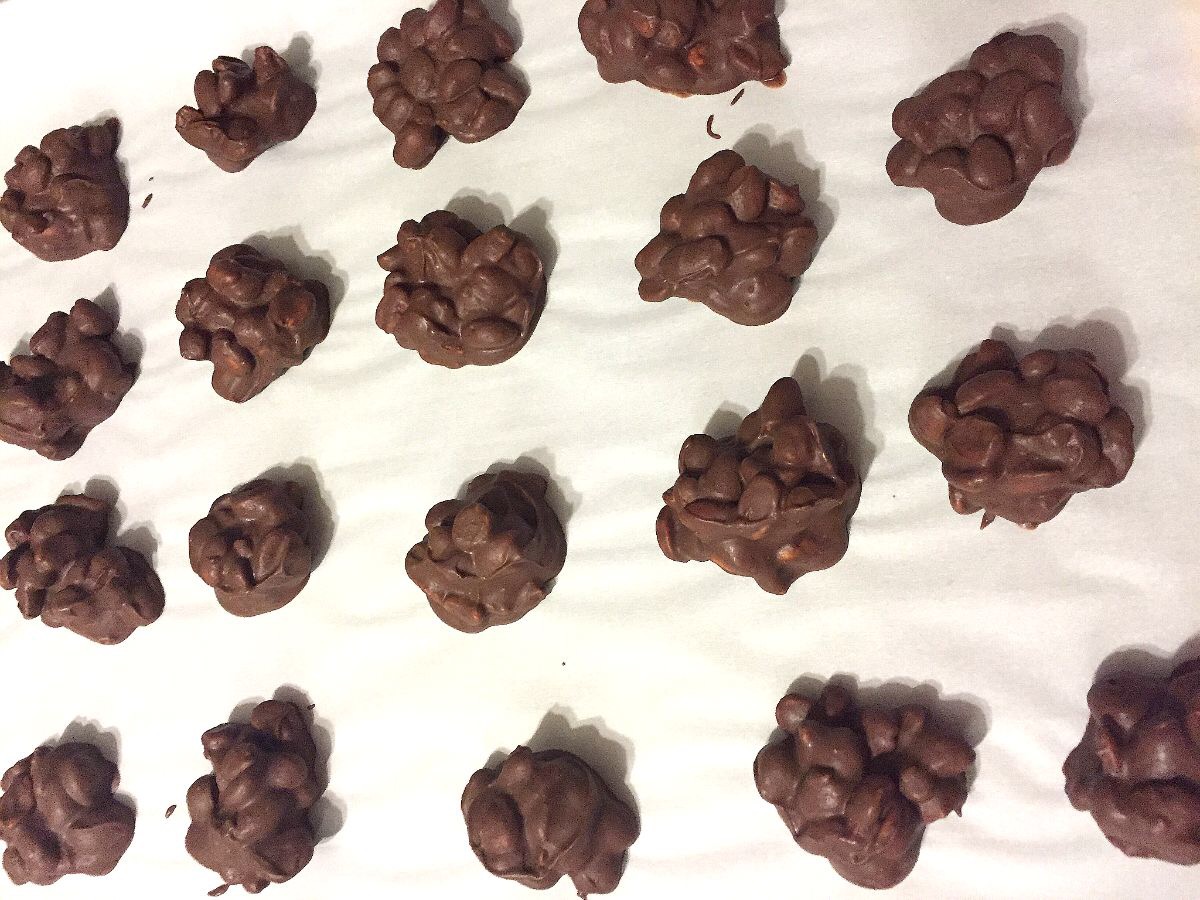
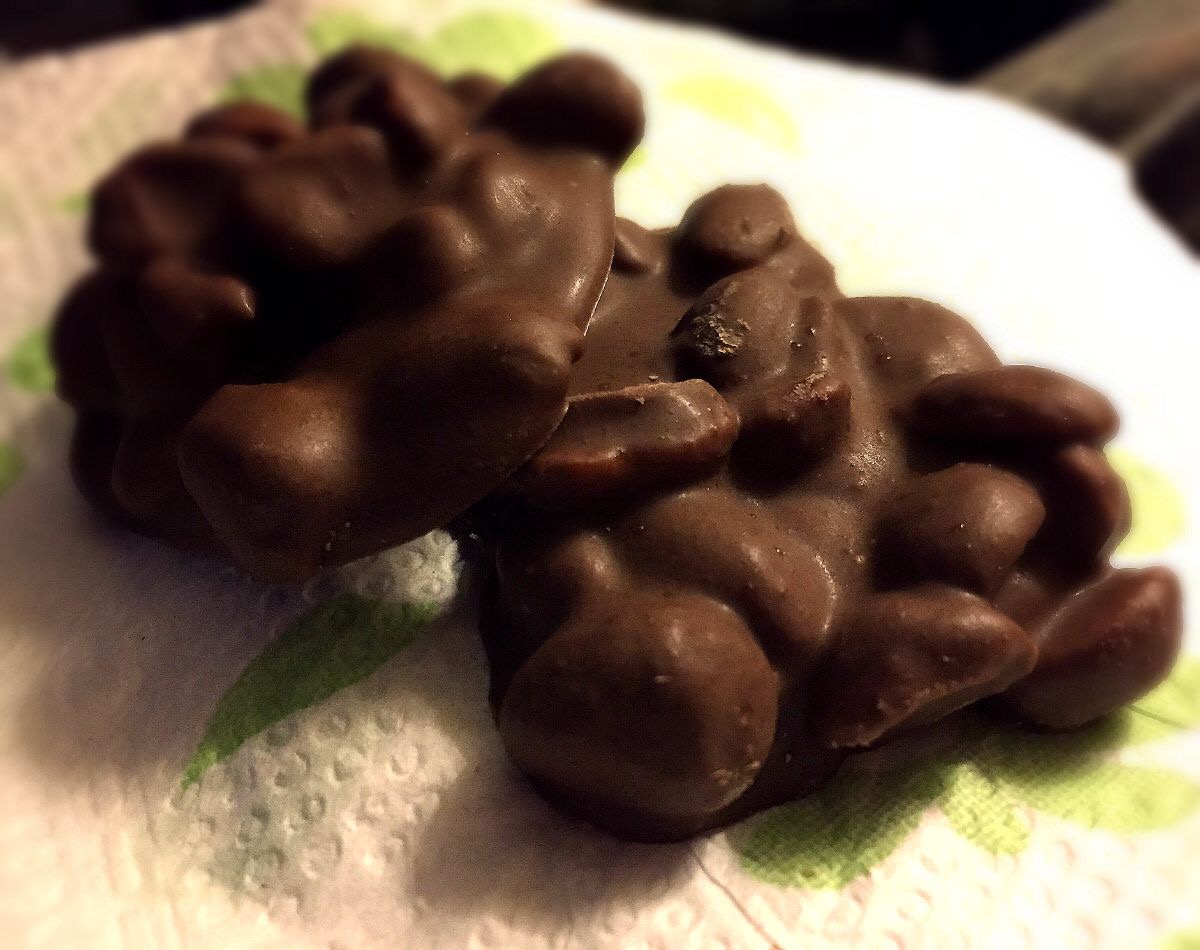
They were good and hard, so I was able to pop them into some zipper bags, and fit those bags into the remaining gaps in the refrigerator then. Even with samples left out (or happily melting in our bellies) I filled an entire gallon bag and a quart bag! Oh, by the way, don’t forget to let these chocolates sit out at room temperature for a little bit before serving, since you don’t want anyone to break a tooth on cold peanuts. Those suckers are hard when they’re cold!

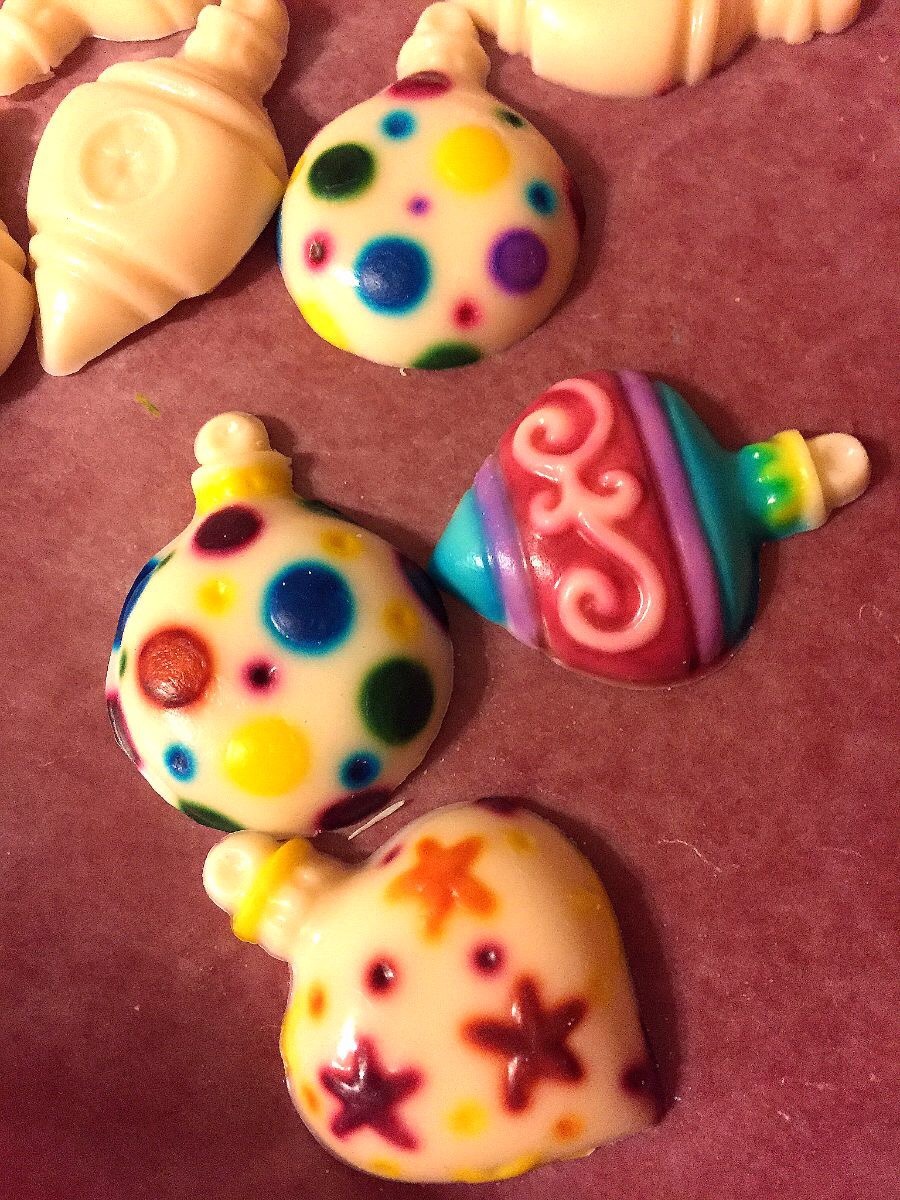
Hopefully this little feature for Serve It Sunday will help if you’re looking for one more item to round out your Christmas dishes. These would also make a great gift, since it’d be easy to put the clusters into decorative mini muffin or candy liners, and then into a festive cellophane bag. The recipe is easy enough that you could cook dinner while it’s melting, too. Just don’t try to make a complicated dessert while making these for the first time. *laugh* They are so worth giving a shot and the original blogger even added decorative candies, so there is a lot of room to put your personal touch to these.

/home/wpcom/public_html/wp-content/blogs.dir/622/26625504/files/2014/12/img_2327.jpg
Enjoy!

Homemade Sloppy Joes

Homemade Sloppy Joes

Hi there! Did you miss me? I figured y’all could use a little break from my rambling after the whole daily blogging challenge. I couldn’t resist sharing a recipe though, so for Serve It Sunday I’m sharing my homemade sloppy joes. I adapted it from a recipe for Sloppy Joe Casserole that I found on Pinterest, original recipe is here, but after having the original we decided to tailor it more toward our taste. The original recipe was good (although I admittedly omitted two ingredients because I had to), but it had a bread topping that neither of us cared for that soaked up almost all of the sloppy joe mixture. After some experimentation this version was born.

I’ve mentioned before that I have some food sensitivities and sadly canned sloppy joe mixture became off limits due to the spices and additives. I’d honestly never seen homemade sloppy joes before, so when I found out it was this easy AND especially that with a little adjustment it doesn’t make me sick, I was tickled pink. The recipe in an easy to copy format will be at the bottom.

First, on the stovetop you brown some ground beef (I vary the amount of meat depending on the mood honestly lol) over about a medium high heat. I use the 92% lean ground beef and it makes for the least greasy sloppy joes I’ve ever seen.
IMG_2237.JPG

While that’s cooking I found that if I mix the spices into a paste first and then coat the cooked meat with that before adding the tomato products, the flavors distribute much better, so in a small bowl mix brown sugar, Worcestershire Sauce, ground mustard (it’s powdered, found in the spice aisle), and garlic salt. If you gather the cooked meat into a small circle and pour the spice mixture over it, it’s easier to coat the meat. Stir well to coat the meat (second picture).

IMG_2236.JPG

IMG_2238.JPG

Add tomato sauce and ketchup (yep, two tomato based ingredients) to the coated meat, then stir it in and reduce heat to medium. (Don’t put a lid on it unless you like runny sloppy joes.)

IMG_2239.JPG

We’re are some cheese loving folks, so in goes a generous helping of shredded cheddar cheese.

IMG_2240.JPG
After awhile the cheese mixes in and it gets all ooey gooey yummy. It may not look it, but this sloppy joe mixture is so thick that it doesn’t drip through the slats in my wood spoon once the mixture is heated well. *grin* It’s not quite “stand a fork in it” chili thick, but it’s pretty dang hearty.

IMG_2241.JPG

Use whatever bread vessel you prefer or have on hand (this go around I had leftover sub rolls from French Dips).

IMG_2235.JPG
It was so yummy and best of all it’s not overly acidic, so it shouldn’t bother sensitive stomachs! It comes together in about thirty minutes all in one pot, with minimal utensils to wash. Busy weeknight cooks can use the extra time to do a happy dance or kick their feet up. *grin*

Homemade Sloppy Joes (adapted)

1.5 lbs lean ground beef
2 tablespoons brown sugar, packed
1 tablespoon Worcestershire Sauce
2 teaspoons dry ground mustard
1 teaspoon garlic salt
1 (15 oz) can tomato sauce (no salt added can)
3/4 cup ketchup
Optional: grated cheddar cheese, to taste
Preferred type of bread

1. On the stovetop over medium high heat brown ground beef in a large skillet.
2. While meat is cooking, mix the brown sugar, Worcestershire Sauce, mustard, and garlic salt into a paste.
3. Once the meat has cooked gather the meat in the center of the pan and pour the spice mixture over the meat. Stir to coat the meat well.
4. Add tomato sauce and ketchup to the mixture and reduce the heat to medium. Do not cover.
5. If desired, add a generous amount of shredded cheese to the mixture and stir it in.
6. Once the mixture is completely warm it is ready to be served on your preferred bread (I recommend a bun or roll, since regular bread may become soggy and fall apart.)

Note: This is a thick version. If you prefer more liquid, cover the skillet after the fourth step. This should keep a bit more of the moisture in.

I hope you enjoy! 🙂

“And I Helped”

My poor mailman delivered the first load of my Amazon lightning sales stuff, so I started wrapping presents tonight. Little Miss Abby got in trouble by smacking the scissors as I cut paper, ripping the wrapping paper itself as well, and decided to dig around in my tissue paper and ribbon organizer (and made a big ole mess of it too! Lol). She acted like queen bee for having “helped”, but she was quite a handful. I couldn’t be angry when I saw where she had settled. The flash made her squint, but she had the cutest, most proud of herself, face at the time and how cute is it that she climbed into the organizer?!

IMG_2095.JPG

She also got brave and finally smacked one of the catnip bubbles that Larry blew for the fur babies. She’s a holy terror most of the time, but little cute moments like these make it so worth while.

IMG_1997.JPG

By the way, the title is a line from a really old commercial for Shake ‘N Bake. The little girl looked a lot like my mom’s childhood pictures, so I used to say that line to tease her and get her all riled up. *grin* I couldn’t resist it when I thought of Abby helping.

Well, I’m going to go back to wrapping before the next wave arrives tomorrow, so I hope you have a wonderful Tuesday and don’t forget to look for one of those special moments to make all of the frustration worth while. 🙂

Cherry Chiffon

I thought for Serve It Sunday I’d share a super easy dessert dish just in case someone doesn’t have the recipe yet. It’s not only easy, but goes over incredibly well for gatherings and buffets. It’s really sweet, yet light and airy, with just a little tang from some pineapple. I’ll write out the regular recipe, then add my notes below it.

Cherry Chiffon
1 can (21 oz) cherry pie filling (in case you’ve never used this don’t drain)
1 can (14 oz) sweetened condensed milk
1 tub (8 oz) whipped topping, thawed
1/2 can (of a 15 oz can) chunk pineapple, drained
1 cup miniature marshmallows.

Stir ingredients together, chill and allow the dessert to set up overnight, and serve cold.

My notes: We love this dessert, but we’ve tweaked the recipe a little. First, we prefer to use crushed pineapple. It seems to incorporate a lot more thoroughly, so there aren’t just pockets of tanginess. Second, we prefer to make the chiffon creamier, so I actually use two tubs of cool whip. And last, everyone loves the marshmallows, so I add the whole bag of marshmallows. It makes the dessert a bit sweeter, but gives more umph to the texture, and people can just cut back on the portion size if it’s too sweet to them. In all of the years that I’ve made this I haven’t noticed a difference in brands of the sweetened condensed milk, but I have noticed that some brands of pie filling has a few pits in them, so watch it carefully as you dump it into the bowl. I usually empty the can into the bowl first, just so that I can double check, although Comstock brand has the least problems. The chilling is a huge part of making this dessert impressive. It gives the chiffon time to set up and get super fluffy instead of just creamy, so don’t get impatient and try to serve it quickly. I’m adding a picture of it, although it’s the picture that Eagle Brand posted of it, since they’re experienced with setting up food shots and I’m not. Mine didn’t look nearly as pretty. One thing to note though is that they didn’t let theirs set up, so it looks uber creamy instead of fluffy. Expect yours to look more like the inside of a meringue, all airy, especially if you indulge with my version.

IMG_2071.JPG

I hope you don’t mind my posting such a basic recipe, but it’s a fantastic one that is always requested when I go to gatherings, so I figured it’d be the perfect one to share. 🙂

Dorkfish Soap

Bill Engvall fans will get the title I used for this post. He has a skit about what he called a “dorkfish” and as soon as I unmolded my soaps that’s what popped into my mind. I knew when I decided that there was no way to duplicate that incredibly difficult color for the chocolate layer soaps and that I’d try to layer that pour instead of doing it the usual way that there was a good chance that things would go wrong. Especially since I’m so prone to problems anyway. Lol Well, the middle layer pour to bind the layers of slices went so wonky. The filling layer in two of them seeped down in areas and looks so weird, while one just plain fell apart from the filling layer. *laugh* One of those odd layered soaps looks like it has a major overbite, which is what made Dorkfish pop into my mind and I can’t quit laughing when I see the soap.

IMG_2064.JPG
The “dorkfish” soap is the one in the forefront of the next picture.

IMG_2065.JPG
Although I’m frustrated and disappointed by these soaps, especially since I’d hoped to feature them for Cyber Monday, I’m kind of excited about redoing them. I’m going to venture off the original concept and do a two layer cake slice soap. I’m going to cut these up, reheat them, and then dye them a bit darker if possible. The next layer I’ll pour right on top like I would normally and do it in as bright of a green as I can get it, scented with peppermint, so hopefully it’ll smell as yummy as the revamped mint cocoa lotion. I think the two toned look might be pretty and stand out a lot more with the contrasting colors. I’m just not sure how to top off the soap; I had planned on doing a vanilla soap frosting piped on top of the chocolate slices, but I don’t think that would look quite right. Or maybe it’ll give a cool Andes Mint-esque look. *shrug* I’m not sure. I’m just having some trouble picturing the direction for the top, so if anyone has ideas about what might be cool, please don’t hesitate to share them with me! *grin* In the meantime, I hope you’re having a fun weekend! 🙂

Following Up on the Ornament Soaps

Between decorating for Christmas, cyber shopping (well, more like stalking Amazon’s lightning deals lol), resting my feet, and working on the layered chocolate cake slice soaps, I haven’t had much time to be creative blog wise. I thought I’d instead show you how the ornament soaps are doing. I didn’t use any additives when I was hand painting the soaps, so there’s a little bleeding and fading going on, and I’m so thrilled with the changes.

IMG_2056.JPG

I seriously love how soft and delicate they look now! Even the bright one that I didn’t originally like is headed toward being a sellable item in my book. *happy dance*

I hope you’ve had a wonderful Friday and Saturday morning! If you’re heading out shopping I read that the crowds are massively less than usual due to all of the Thanksgiving Day shopping, so hopefully that means you’ll get to enjoy yourself! My UPS man is going to be cursing me on the 1st and 2nd since I completed almost all of my shopping online. *laugh* I’ll have to look on Pinterest for some ideas on a nice little gift for him this Christmas, since the poor guy has to keep coming here. I’m off to try to sleep. 🙂

Quick and Amusing

Since I know people are busy right now I wanted to just post two amusing pictures in honor of Thanksgiving and Black Friday. If you’re going shopping (or have been), then good luck with the sales, be kind, and be safe! 🙂

IMG_2016.JPG

IMG_2017.JPG

Happy Thanksgiving

Since it’s technically Thursday in most of the states I figured I’d start off wishing you a very Happy Thanksgiving, if you’re celebrating it. I’m alternating between trying to stop hurting and getting things ready, so I thought I’d just share some Thanksgiving themed funnies that I’ve been saving. I hope that everyone has a day of happiness, peace, yummy food, and elastic waistbands. 🙂

IMG_1998.JPG

IMG_2007.JPG

IMG_1999.JPG

IMG_2008.JPG

Painting Ornaments

Tonight I’ve been experimenting with painting ornament soaps. It’s been a couple of years since I did painted soaps, and I have new types of dyes compared to the basics from back then, so I knew there’d be at least a couple of soaps getting demoted to home use after this. *grin* I found that powdered pigments reconstituted with glycerin just plain didn’t work and I don’t even have examples, since it literally didn’t dye the soap. A couple of oxides were definitely a bit too strong for my taste and they make me a little nervous that being so strong on the surface of the soap might dye the skin a bit, so those will become “Goodyear soaps”, for Larry to use when he’s all ready stained up from the plant. *laugh* After a while I found that the “stained glass liquid colorants” worked the best and looked the best as decorative touches, instead of painted over most of the surface. Without further ado here are the hits and misses of a few Buttercream scented hand painted ornament soaps…

IMG_1985.JPG

IMG_1986.JPG

IMG_1983.JPG

I really like the star ornament that accidentally took on a fall color scheme, plus the polka dot one that I photographed individually, and I usually hate all things polka dot. *smile*

I definitely don’t care for the brightly painted blue, purple, and red ornament. Meh. Just a little too bold maybe. I’m really disappointed about the burgundy soap. Although I usually love glitter it totally didn’t work the greatest as a coating over the paint or when it was mixed into the paint. One, it’s a serious pain to try to paint with chunky paint, especially fine details when a tremor and involuntary movements all ready make an intriguing challenge. Two, when the paint and water dried the glitter began to flake off. I have glitter all over the couch, my pajamas, my tray, my walker, and maybe not so accidentally the dog’s head. *laugh* When you break an egg you might as well enjoy an omelet, right? Instead of griping over glitter getting all over just smear a bit on your dog’s head and admire how cheerful he suddenly looks. That’s today’s tip for trying to stay cheerful. *grin*

I always forget until I do these projects just how much I miss painting. I was always so critical of myself, but it’s a lot of fun, and rather relaxing, except in my shoulders. I think I’ll paint a few more of the polka dot ornaments and call it good, otherwise I’ll end up needing shots in my shoulders again from getting them too inflamed. No thank you.

Depending on how well I can get stuff prepped for Thanksgiving and on how my feet are doing after some uninterrupted bedrest, maybe tomorrow I’ll be able to work on the cake slice soaps. *crossing fingers* I hope your holiday prep, if you are celebrating, goes smoothly and you can enjoy some extra time with your family or a few moments to yourself for some pampering. 🙂

One of Those Days

Don’t you hate when you have one of those days where everything goes wrong and there isn’t even a happy accident to make it worthwhile? Lol. My day was I Love Lucy worthy when I tried to make some product. *rolling eyes*

First, my foot has been really bothering me, so I tried to do some of the prep work while sitting, and when I cut some of the glycerin soap base I almost sent it flying across the kitchen. I ripped a hole in the wax paper, nearly dumped my FO and vanilla stabilizer mixture, and almost overflowed my measuring cup.

It has to get better, right? Nope. *laugh* I have a sample of Matte Burgundy pigment, which looked like the perfect red for Red Velvet Cake Soap, so I mixed the powder into some glycerin and it looked gorgeous. Added it to the soap and it turned lavender. Huh?! So I added more thinking it was so light that it wasn’t showing the real color and it just became an even richer shade of lavender. It was pretty, but not when representing a cake. lol. Added some yellow to bring out a muddy tone, but fourteen drops of yellow didn’t change it a bit. Holy smokes! I don’t think I’ve ever added that many drops of dye to a soap before and here I was adding it on top of a whole milliliter’s worth of burgundy dye! Somewhere around 8 drops of brown oxide made it a little darker, but not a big change. Finally I cut some slices from my strong and deep Americana Red color bar (which is basically a chunk of super strongly colored soap that you usually shave a tiny bit off of to color your soap) and finally after four small chunks of Americana the soap actually turned an acceptable reddish brown. *cracking up* I literally lost track of how much dye went into this soap and have no way to accurately figure up the cost, let alone recreate this color. I started to pour the first halves of the soap slices (I’m going to put a “filling” between layers and then pipe “frosting” on top) and my hand decided to do its own thing, and I poured soap down the side of one of the mold cavities. A little hard to have layers when there’s a smear of soap down the side, so I tried to clean it off. Buh me. It’s a silicone mold, so of course the cavity moved around when I tried to scrape the upper side, which resulted in me totally wrinkling up that slice of soap. *shaking head* I got disgruntled about that and then it suddenly dawned on me that I can’t duplicate this color, so I can’t do a second pour to finish these after pouring the filling layer. I’ll have to use half of the other first pours to make layers now. Dude, seriously?! Fine. I set the mold aside and I’ll deal with them some time after they set. Maybe my luck will improve by then.

IMG_1947.JPG

Since things weren’t going so well I figured I’d switch to an easy peasy pour. Just add some stabilized Buttercream FO to white glycerin base, and pour some ornament soaps to hand paint later. They turned peach for some reason. I’m not joking. I expected a little discoloration from the vanilla, but I’ve never had it become so noticeable. My mom was here helping so I asked her if it was too weird to use for ornaments, but she assured me they would be pretty with this color. I then overpoured one cavity so bad it went all over my stove top. Lol. I still have no idea how either. One moment it didn’t have enough to fill the top of the cavity and quicker than the blink of an eye I had soap pouring over the side of the mold. I wasted probably one whole soap’s worth.

I figured I’d try one more batch of soap that can’t go wrong (at least to my knowledge so far). Mechanic’s Soap. I pulled up soap recipes on my laptop and I couldn’t find over half of the soap recipes. I checked Overdrive and they’re not there either. Biscuits and gravy!! (Apparently a bunch of files were on a flash drive for me to transfer from the desktop to my laptop, but with my lovely memory issues I had managed to forget this key bit of information. This has since been remedied. *grin*) I pulled up the mechanic scrub which has some of the same ingredients, to refresh my memory, and after seeing apricot seeds and ground flax in the scrub recipe I started doubting that I’d get the soap version right, so I decided to go ahead and make the scrub, since I needed some anyway and actually had the recipe. Lo and behold I don’t have any pumice. *cracking up* I had put a note to myself in my grocery app to order more when I next ordered from my wholesaler, but I’ve been really well behaved and haven’t ordered from them in a long time, so I never got it and hadn’t seen that reminder for a long time. After sounding like Muttley from the Dastardly and Muttley cartoons I scrapped that and decided to try to save the work session, since it was one of the few times I had help, and decided to make some Sleepy Time and Monsters Away sprays.

In those missing files were the recipes for those sprays, but hey, no big deal. I know the scents that go into at least one, so I thought all was good. However, the spray base is a concentrated formula that has to be reconstituted, and I couldn’t remember the ratio. I got on the wholesaler’s website to find out that it was discontinued and they had removed the product directions, of course. I was about in tears at this point. *laugh* After some searching I found my binder of printouts from the wholesaler’s site of the MSDS files, which also included instructions. I finally found the sheet for the multispray base thankfully, but at that point I was so discombobulated that I knew I wouldn’t get the recipes right, and plus I was having a debate over should I even make more product to sell when I probably can’t recreate them later if they sell out. (After I sat for awhile I decided that I still will, but more about that later.)

I decided to move on to some bubble washes. Mom was here to help, so I figured I’d put her at the stove heating the base, to keep me from starting a fire somehow or something, with this streak I was having. Then I discovered that I only had a few ounces of base left. Mom and I talked it over and decided we would try to go to the store in Topeka in a few days (one of the few ingredients I can get in this state instead of online), and I figured I’d check their price on their website before I could forget, so we could figure up how many to get/how much I could afford. It too was discontinued. *shaking head* Wrap it up, no more filming today Folks. *laugh*

After Mom left and I finished putting ingredients and equipment away I did some research on my wholesaler’s site. Thankfully they have an all purpose body spray base that is also safe on linens, so it’ll replace the discontinued multipurpose spray, which makes me confident that I should be able to keep making my kid sprays. I also found a well rated bubble wash base that will hopefully be as good as the one I (and customers) have loved. I also ordered the low supplies and got a free sample of black glitter. Finally something went right. *grin*

It helped my mood to discover that the soap cake slices have turned out a usable color and Larry has a four day “weekend”, so hopefully he can use that steady hand of his to cut off the edges that bled on several of the ornament soaps. See, I think that although the cake soaps are more of a brownie batter color than Red Velvet, that it’ll work. Just might be a “Chocolate Layer Cake Soap Slice” instead. *laugh*

IMG_1948.JPG
Since I’m not truly convinced that my luck has changed, I don’t trust myself with an Xacto knife and will leave that to Larry. *cracking up* I don’t want to try to host Thanksgiving with a cast or stitches. So I’ve decided to let the fire burn out in the woodstove early in order to avoid burns or catching the carpet (or my hair) on fire and I’m just going to re watch some Quack Pack on DWTS. *grin* It’s probably safer for everyone if I just recline with Bo and watch Sadie. Redneck pride, baby!

I hope my misadventures in crafting has lifted some spirits and that you have some awesome luck this fine Tuesday. I think I’ll just wait until afternoon to test my luck again, so maybe I’ll sleep in really late. 😉