RSS Feed

Category Archives: Recipes

Super Easy Roasted/Baked Chicken

If you’ve been following my blog for the last few months, then you know I’m on a frozen meal prep kick and learning how to come up with energy saving ingredients that allow me to still cook a meal on my bad health days. One ingredient I had trouble with for months was basic diced chicken (in bulk). My crock pot chicken always came out tender, but always shredded instead of holding up to being diced, and I really wanted some diced chicken that I could freeze into portions that didn’t cost an outrageous amount (really grocery stores?!  That has to be a massive profit margin!). I tried a lot of variations until I finally came across a post via Pinterest that explained how to get flavorful roasted chicken without being super intimidating. The original post is at Roasted Chicken Breasts and I urge you to read through it if you haven’t mastered chicken yet. 

I followed the instructions on the site, although I used Daddy Hinkle’s dry marinade since I have a lot of that on hand (we get a combo pack with the original liquid marinade since that’s the only way it’s available around here and go through the liquid WAY faster lol). I bought a big package of chicken “tenderloins” for a great price at Sam’s Club and it took three batches to cook them all. Oddly enough I had to cook the tenderloins just a bit longer than the breasts in the instructions, but it gave me a time frame to start checking with my meat thermometer.  They came out mouthwateringly gorgeous. 

While each batch cooked I cooled the previous batch and then diced them up, after I performed some quality control checks. It took eating three before I actually declared this a success.  You know, you can’t rush quality control.  We all have to fall on our sword sometimes. *grin*

Anyway, one bulk package from Sam’s took about an hour and a half with prep, baking, and cutting, and filled three freezer zip bags, as well as a bag of some solid tenders for lunches in the refrigerator. 

These have been SO handy too!  I thawed a bag and used half of them in the Frito Supreme dish I previously blogged here.  I was able to just warm the pieces up with the wet ingredients and the meal was ready for plating within ten minutes!  

I never realized until I read the roasting instructions that I had mostly been over cooking the chicken, which was why I couldn’t get that store bought tenderness when I tried baking. I always use my thermometer, but I was testing WAY too late. Doh!  She made a great point about needing to season the chicken, too. I’ve always seasoned the dishes themselves, but it never dawned on me to use the Hinkle’s directly on the chicken in this capacity until I read that post (for shredded crock pot I just do a few bouillon cubes and water, plus a little poultry seasoning, usually).  I love that I can use whatever I can tolerate at the moment, too, since I can’t always tolerate the same spices!  Bonus: the sliced pieces have been flavorful enough as is to make a healthy topping for Larry’s salad “lunch” at work (what do you call meal break when it’s in the evening, yet not dinner, anyway?). I had never baked meat on parchment paper either and I think that was much better than the usual foil versions I had tried before. It also seems a lot healthier with a better texture, to us at least. 

I really wanted to share this information since there are so many other variations out there and this is the first that truly worked for me. This helped us save quite a bit of money, keeps cooked chicken on hand for quick meals, and was so easy that I was able to do it on one of my not-so-good days. A few days later I cooked up a huge package of lean ground beef, unseasoned, that I throughly drained, broke up into pretty small pieces, and froze, too.  Having precooked proteins on hand has made cooking during my worst point of the day a lot less daunting, not to mention a lot more cost effective, since I can get some great bulk prices. *happy dance* I can’t just pop on down to the market when I decide to cook, so having things on hand is essential, but can get expensive when you buy them in handy packages at the store. I’m absolutely tickled!

Are you interested in hearing about other hacks that I try?  Do you have any other meal “hacks” that have made things easier for you that you wouldn’t mind sharing?  My next hack attempt is going to be freezing blueberries. I’ll be able to have them for smoothies even when it’s hard to get good ones at a decent price out in The Midwest. I just love life hacks! 🙂   

Freezing Bell Peppers

I thought I’d share this super helpful tip I learned recently. I’ve been trying once a week to do the prep for several meals and have been trying to even do the whole homemade freezer meals thing.  I’ve been using bell peppers a bit more than usual due to the meal preps (and because I’m suddenly not intolerant of them like I was, although I so far can only eat green ones). The worst part was that several of the peppers would go bad before the coordinating meals were fixed. I decided to see if it’s possible to freeze them and found tons of variations, so I’m not including any links this time. There are just so many versions and I have no idea who actually figured it out, so I don’t know who to credit. I’m very thankful to everyone else that knew how to freeze bell peppers though! Now I can just pull out the portion I need from the bag and fry them for a few minutes with meat for quick fajitas. 

Basically you just prep your peppers, cut in the way you want, flash freeze them, and then you can bag them. There are some handy details I put together from all of the versions, though. First, make sure to dry your peppers after you wash them, before you cut them. You don’t want extra water during the flash freezing. Second (and this I actually learned from Top Chef), you can trim from a pepper in four to five cuts. The key is to start at the top and curve your knife to follow the flesh as you cut down, until you cut through the bottom. Third, try to keep the peppers from touching much, especially if you end up dicing them. That flash freeze will freeze them in clumps and it won’t be so easy to just grab a few. Last, this doesn’t work for raw usage. Once frozen the bell peppers must be cooked. They will be nasty once they thaw if they’re not cooked, so don’t try it.  Bonus tip (although I’m still on the fence on this one): supposedly the bell peppers with three points on the bottom instead of four (or more) are sweeter and have a little less acid. 

Instructions are basic, but at least I can provide pictures so that you know you’re doing it right. I started off by washing and drying the bell peppers, and then cut them off of the core as described. 


Next I sliced mine into thin strips, since I knew that cut would work for my household. They are just the way we like them for fajitas and easy to dice if I want to add into some rice or something. 


Cover a cookie sheet with wax paper and lay the sliced/diced peppers out on the paper, touching as little as possible. (This cut is more forgiving, so if they touch it’s not as big of a deal thankfully.) 


If needed you can put another sheet of wax paper right on top of those peppers and repeat the process. Keep in mind that it’ll take a lot longer to flash freeze like this. It’s recommended that if you have the room, then lay everything out in a single level for quick and even flash freezing. I don’t have much space to dedicate to whole sheets all laying flat, especially with all of the freezer items I now have, so I had to try stacking. It works for us, but it definitely does take longer, so if you have room, stick to a single layer. 

I have no real clue how long it takes to flash freeze. I’ve done this in single layers all the way up to three stacks deep and still haven’t really figured out the right time frame. My recommendation is that if you have the space and don’t mind a little bell pepper aroma for a day, make it easy and then just freeze them (exposed) overnight.  Check on them and see if they are frozen through. If you have stacked them, you’ll probably package the stacks at different times, since the bottom ones will need some exposure to flash freeze. Here they are frozen. If you look closely you can see the little frost where the flesh was moist. 


Peel them off of the wax paper (they’ll have a little cling) and put them in a freezer zipper bag. I did a whole bag of bell peppers from Sam’s Club, at a super great price, and ended up with three layers. They all fit in a gallon zip bag and I put a pop can beside it so you can see how much frozen bell pepper I have on hand now. 


When I make fajitas tomorrow all I’ll have to do is pull out a handful and warm them in a skillet with the cooked, sliced meat for just a few minutes. Easy as can be and no need to cook all of your bell pepper dishes one after the other so that your peppers don’t go bad. *big grin* It’s such a small thing, but it has been a huge help!  

If you have any questions, please don’t hesitate to ask, and I’d love to hear about your way if you all ready are a pro at this. 🙂 I’m hoping to discover more tips for meal prep as I get better at the freezer meals. 

Peanut Butter Bon Bons

Peanut Butter Bon Bons

Just in case you’re cramming in some last minute holiday desserts, or just have a sweet tooth driving you nuts like me, I thought I’d share one of my family’s favorite recipes that you can still make in time for the festivities. There are tons of versions and copies of this recipe, so I’m not claiming any new ground here. I do have a few tips though, plus I really want to share such a yummy AND easy enough recipe that even I can do it. If a recipe is Georgia-proof, then I feel it must be shared with the world. *smile* As usual, the easy to copy and paste recipe will be at the bottom, below the pictures and tips.

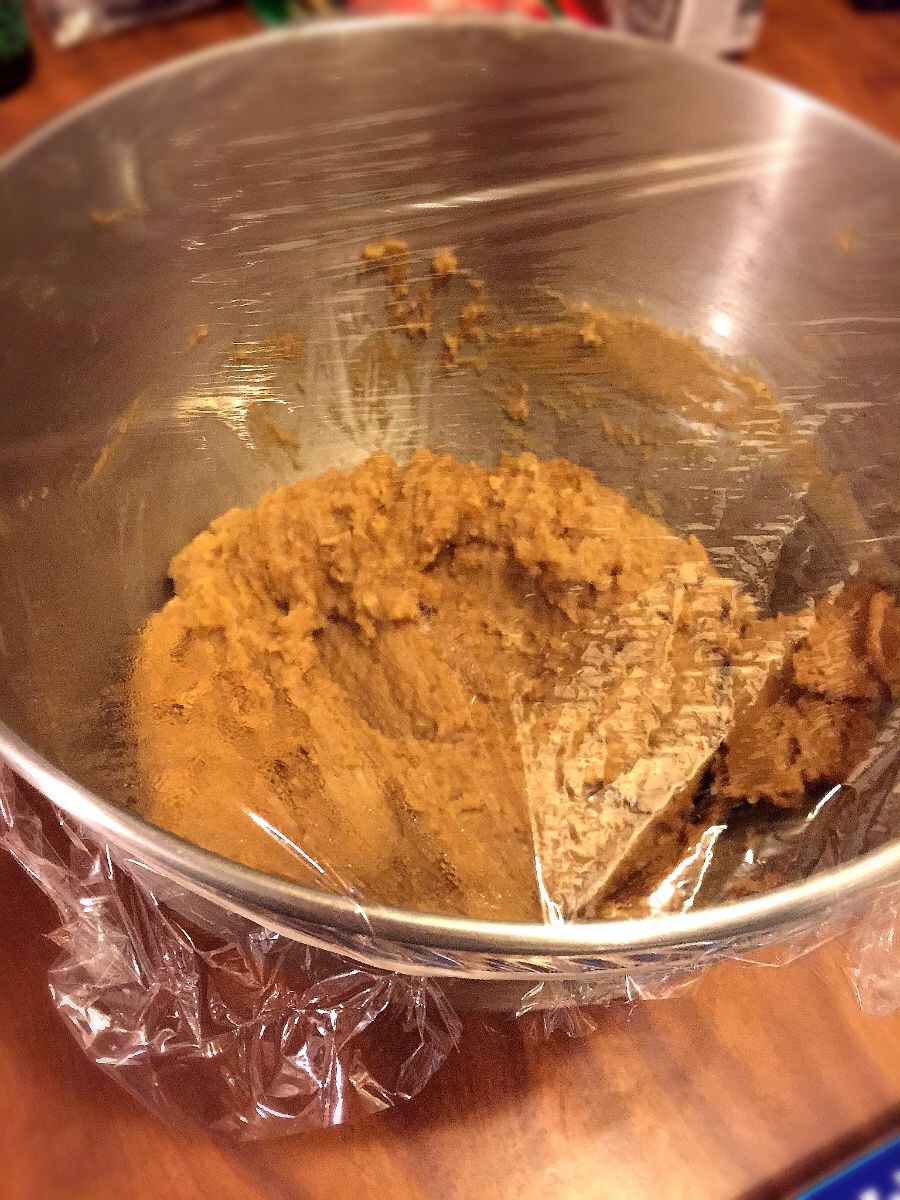
In a food processor or sturdy stand mixer combine crushed graham crackers, peanut butter, powdered sugar, and melted margarine until the mixture is thoroughly mixed.

/home/wpcom/public_html/wp-content/blogs.dir/622/26625504/files/2014/12/img_2407.jpg

/home/wpcom/public_html/wp-content/blogs.dir/622/26625504/files/2014/12/img_2406.jpg

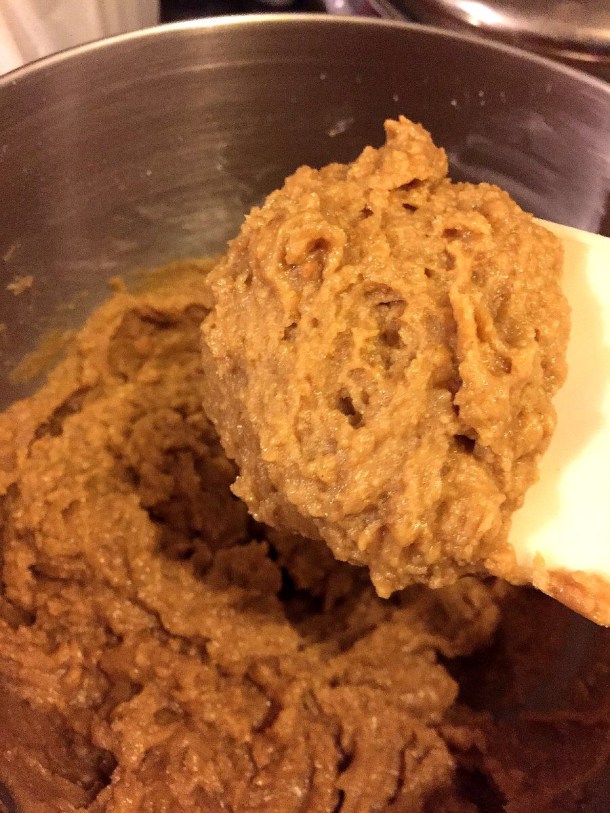
If the mixture seems too crumbly, then add a little more melted margarine. If it’s too creamy to shape, or won’t hold shape, then you can add a little more crushed graham crackers (use caution, since this will change the flavor a little) or you can cover it and let it chill in the refrigerator for a little bit. (Sometimes the room temperature can cause issues, or tiny variations in the ingredients, or just that wild tendency for things to go wrong like I have.)

/home/wpcom/public_html/wp-content/blogs.dir/622/26625504/files/2014/12/img_2405.jpg
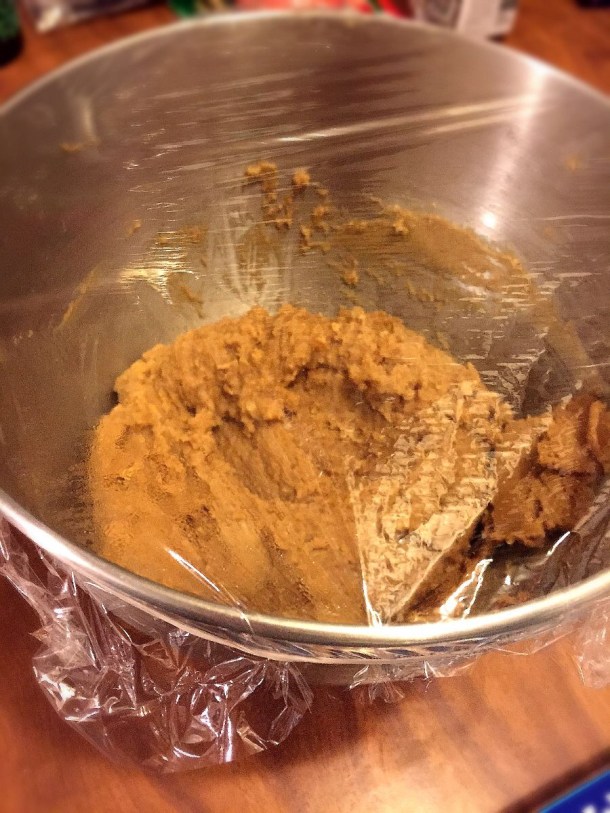
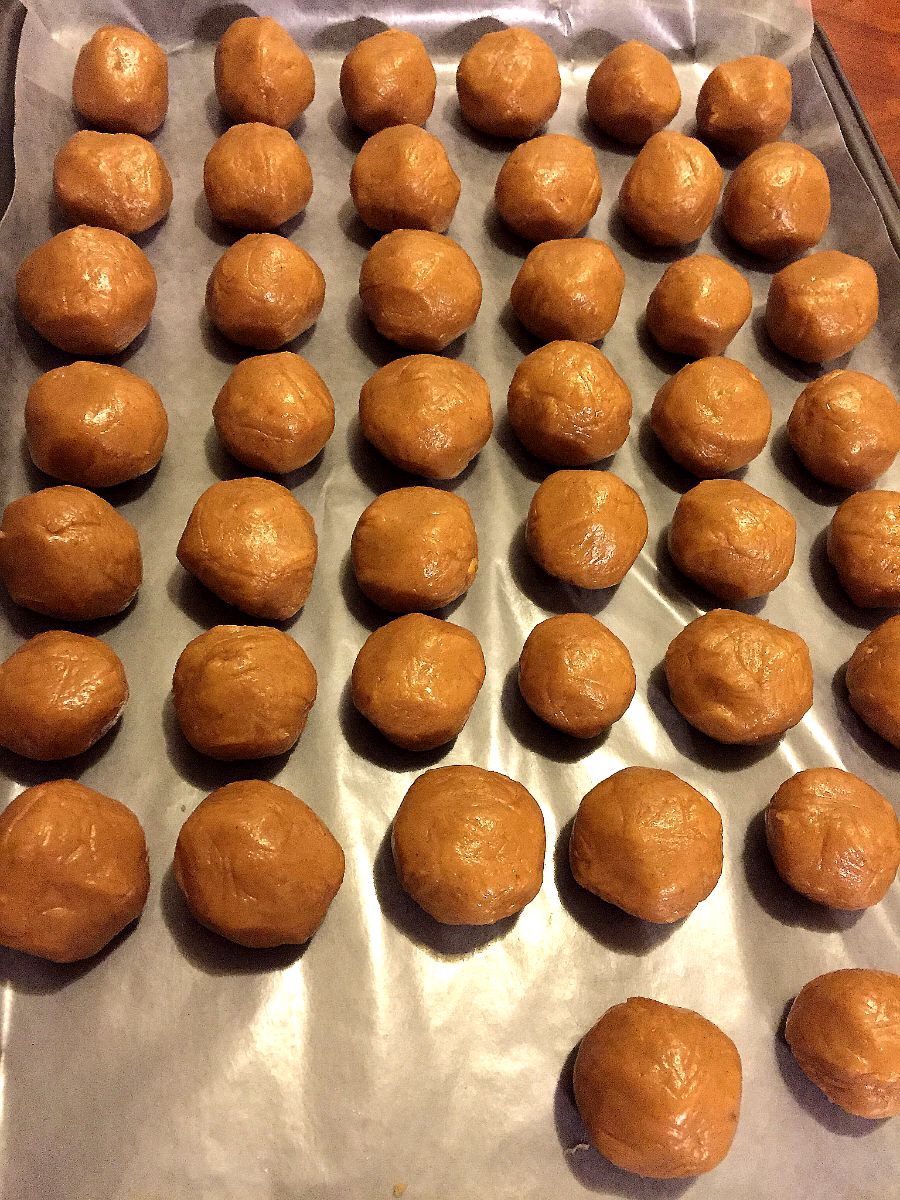
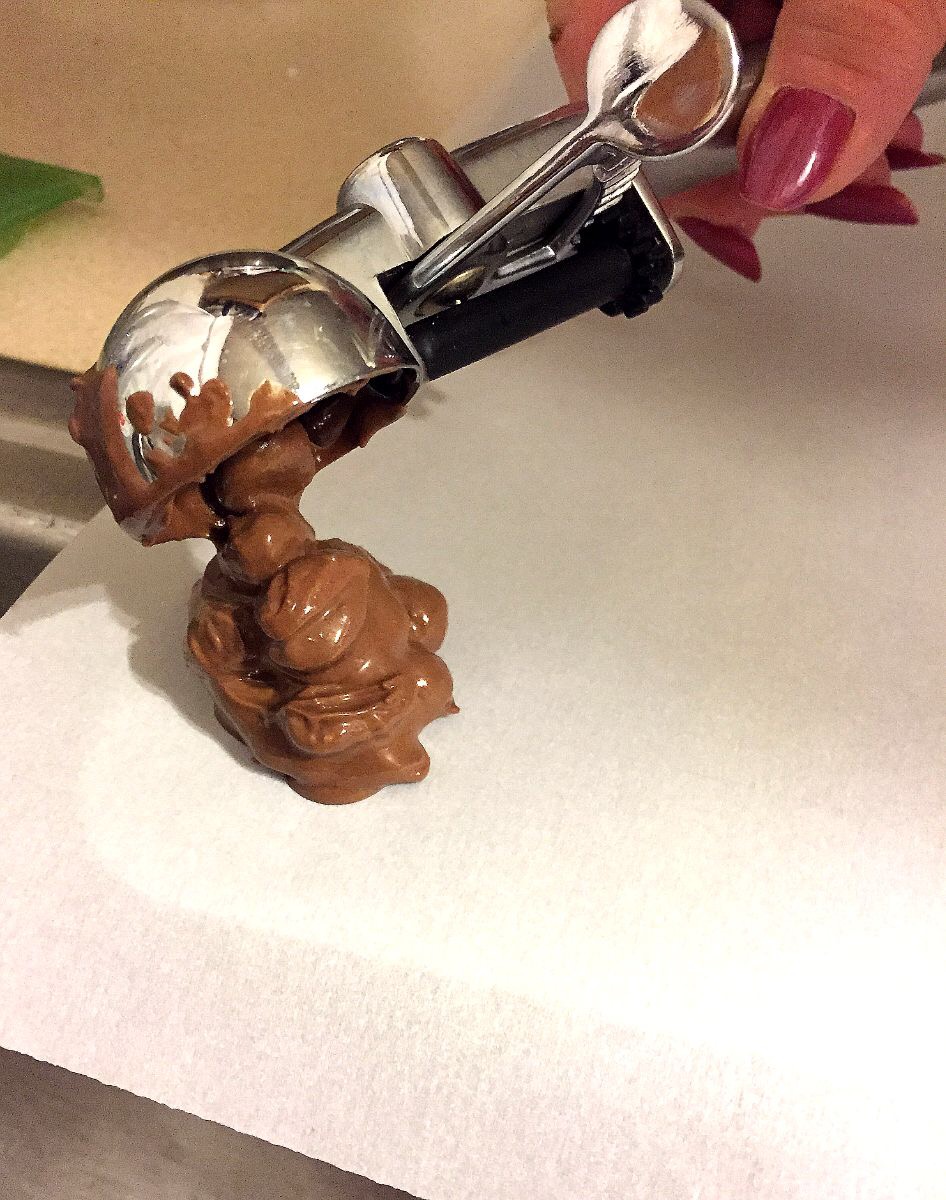
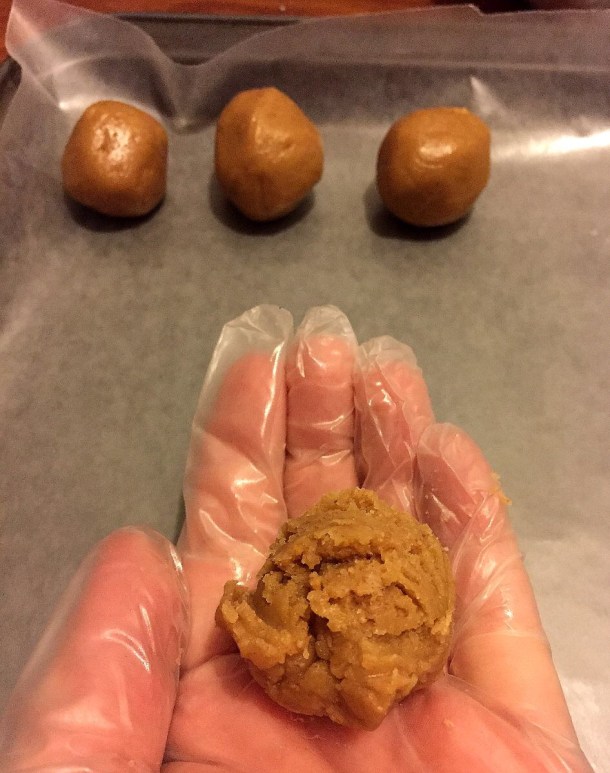
Chilling worked perfectly for me and you can either grab a little out by hand or use a small scoop, like me. The mixture should be thick and hold together pretty well, yet is still pliable, so it can be shaped into balls. Prep a cookie sheet with some waxed paper for easy cleanup. Powder free vinyl gloves work wonderfully, too.

/home/wpcom/public_html/wp-content/blogs.dir/622/26625504/files/2014/12/img_2404.jpg
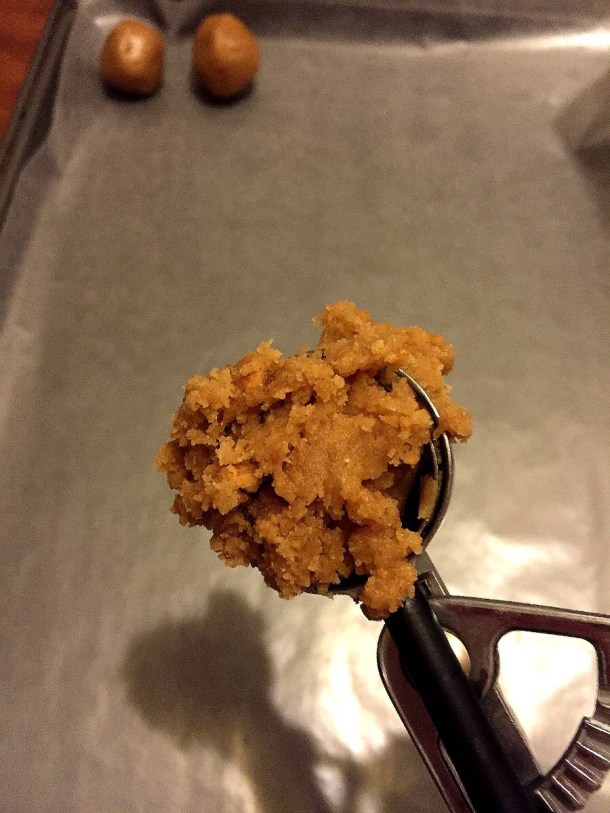
One handy step in making these, other than the scoop taking the work out of trying to keep things somewhat uniform, is to smash the scoop of filling in your hand, and then roll it into a ball between your hands. The smashing seems to help it stick together better and makes rolling a lot easier without crumbs trying to escape.

/home/wpcom/public_html/wp-content/blogs.dir/622/26625504/files/2014/12/img_2403.jpg

/home/wpcom/public_html/wp-content/blogs.dir/622/26625504/files/2014/12/img_2402.jpg

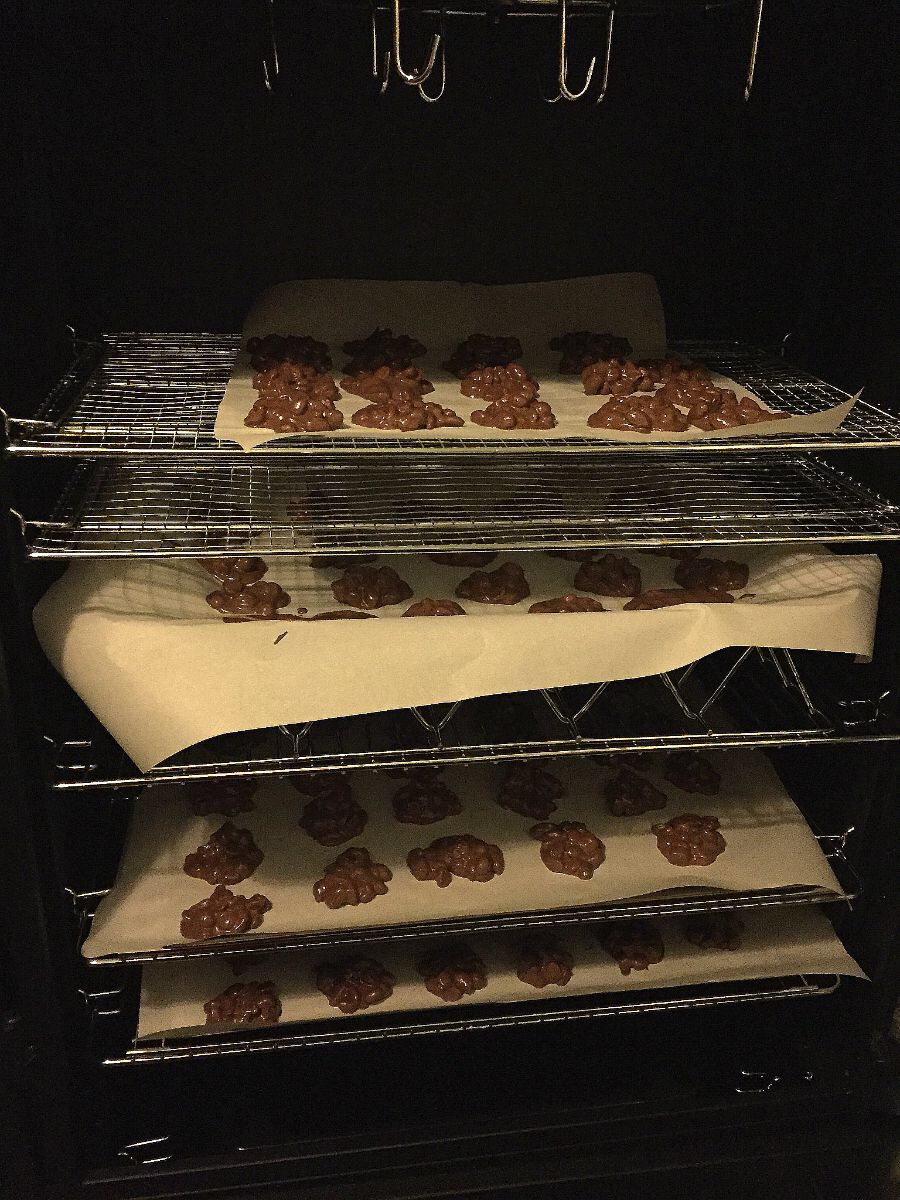
When all of the mixture has been rolled insert a toothpick into each one (unless you prefer to use fondue style dipping tools, then you can skip the toothpicks), cover loosely with a sheet of wax paper, and then refrigerate them for at least two hours. Or set them in an outdoor smoker if you live in the Midwest and it’s December. *laugh*

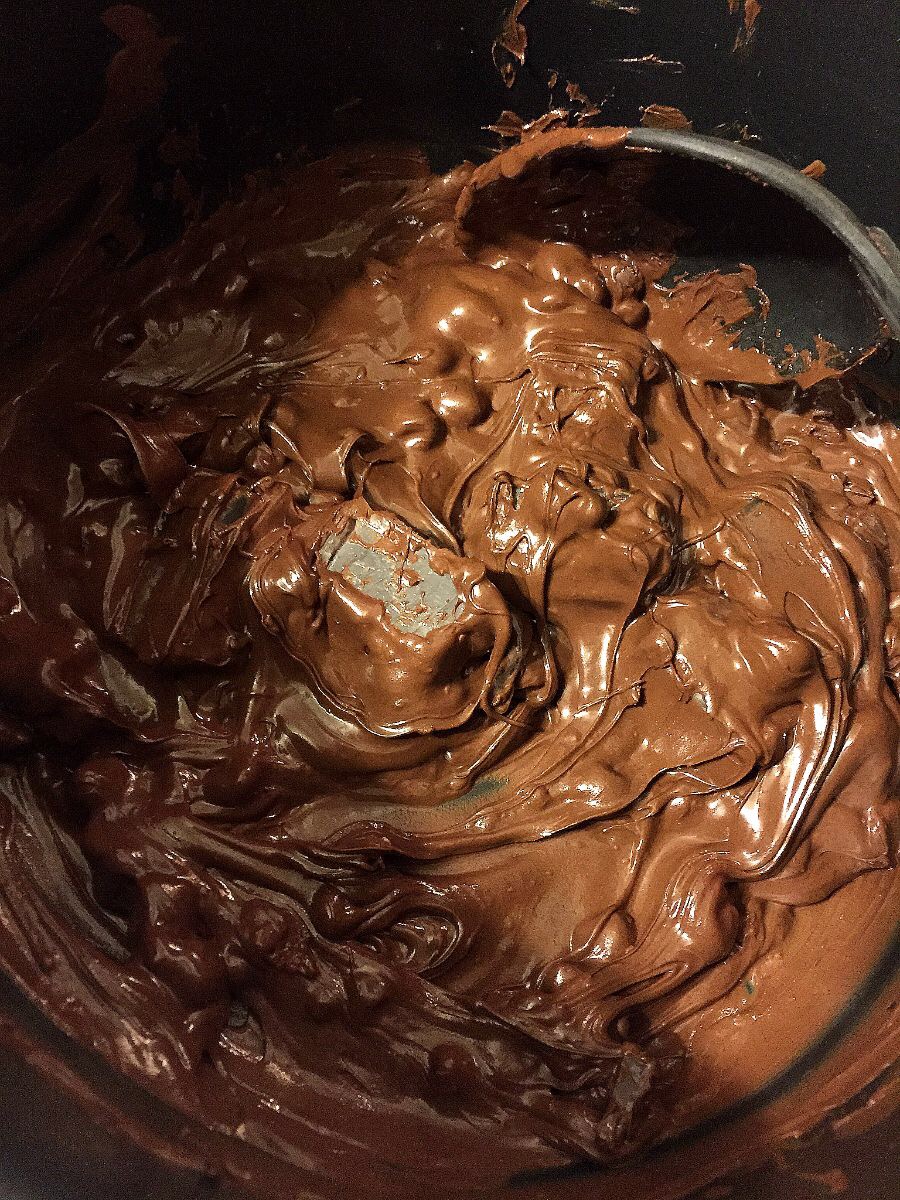
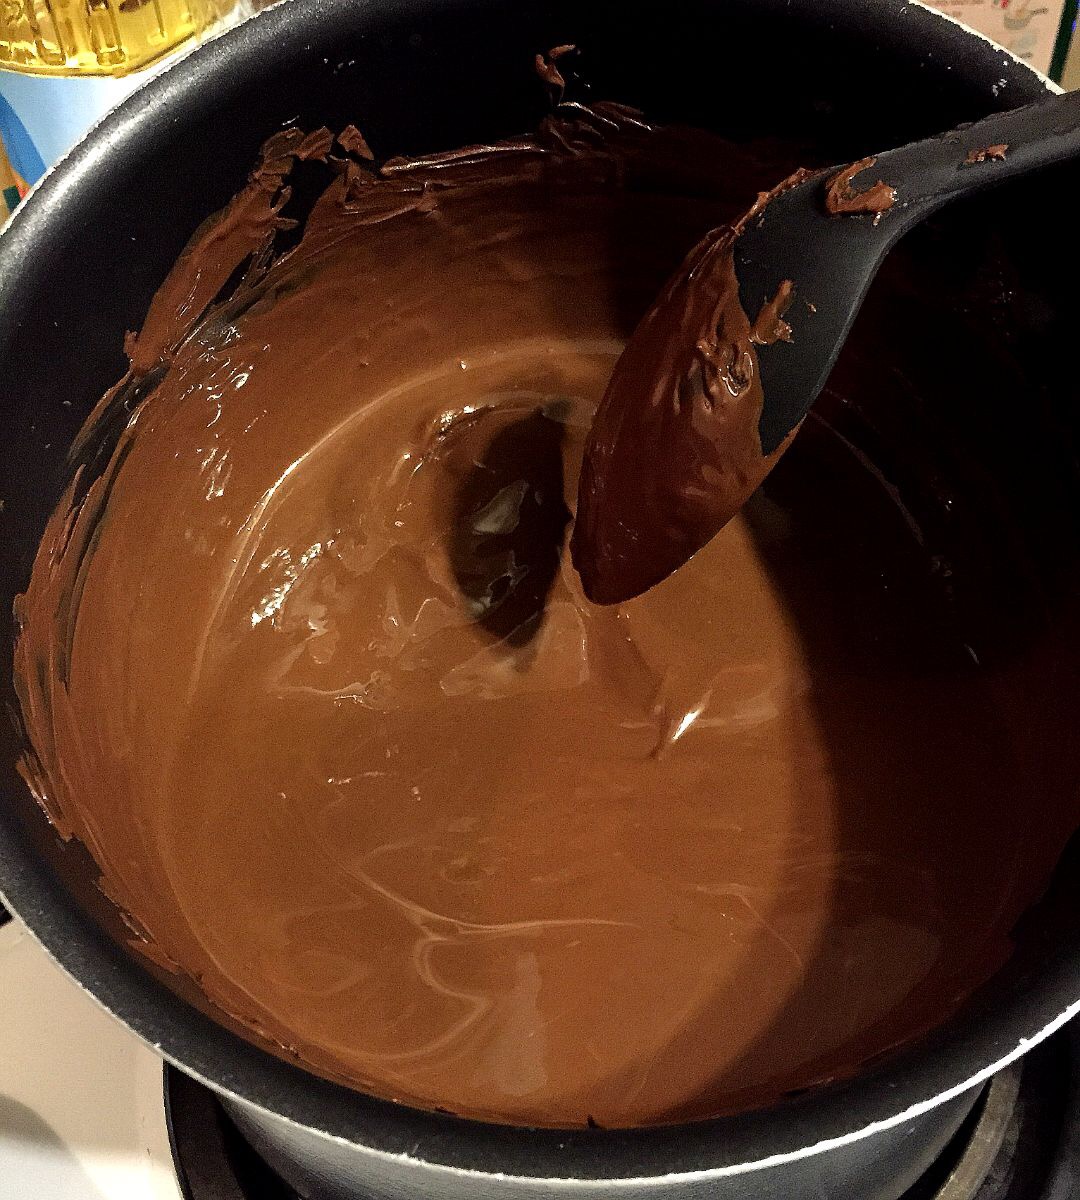
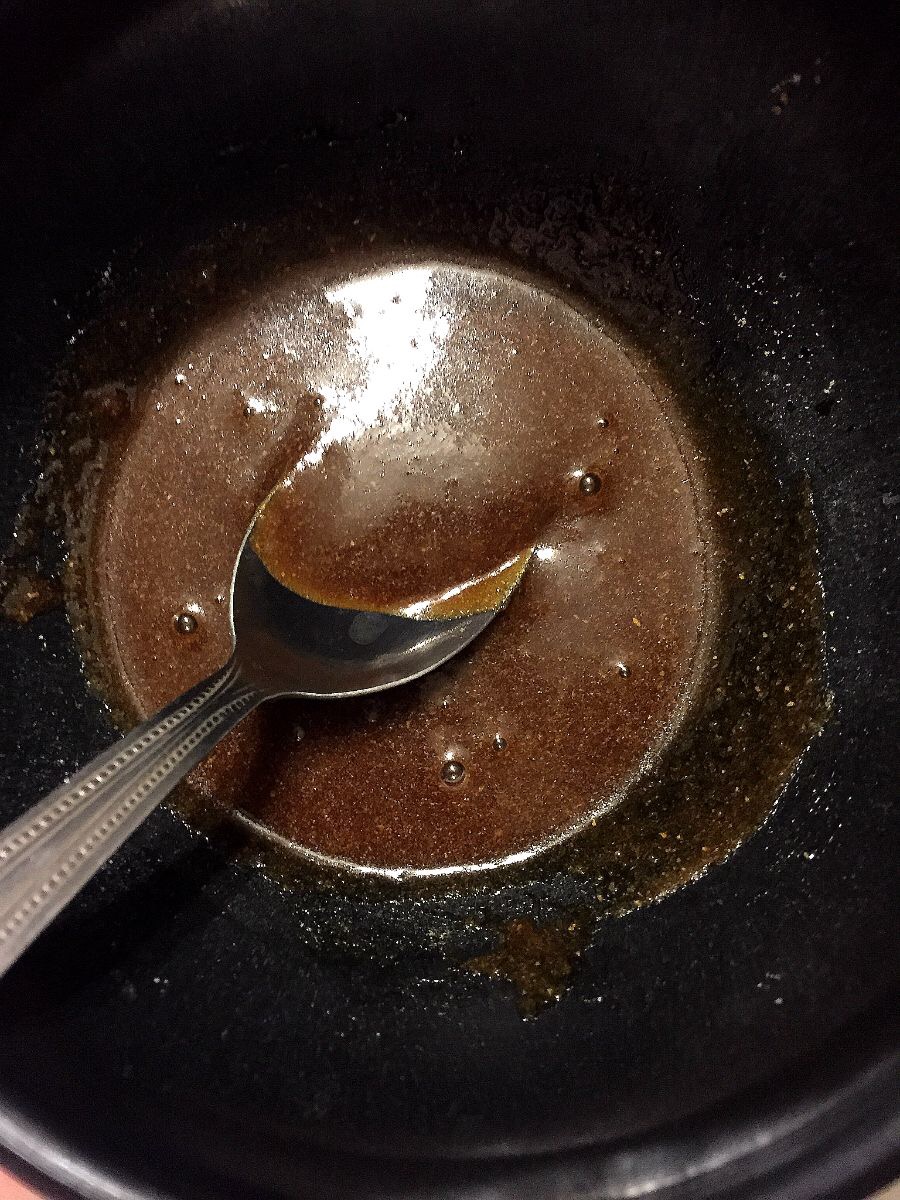
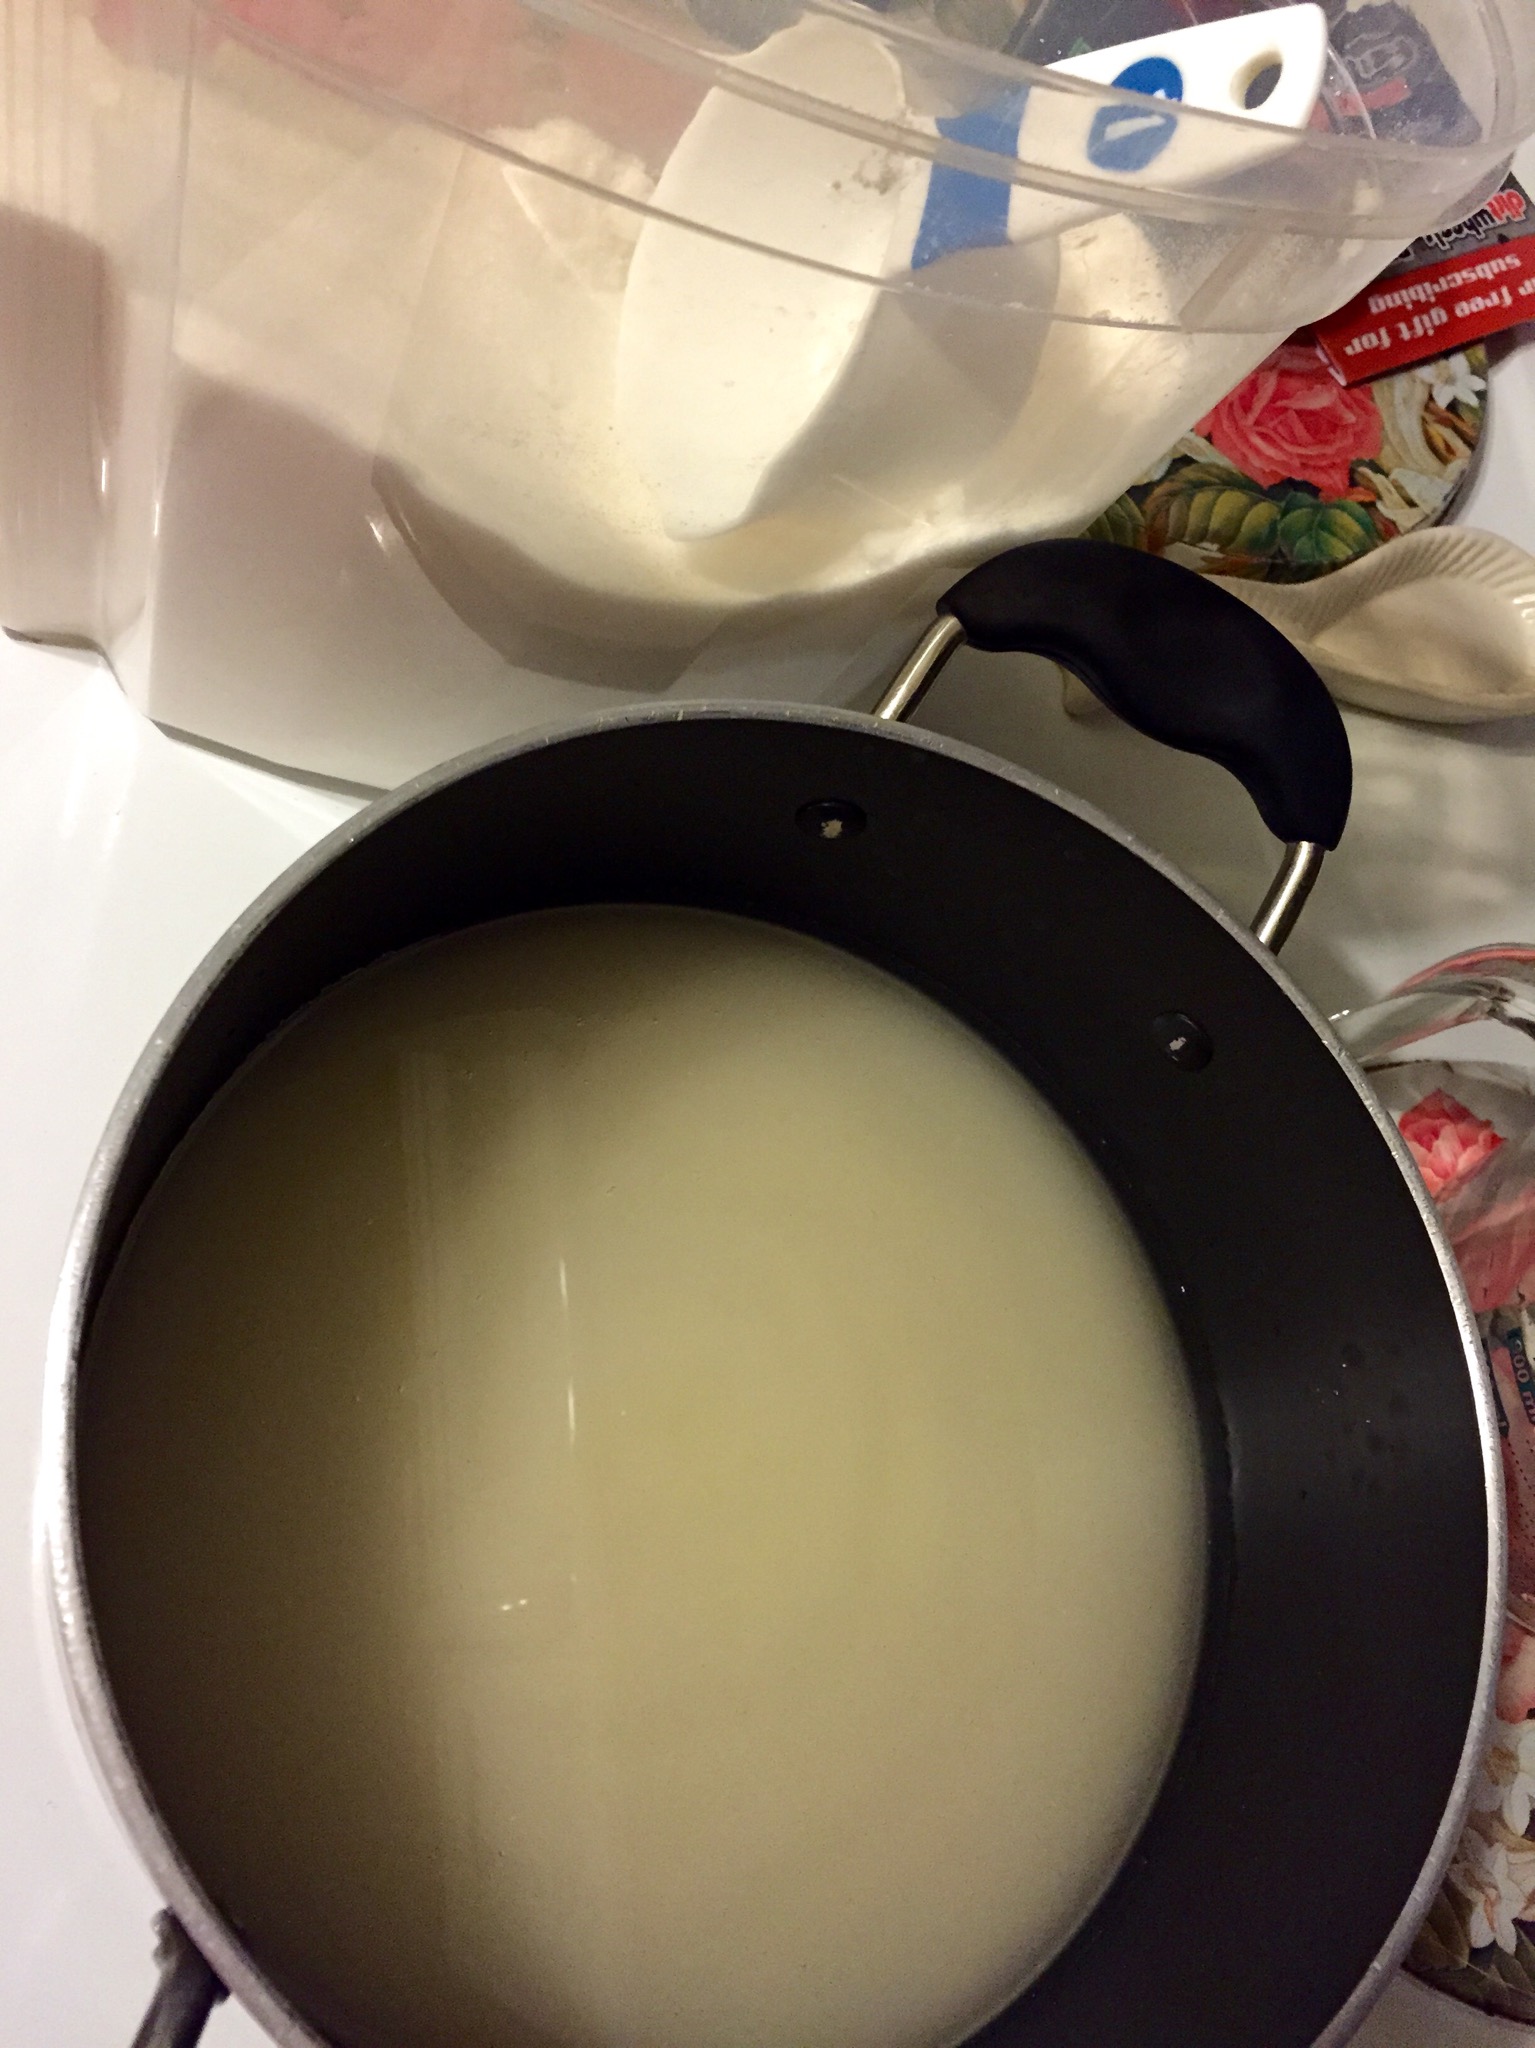
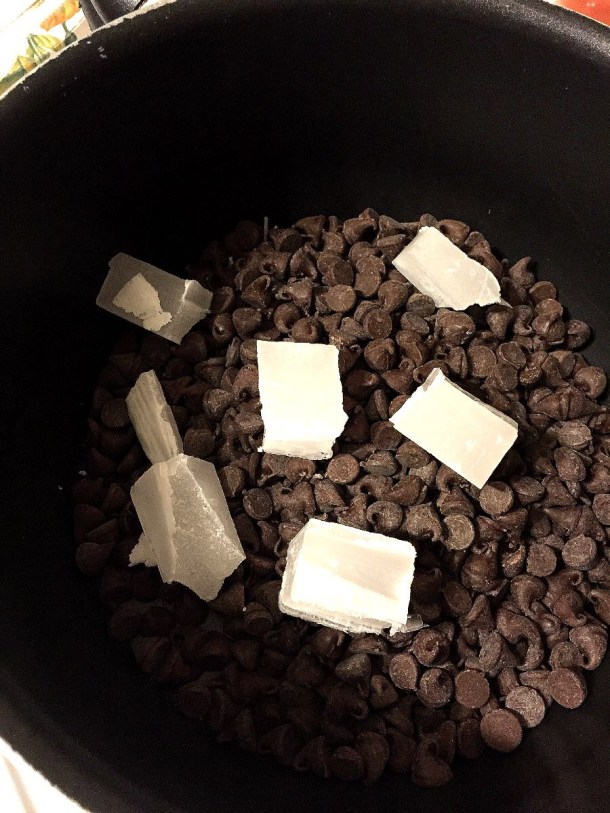
Once they’ve chilled you can start on my favorite part, the chocolate coating. *grin* You’ll need to melt chocolate chips with a little paraffin wax in a double boiler while stirring frequently until it’s melted smooth. If you’re using two saucepans in place of a double boiler, make sure that the top pan does NOT touch the water in the bottom pan, or else the chocolate may scorch or seize. I’ve also found that cutting up the paraffin really cuts down on the stir time and therefore less worry about ruining the chocolate. I didn’t pay close enough attention this round – cut yours to about half the size of what’s in the picture for an even easier experience. (By the way, if the idea of the wax grosses you out, you can totally leave it out. Your Bon Bons won’t have the gloss and harder shell, is all. You’d be surprised how much wax you regularly ingest anyway, though, so this little bit truly isn’t a big deal.)

/home/wpcom/public_html/wp-content/blogs.dir/622/26625504/files/2014/12/img_2401.jpg

/home/wpcom/public_html/wp-content/blogs.dir/622/26625504/files/2014/12/img_2400.jpg

/home/wpcom/public_html/wp-content/blogs.dir/622/26625504/files/2014/12/img_2399.jpg

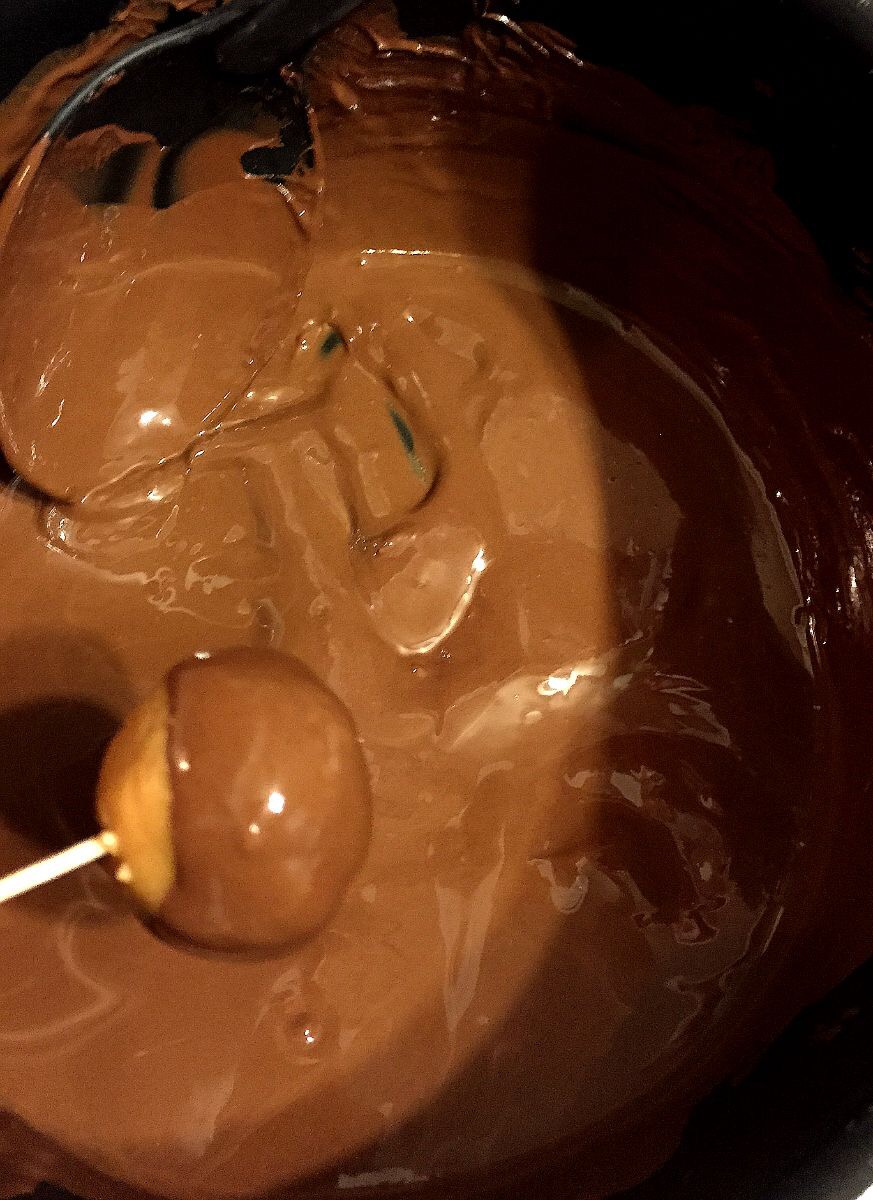
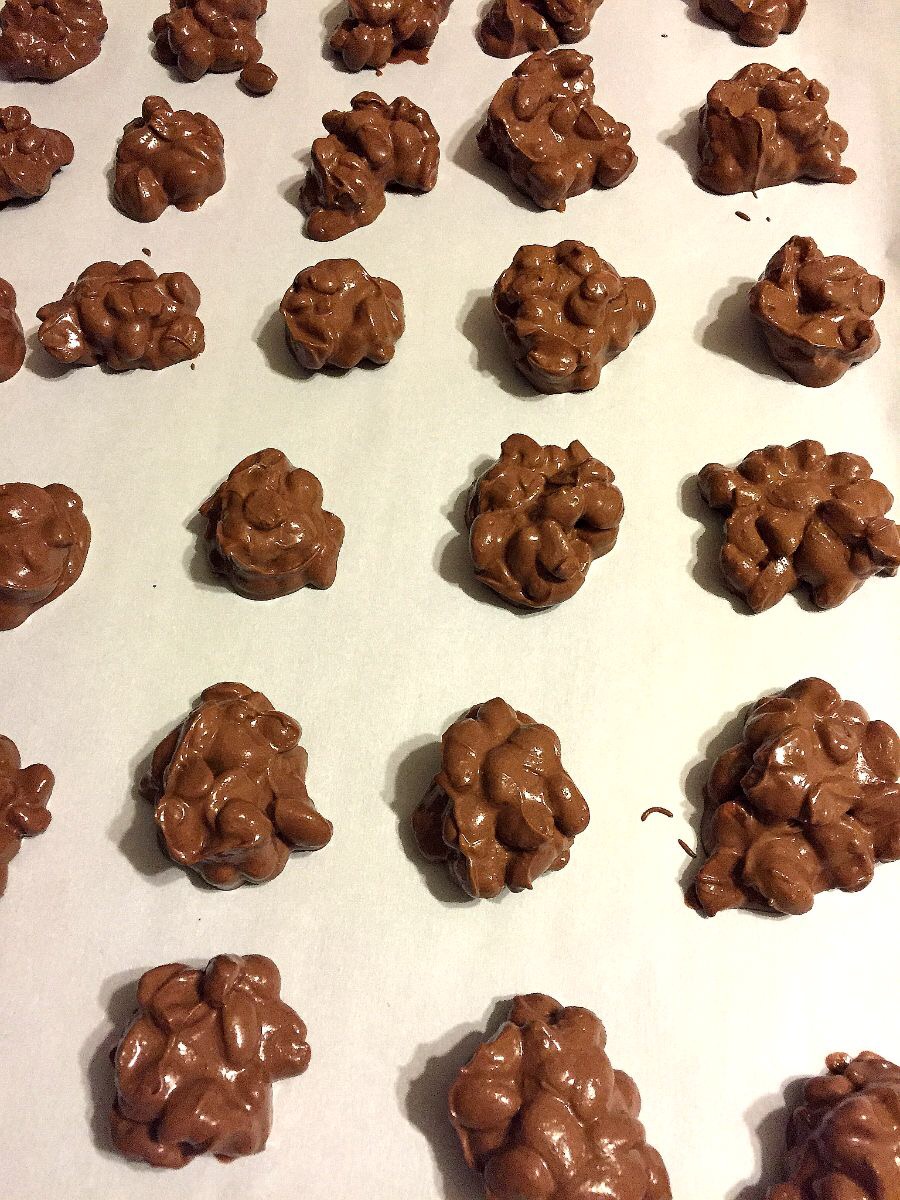
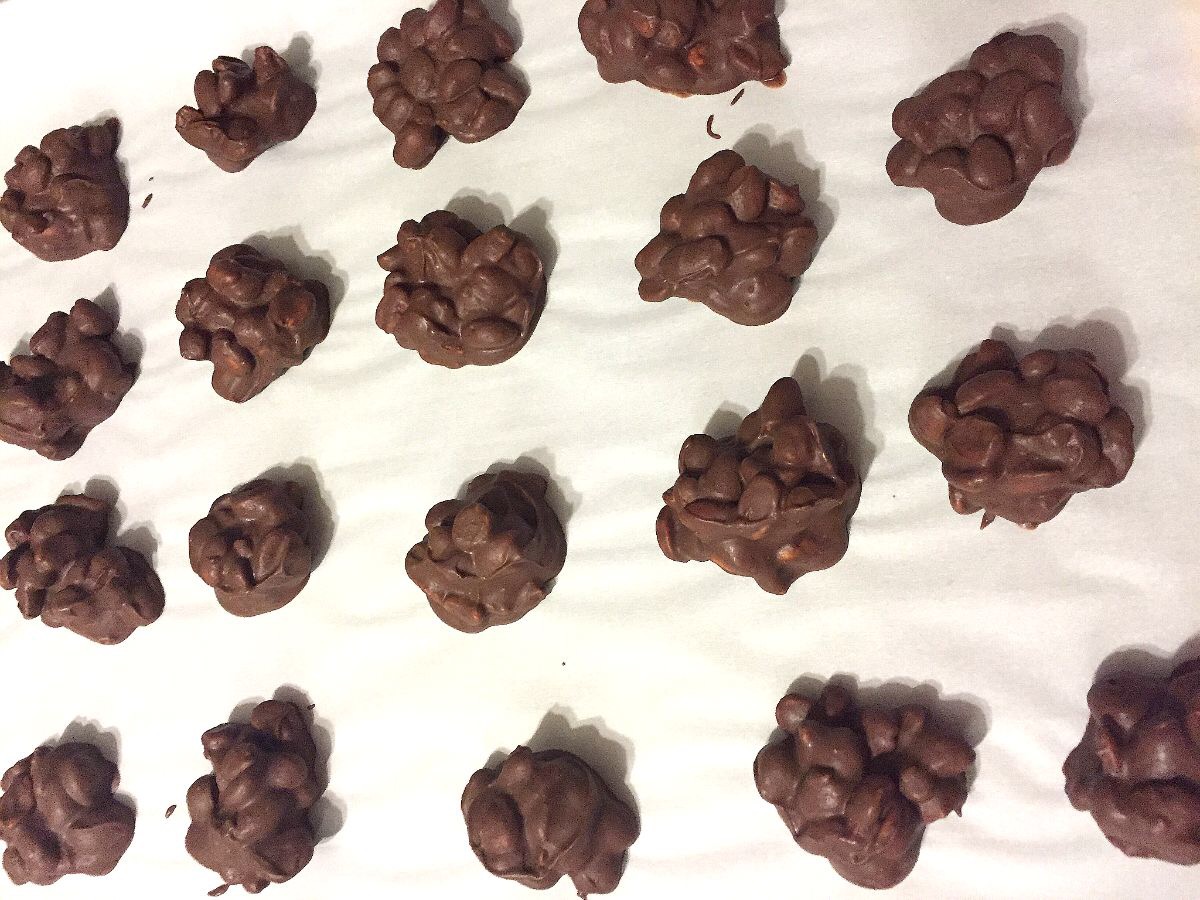
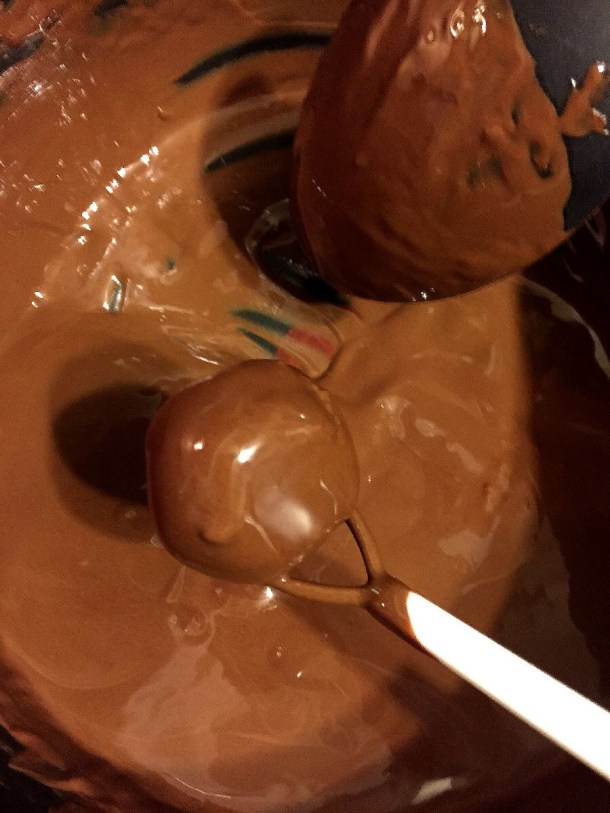
Dip the chilled peanut butter balls into the chocolate, let the excess drip back into the pan, and then place back on your wax paper lined cookie sheet. They can get a little squirrelly when you’re dipping, so you may have to get creative in order to make sure that they’re fully covered. Spin them, swirl with your fondue dipper, pour some over the top with your spoon – whatever it takes. My mom has the spinning toothpick technique down while mine tends to include a little jig (I wish I meant the Bon Bon), swirling the ball with the fondue dipper, and then covering any missed spots by pouring some chocolate from the spoon. You know me, I can’t do anything like a normal person. *grin* That dance is essential for my success for some reason.

/home/wpcom/public_html/wp-content/blogs.dir/622/26625504/files/2014/12/img_2398.jpg

/home/wpcom/public_html/wp-content/blogs.dir/622/26625504/files/2014/12/img_2397.jpg

Once the chocolate starts to harden a little you can remove the toothpicks, if used, and I warn you now that usually about half of the toothpicks pull right out as we set down the coated candies, so don’t worry if it happens to you. Shoot, we’ve had the ball slip right off into the chocolate even, so you didn’t do anything wrong. Ahem, back to the recipe…If you want really beautiful Bon Bons (really, the shininess of that chocolate and the allure of peanut butter and chocolate together making yumminess on your tongue isn’t enough for you? I’m all ready happy at this point, but just in case you’re planning a gorgeous spread…), then you can always cover the toothpick holes by spooning a little of the leftover chocolate over them or even by drizzling a contrasting colored melted chocolate over them. The drizzle does double duty – covers the hole and makes them look all snazzy. I don’t do it, but I’ve seen plenty of recipes that call for it. It definitely jazzes them up. I had some issues this round with marks from the fondue tool, plus some hit and runs due to my shaking hand, so there were quite a few to fix before we decided that it’s just for family and gave up. Plus, we wholeheartedly believe in the best part of being the cooks for this treat…if you have leftover chocolate you can just dig in and no one will ever know! *cracking up*

/home/wpcom/public_html/wp-content/blogs.dir/622/26625504/files/2014/12/img_2396.jpg

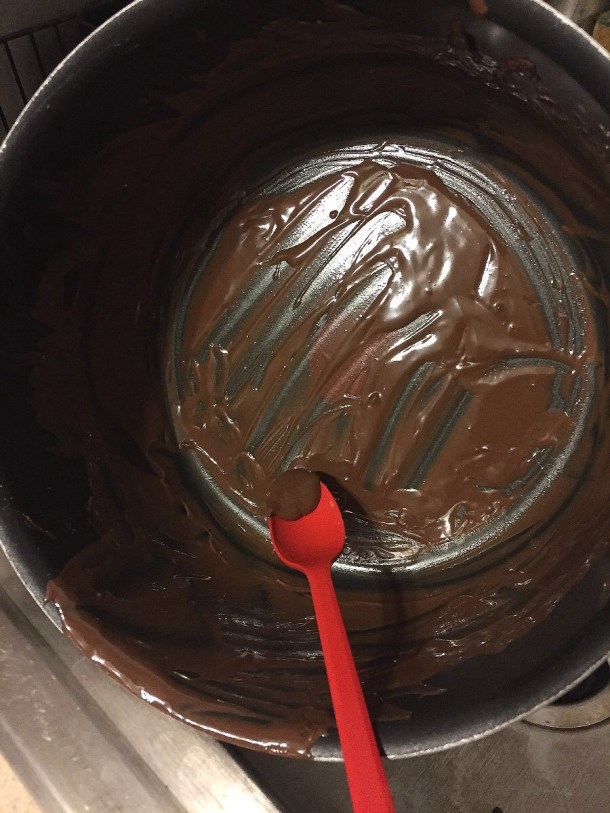
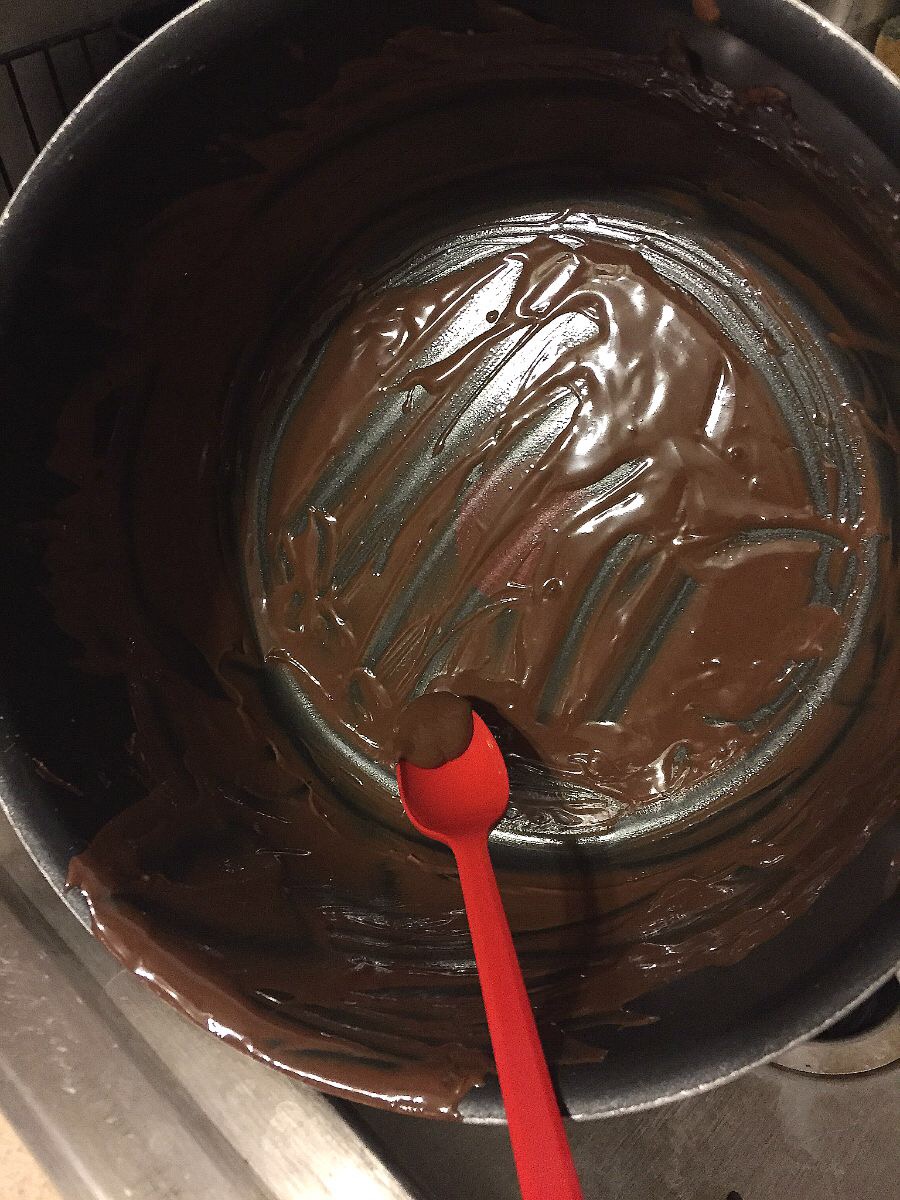
You may still have a healthy bit of chocolate in your pan after everything is coated. Just take a paper plate (or real one if it has a high edge and a dipped center), cover it with some wax paper, and pour the leftover chocolate on there. The high edge of the paper plate keeps the chocolate in a pool in the center and prevents it from running all over, like your hand or refrigerator. I use that second sheet of wax paper that was used to cover the Bon Bons earlier, when they were chilling before the dipping, to pour the leftover chocolate onto actually. If you do it right you can pull up part of that wax paper and cover the chocolate, too. Once the leftover chocolate cools you can nibble on it, use for something else later, or put in the bottom of your cup when you pour hot chocolate or coffee for a little umph. Personally I vote for nibbling. I’ll fight you for a hunk of chocolate any day. *grin*

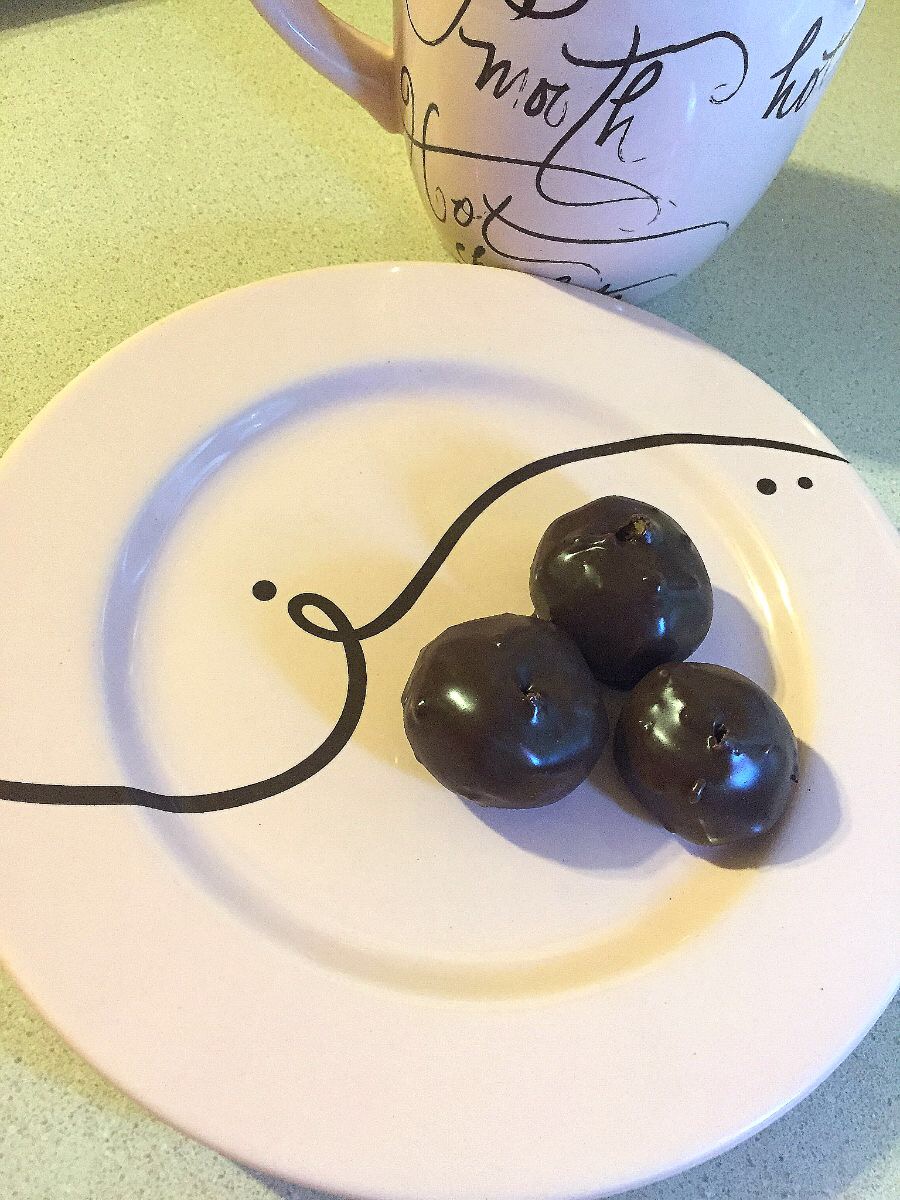
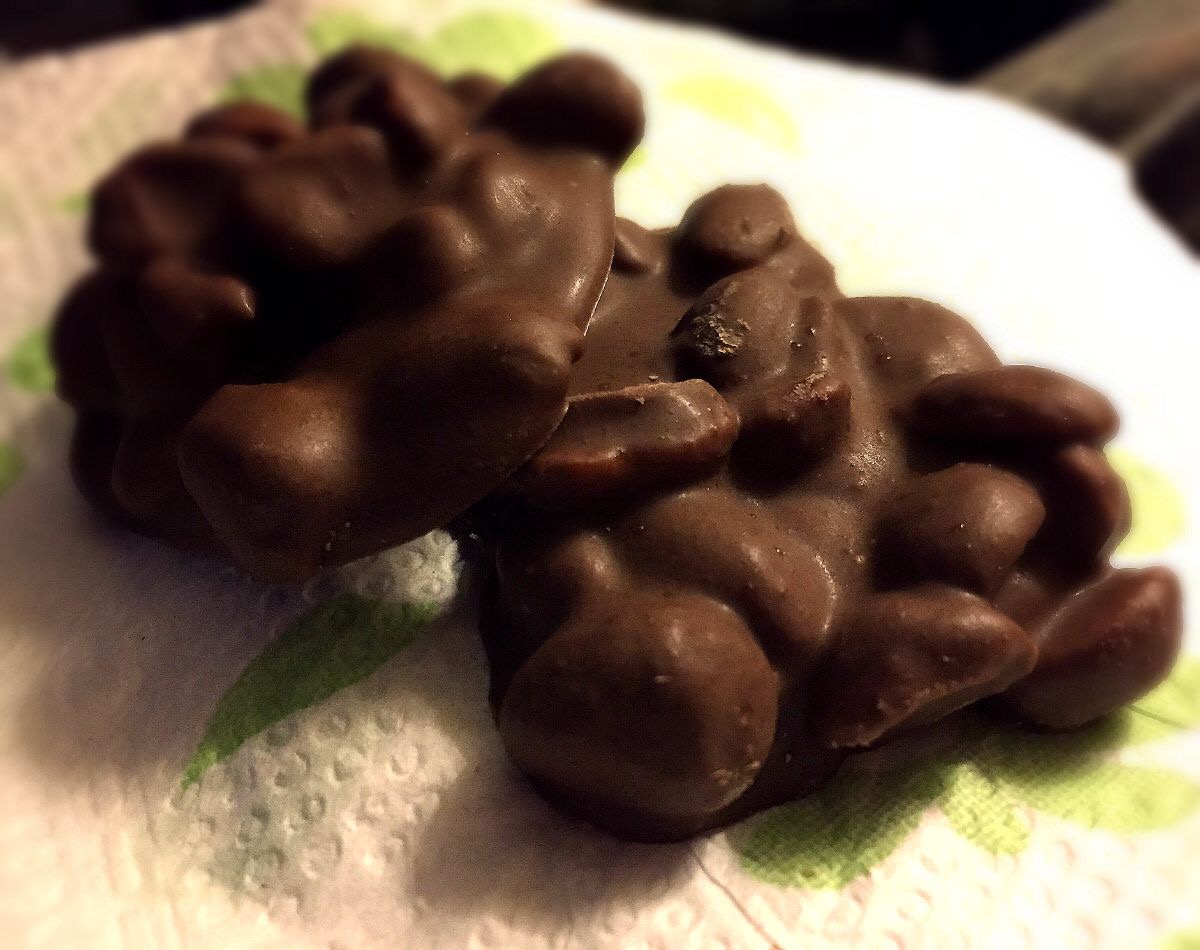
Allow the coated Bon Bons to chill in the refrigerator for at least two hours. They’ll darken, get uber shiny, the flavors will develop, and they’ll have this awesome crunch when you bite into the chocolate shell. I got a little fancy for the final picture for you, fancy for me at least, and put mine on one of my special occasion “chocolate” saucers with a cup of hot chocolate. The Bon Bons look so pretty and are pure bliss in my book.

/home/wpcom/public_html/wp-content/blogs.dir/622/26625504/files/2014/12/img_2395.jpg

Make sure to refrigerate until serving and to refrigerate all leftovers. In theory leftovers can be refrigerated for up to two weeks. We’ve never ever ever had leftovers, even when my mom made double batches for bigger family parties, so I can’t give any handy tips for that part of the recipe. *laugh*

The recipe:
Peanut Butter Bon Bons

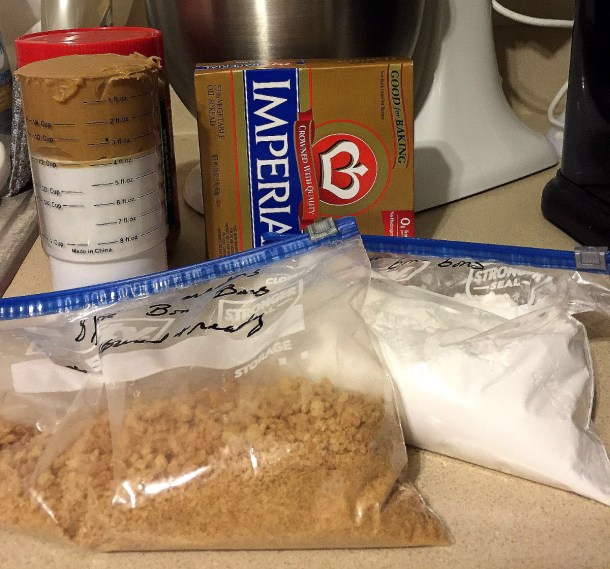
1 cup crushed graham crackers (you can use the food processor or I find it works just as well to put them in a zipper bag and run my rolling pin over them several times)
1.5 cups peanut butter (some swear by chunky for binding, I prefer using creamy because of the texture)
1 box of powdered sugar (or 16 oz by weight)
1 cup of melted margarine (use the stick margarine, not the tub kind, or else it doesn’t have the right oil percentage)
12 oz semi sweet chocolate chips
Half a bar of paraffin wax , cut into pieces (comes in a box with four bars, found in the canning and baking aisles)

In a food processor or stand mixer combine the first four ingredients until smooth and thoroughly mixed. Scoop mixture and form into a ball, and set on a cookie sheet lined with wax paper. Once all of the mixture has been rolled into balls, insert toothpicks about halfway in each ball if you will be dipping them that way (skip this if you are using fondue style dipping tools). Cover loosely with a sheet of waxed paper and refrigerate for at least two hours. Melt the chocolate chips and paraffin in a double boiler. Dip the chilled balls into the chocolate and coat the entire surface, allow any excess to drip back into the pan, and then place back on the lined cookie sheet. Once all of the Bon Bons are coated and the chocolate has hardened a little, remove the toothpicks, if they were used for dipping. Refrigerate the Bon Bons at least two hours, until fully firm. Serve while still cool. Bon Bons can be refrigerated for up to two weeks.

Hopefully this post takes some of the mystery and nervousness out of making these tasty treats. If you follow my tips then the recipe is pretty foolproof. My pictures are proof. *grin* They sound super complicated, but once you’ve made them a few times, it’s not bad at all, as long as your arm doesn’t wear out quickly. You can always call in some reinforcements to help with the dipping and give your arm a break, like I did. I hope you give these a try and enjoy them as much as my family. I wish you a very merry Christmas and happy pampering! 🙂

Crockpot Peanut Clusters

Crockpot Peanut Clusters

I actually found the original recipe on Pinterest (I may have an addiction *laugh*), and the original printable recipe is here, but there weren’t any pictures of the process and there were a couple of hard learned tips that will make your experience much better, so I thought I’d share the recipe. I am not claiming any credit, it belongs to the original blogger. I simply want to share an easy recipe that is truly easy when you don’t make the mistakes I did. *grin*

First off, you need a 5 quart crockpot, a sturdy spoon or spatula, parchment paper, cookie sheets, a scoop, and a little over two hours.

For ingredients you will need 34.5 oz of honey roasted dry roasted peanuts (**My note: Larry said that he doesn’t like the flavor of the honey roasted in the peanut clusters, so I’ll definitely be using plain dry roasted from now on), 32 ounces of vanilla flavored almond bark (in the baking supply aisle and contrary to the name doesn’t have any nuts), 12 ounces semisweet chocolate chips, and 4 ounces Baker’s German Chocolate bar (found near the almond bark and the bar itself is the full 4 ounces).

Now, I’m going to admit that this is where things started going wrong. We were trying to make the peanut clusters and another candy at the same time, and ditched the other one because so much was going wrong, but found that there was a snafu with this one too. It was the first time I had bought or used almond bark, so silly me didn’t pay attention to the size and notice that the recipe would need part of a second package, so instead I compensated for the missing eight ounces of almond bark by adding that much more of semisweet chips. I liked the results, so I’m not sure that I’ll do it the correct way the next time I make this, but I want to be honest about what went on in case you have the same problem or want to go that way.

Pour the peanuts into the crockpot – it will seem like there’s an insane amount of peanuts in there, but I assure you, you’re doing it right. Next is one key tip that the original didn’t mention. Before layering the almond bark over the peanuts cut that bar up!! I can vouch that the blob of almond bark may soften, but won’t fully melt in the allotted time, so cut it on those scored lines please. You will have a very hard clump that you’ll have to pull out of the pot, chop up, and put back in, all while trying not to make a huge mess, which is nearly impossible, if you don’t chop it at the beginning. *sigh* Anyway, lay the bits of almond bark over your peanuts, and then scatter the chocolate chips over that. Next is the Baker’s bar, which will melt just fine without cutting (it isn’t nearly as bulky as that bark *grin*). Put the lid on it, turn the crockpot to low, and walk away for one whole hour. Don’t stir, don’t lift the lid to peek, nada. Dance around that Christmas tree, pull the cat out of the said Christmas tree, or fall into the black hole of Facebook until your alarm goes off. Whatever floats your boat, but hands off!

Now you can stir and look how yummy it all ready looks!

/home/wpcom/public_html/wp-content/blogs.dir/622/26625504/files/2014/12/img_2321.jpg

Put the lid back on, set the alarm for fifteen minutes, and stir the mixture every fifteen minutes for an hour. It won’t be the prettiest girl at the prom, but it’ll be the one with all of the personality, so don’t worry if the sides look a bit icky like mine.

After the hour of stirring intervals it’s time to scoop. The original recipe just calls for laying out parchment paper, but I don’t have a very big kitchen with tons of cabinet space, so we lined cookie sheets and swapped them out. I tried one batch without a cookie sheet and it was pure misery with some of the candies oozing together into big blobs when I tried to move them a little, so I strongly recommend cookie sheets. The flat AirBake sheets worked best for us. Now, I have no idea what makes parchment better than wax paper for these, but I didn’t want to risk trouble by experimenting to figure it out. Parchment paper it is. *grin* Don’t forget to turn off the crock pot! If it’s really cool in your kitchen you can keep it at warm, but you’ll have a little trouble with the mixture staying runny once you get to the bottom. That’s better than a solid mass though, so I’d definitely do it if I felt it was necessary. You just don’t want to keep it on low the whole time you’re scooping.

We used a tiny cookie scoop for scooping the peanut clusters. While the mixture was fresh and hot, it was more runny and didn’t need the little sweeper arm. As the mixture set up a little more the little arm was quite useful. Make sure to drop the scoops apart from one another.

/home/wpcom/public_html/wp-content/blogs.dir/622/26625504/files/2014/12/img_2320.jpg

/home/wpcom/public_html/wp-content/blogs.dir/622/26625504/files/2014/12/img_2322.jpg

Once we had scooped it all (and licked the spoons *grin*) I noticed that the chocolate wasn’t setting up and realized that my house was too warm for them to set up. I must have accidentally grabbed a log of hedge when I loaded the woodstove, so it was nearly as hot as the face of the sun, while it was 30 degrees outside. *laugh* Some creative thinking resulted with utilizing our standing smoker as a refrigerator. Let my amusing substitution show you that if your refrigerator is full of Christmas meal prep, you just need to think outside of the box. Literally. *smirk*

/home/wpcom/public_html/wp-content/blogs.dir/622/26625504/files/2014/12/img_2323.jpg

I left them to cool for about four hours and then brought them in.

/home/wpcom/public_html/wp-content/blogs.dir/622/26625504/files/2014/12/img_2324.jpg
They were good and hard, so I was able to pop them into some zipper bags, and fit those bags into the remaining gaps in the refrigerator then. Even with samples left out (or happily melting in our bellies) I filled an entire gallon bag and a quart bag! Oh, by the way, don’t forget to let these chocolates sit out at room temperature for a little bit before serving, since you don’t want anyone to break a tooth on cold peanuts. Those suckers are hard when they’re cold!

Hopefully this little feature for Serve It Sunday will help if you’re looking for one more item to round out your Christmas dishes. These would also make a great gift, since it’d be easy to put the clusters into decorative mini muffin or candy liners, and then into a festive cellophane bag. The recipe is easy enough that you could cook dinner while it’s melting, too. Just don’t try to make a complicated dessert while making these for the first time. *laugh* They are so worth giving a shot and the original blogger even added decorative candies, so there is a lot of room to put your personal touch to these.

/home/wpcom/public_html/wp-content/blogs.dir/622/26625504/files/2014/12/img_2327.jpg
Enjoy!

Homemade Sloppy Joes

Homemade Sloppy Joes

Hi there! Did you miss me? I figured y’all could use a little break from my rambling after the whole daily blogging challenge. I couldn’t resist sharing a recipe though, so for Serve It Sunday I’m sharing my homemade sloppy joes. I adapted it from a recipe for Sloppy Joe Casserole that I found on Pinterest, original recipe is here, but after having the original we decided to tailor it more toward our taste. The original recipe was good (although I admittedly omitted two ingredients because I had to), but it had a bread topping that neither of us cared for that soaked up almost all of the sloppy joe mixture. After some experimentation this version was born.

I’ve mentioned before that I have some food sensitivities and sadly canned sloppy joe mixture became off limits due to the spices and additives. I’d honestly never seen homemade sloppy joes before, so when I found out it was this easy AND especially that with a little adjustment it doesn’t make me sick, I was tickled pink. The recipe in an easy to copy format will be at the bottom.

First, on the stovetop you brown some ground beef (I vary the amount of meat depending on the mood honestly lol) over about a medium high heat. I use the 92% lean ground beef and it makes for the least greasy sloppy joes I’ve ever seen.
IMG_2237.JPG

While that’s cooking I found that if I mix the spices into a paste first and then coat the cooked meat with that before adding the tomato products, the flavors distribute much better, so in a small bowl mix brown sugar, Worcestershire Sauce, ground mustard (it’s powdered, found in the spice aisle), and garlic salt. If you gather the cooked meat into a small circle and pour the spice mixture over it, it’s easier to coat the meat. Stir well to coat the meat (second picture).

IMG_2236.JPG

IMG_2238.JPG

Add tomato sauce and ketchup (yep, two tomato based ingredients) to the coated meat, then stir it in and reduce heat to medium. (Don’t put a lid on it unless you like runny sloppy joes.)

IMG_2239.JPG

We’re are some cheese loving folks, so in goes a generous helping of shredded cheddar cheese.

IMG_2240.JPG
After awhile the cheese mixes in and it gets all ooey gooey yummy. It may not look it, but this sloppy joe mixture is so thick that it doesn’t drip through the slats in my wood spoon once the mixture is heated well. *grin* It’s not quite “stand a fork in it” chili thick, but it’s pretty dang hearty.

IMG_2241.JPG

Use whatever bread vessel you prefer or have on hand (this go around I had leftover sub rolls from French Dips).

IMG_2235.JPG
It was so yummy and best of all it’s not overly acidic, so it shouldn’t bother sensitive stomachs! It comes together in about thirty minutes all in one pot, with minimal utensils to wash. Busy weeknight cooks can use the extra time to do a happy dance or kick their feet up. *grin*

Homemade Sloppy Joes (adapted)

1.5 lbs lean ground beef
2 tablespoons brown sugar, packed
1 tablespoon Worcestershire Sauce
2 teaspoons dry ground mustard
1 teaspoon garlic salt
1 (15 oz) can tomato sauce (no salt added can)
3/4 cup ketchup
Optional: grated cheddar cheese, to taste
Preferred type of bread

1. On the stovetop over medium high heat brown ground beef in a large skillet.
2. While meat is cooking, mix the brown sugar, Worcestershire Sauce, mustard, and garlic salt into a paste.
3. Once the meat has cooked gather the meat in the center of the pan and pour the spice mixture over the meat. Stir to coat the meat well.
4. Add tomato sauce and ketchup to the mixture and reduce the heat to medium. Do not cover.
5. If desired, add a generous amount of shredded cheese to the mixture and stir it in.
6. Once the mixture is completely warm it is ready to be served on your preferred bread (I recommend a bun or roll, since regular bread may become soggy and fall apart.)

Note: This is a thick version. If you prefer more liquid, cover the skillet after the fourth step. This should keep a bit more of the moisture in.

I hope you enjoy! 🙂

Cherry Chiffon

I thought for Serve It Sunday I’d share a super easy dessert dish just in case someone doesn’t have the recipe yet. It’s not only easy, but goes over incredibly well for gatherings and buffets. It’s really sweet, yet light and airy, with just a little tang from some pineapple. I’ll write out the regular recipe, then add my notes below it.

Cherry Chiffon
1 can (21 oz) cherry pie filling (in case you’ve never used this don’t drain)
1 can (14 oz) sweetened condensed milk
1 tub (8 oz) whipped topping, thawed
1/2 can (of a 15 oz can) chunk pineapple, drained
1 cup miniature marshmallows.

Stir ingredients together, chill and allow the dessert to set up overnight, and serve cold.

My notes: We love this dessert, but we’ve tweaked the recipe a little. First, we prefer to use crushed pineapple. It seems to incorporate a lot more thoroughly, so there aren’t just pockets of tanginess. Second, we prefer to make the chiffon creamier, so I actually use two tubs of cool whip. And last, everyone loves the marshmallows, so I add the whole bag of marshmallows. It makes the dessert a bit sweeter, but gives more umph to the texture, and people can just cut back on the portion size if it’s too sweet to them. In all of the years that I’ve made this I haven’t noticed a difference in brands of the sweetened condensed milk, but I have noticed that some brands of pie filling has a few pits in them, so watch it carefully as you dump it into the bowl. I usually empty the can into the bowl first, just so that I can double check, although Comstock brand has the least problems. The chilling is a huge part of making this dessert impressive. It gives the chiffon time to set up and get super fluffy instead of just creamy, so don’t get impatient and try to serve it quickly. I’m adding a picture of it, although it’s the picture that Eagle Brand posted of it, since they’re experienced with setting up food shots and I’m not. Mine didn’t look nearly as pretty. One thing to note though is that they didn’t let theirs set up, so it looks uber creamy instead of fluffy. Expect yours to look more like the inside of a meringue, all airy, especially if you indulge with my version.

IMG_2071.JPG

I hope you don’t mind my posting such a basic recipe, but it’s a fantastic one that is always requested when I go to gatherings, so I figured it’d be the perfect one to share. 🙂

Sugared Cranberries

I’ve been working on a little festive snack to have available for munching. I’ve been hoping that although it’s not overly healthy, it’s a step into getting Larry to start eating fruits. *grin* So when one of my favorite blogs posted a recipe for sugared cranberries I figured this was the one that would probably be the most likely to succeed with Larry. He loves tart and sour foods, as in he can actually straight up eat a lemon and enjoy it. *shuddering in mock horror* I’m more into mild flavors, probably because of my sensitivities from my illness that makes most regular things pack quite a punch to me.

I’m not going to post the actually recipe, since the blogger did a fantastic job, and I love recommending their awesome blog, so if you like what you see and read here, then hop over to Our Best Bites for the recipe please.

First off you rinse the fresh cranberries and then soak them overnight in simple syrup (I soaked them for 24 hours actually and used their 1:1 ratio syrup).

IMG_1931.JPG
Since cranberries naturally float I had them in a large measuring cup with the syrup, and then an empty margarine tub filled halfway with tap water to work as a weight, which I placed on top of as many of the cranberries as possible, and then I wrapped it in plastic wrap to try and keep the cranberries as submerged as possible. Basically:
IMG_1929.JPG
Scoop the berries out and let dry for an hour on a drying rack over foil. Now, the recipe said to make sure they weren’t touching. Um, pretty much impossible for me, since they kept trying to roll off if they were anywhere near the edges. *laugh* As long as you work with the berries after that hour then they’re easy to pull apart if they happen to stick together. Since I’m a slow mover the ones at the end of my project dried the longest and a few needed a little umph to pop apart. If you’re not going to work with the berries for a while I’d definitely recommend that you follow their instructions to keep them from touching, even if you need to do two separate trays!

IMG_1932.JPG

After they’ve dried you put a handful into some sugar and coat them. Now, I had a brain fart when I made my grocery list and forgot that the recipe recommends a coarser sugar, so I only had plain granulated sugar. It works, but you can’t just roll them in the sugar and call it good. To make a good coating with plain granulated I found that rolling all of the handful together first, and then working individually after that worked best. The initial roll keeps any of them from sticking, especially if they are bouncing into one another while you work the sugar around. Then I found that mounding and patting the sugar onto the berries seemed to hold the best. The coarser sugar is supposed to cover the berries much better and I bet it’s much easier to work with for this. Anyway, I also noticed that the longer I worked, the coarser my sugar became because of the syrup clumping some of it, and the better it covered, so when I ran out of sugar and had to add fresh, I dipped my fingers into some syrup and then swirled into the sugar. My fingers got coated, so then I just rubbed them together and let the clumps fall into the sugar, and mixed them into the rest of the sugar. It made all of my fresh sugar a bit coarse and the coating process went much faster then.

IMG_1924.JPG

It took me a lot longer than I expected to roll one bag’s worth of sugared cranberries, almost an hour and a half total. I’m a slow mover these days, but even for me that’s a bit long. I think the coarser sugar would massively speed things up, plus make sure you’re generous with the amount of sugar in your bowl for rolling! The more abundant it is, the easier it goes on. I’d much prefer to throw some leftover sugar out next time over spending so much time at this. *laugh* The coated berries dried on a wax paper lined cookie sheet for two hours. I think next time I’ll let them sit an extra hour. The coating was mostly hard, but I noticed that the coating was vet crumbly and came off easily as I moved them individually to the container, so I’d recommend three hours. If your home’s air is moist I might consider just a little more drying time even.

IMG_1933.JPG

Anyway, let them dry and then transfer them to a container. I’m using a cake pan that has a snap on lid for easy access for snacking. They emphasize in the recipe to keep them in a single layer to reduce rubbing off the coating. I think they look gorgeous and they’d be beautiful in a small crystal bowl as an after the big meal cleanser. Although it didn’t show up in the picture the sugar sparkles with the light; they look almost like a frost hit and you brought them right inside, so the ice is still sparkling and coating them. *happy sigh*

IMG_1934.JPG

They are truly pretty good and probably a healthier little snack than some options that are readily available at this time of the year. I’m a fan of cherry craisins, but not cranberries themselves, since I drank cran everything for most of my childhood, but I actually like these, so that says a lot! They’re totally worth trying again, too. I learned a lot this round and even thought of a few things I want to try next time. I think I’ll add some cherry extract to my simple syrup and see if I can incorporate a little of that flavor since I love cherry craisins so much. Also, I’ll definitely use a mixture of the finer sugar with a coarser one. I love that this recipe actually leaves you a lot of little options to tweak to your family’s preference, too.

I hope you’ll give these little treats a try and also that you’ll take a peek at some of the great recipes that the ladies over at Our Best Bites post. (And no, I received absolutely nothing from them for this recommendation or post. I just like them, and this snack, so I wanted to share. *smile*) I hope you have a relaxing start to your holiday week and that you carve out (see what I did there? lol) a little time to pamper yourself. 🙂

Simple Syrup

I’ve been planning out our Thanksgiving meal with our parents and am getting a few things done before things get busy. One must have for us is some sweet tea, but since preferences vary I am going to be set up for people to sweeten to their taste. For a really good tea I’m a firm believer in using simple syrup instead of granulated sugar, since it incorporates so well, doesn’t leave part of the sweetener at the bottom, and keeps the tea nice and smooth. Until I got The Cozy Chicks Kitchen Cookbook (ebook) I didn’t know that simple syrup was so easy to make; I’ve been making it ever since. I thought I’d share my experience with their recipe in case anyone else has been too intimidated to try it, too. (Note: The Cozy Chicks are a group of authors who write a type of mystery called a “cozy”, and the recipes are either from their books or “used” by characters in their books.)

A quick word on simple syrup. The recipe I used is for a thicker syrup, with a 2:1 ratio, which is more common with southern sweet tea. Others are much thinner with a 1:1 ratio. I love the thicker syrup because it goes a lot further, so I don’t make it as often. A little bit goes a long way.

Leann Sweeney’s “Jillian’s Sweet Tea” has the instructions for the thicker simple syrup in her recipe. Basically it’s just a 2 sugar to 1 water ratio, so 6 cups of sugar to 3 cups of water. If you’re using bottled water, it can be hot, but if you’re using tap, definitely use cold water, since it’s the cleanest water for drinking (think no water heater). Mix the sugar and water in a saucepan/pot on your stove. I warn you, it’ll seem so extreme when you see all of that sugar. Lol.

IMG_1887.JPG
Heat the mixture on medium-high until the sugar dissolves and the liquid is clear (takes 5-10 minutes). You will see the following, but that’s not enough.

IMG_1888.JPG
It’s tempting to stop now, but trust me, if you keep going it’ll become so beautifully clear you can see the tiny nick in the bottom of my pot. *laugh* Stir/whisk the liquid until the sugar is fully dissolved. Sometimes it’s hard to tell if there is sugar at the bottom or just bubbles, so I usually turn it down a tad when I’m unsure, which reduces the amount of bubbles and lets me see the bottom clearly.

IMG_1902.JPG
Let it cool enough to pour into a bottle or jug and seal it (I just use a lidded jug with a pour spout that is blocked when I turn the lid). If you let it cool too much and you see some crystals start again on the top (like if you’re trying to multitask and vacuum while waiting, but encounter a little detour that you have to clean up in order to finish vacuuming, and then you have to fold that fresh load of laundry, and oh no! you suddenly remember the mixture after an hour *grin*), just warm it back up.

Most believe that simple syrup can sit sealed on your countertop, although some people feel quite strongly that it must be refrigerated. I’m not about to tell you what to do, but I will say that mine sits on the counter not far from my tea maker, and the only problem I’ve ever had is when I’ve forgotten to close the seal and some of it formed clumps of sugar.

A great thing about the syrup is that it’s really easy to flavor, too, by cooking with a vanilla pod, extracts, herbs, or even mixing in some steeped flavored tea into the mixture while dissolving the sugar. www.food.com has some great recipes/instructions for flavored syrups.

If you want to make some and have any questions, I’m more than happy to help. It’ll work great in tea or coffee, and I’m even using it to make a crunchy coating on cranberries (if it turns out I’ll post it soon). It’s a great recipe to have in your back pocket. 🙂

Chicken Frito Supreme

Chicken Frito Supreme

Hi there!  In honor of Serve It Sunday I want to share a new recipe that I found on Pinterest that will become part of our regular meal rotation.  The original recipe is at http://www.redaprongirl.com/chicken-frito-supreme/, although mine has a few changes plus a little tip.  This meal comes together without a whole lot of work, especially if you all ready have some trimmed chicken breasts ready.

We used:

2 trimmed chicken breasts, diced

1 cup salsa (due to my sensitivities I used extra mild picante instead, but it’s totally whatever you prefer, and I only had the one cup of salsa, so that’s why I went with some Ro-tel.  If you have a full jar of salsa, then use the original 2.5 cups of salsa and omit the Ro-tel)

1 can mild Ro-tel

1 can of chicken broth

5 tbsp. cornstarch (original calls for 3; if you use a picante or Ro-tel, then you will also need more cornstarch)

Grated cheddar cheese

Fritos chips

2 cups Instant Rice

Sautee the chicken until it’s cooked through (we went with two breasts because we didn’t want it as meaty, while the original recipe calls for 4), and then add the salsa/Ro-tel, broth, and cornstarch to the chicken.

ChickenFrito1 ChickenFrito2

Here’s where I take a detour from the original recipe.  It says to “let simmer while rice cooks”.  Most of the time cornstarch needs some heat to become active, just like when you make gravy, so after I stirred the mixture together (and added the extra cornstarch beyond the original recipe) and let it simmer for a while, I finally realized why the mixture was still thin and increased the heat to medium high just until it came to a boil. I then turned it down and let the mixture simmer, stirring frequently, and it thickened up well.  I cooked the instant rice with hot water as the package indicated.

(My feet have been excruciating for the past few days, so I was sitting on my knees on my walker to cook today.  I stepped down to rinse a measuring cup and when I turned back I discovered that Abby had taken advantage of my walker to check on the meal.  *laugh*  Apparently it smelled good, because she really didn’t want to get back down to the floor! *grin*)

ChickenFrito3

Look how yummy the sauce looks once it thickens:

ChickenFrito4

Once everything is cooked, layer rice, chicken sauce mixture, shredded cheese, and fritos on each person’s plate.

Chicken Frito Supreme

Chicken Frito Supreme

It is SO good and surprisingly hearty.  I only ate half of the plate of food.  We love cheddar, so we were pretty generous with the cheese, and I love how gooey it got after sitting on the hot chicken sauce mixture for a few minutes.  You can change up the chips, but I agree with the original blogger that Fritos really makes this dish pop.  I think it’s because of the corn flavor rounding out the almost Mexican food flavors.  If you like a meatier dish, then you can totally add more chicken.  The two breasts turned out to be the perfect amount for our preference (which is ironic, since Larry is very much a “meat and potatoes” man).  I like that the recipe is a good start that allows for a lot of versatility.  I really want to stress though that if your sauce mixture doesn’t seem to be thickening, then you need to bring it up to a boil and then let the mixture simmer, just like you would with a cornstarch based gravy.  It makes a world of difference.  If you have a really thick and hearty salsa, then I’d start with 2 tablespoons of cornstarch and add as needed, if needed.  We’re going to make this again next week and we’re going to add some sliced black olives when layering.  Mmmm.  I hope you give this recipe a try.  You serve right from the two pans, and no baking needed, so it’s a great meal for a busy day in my opinion.

If you try it, I’d love to hear about your experience and especially any tweaks you made.  Until tomorrow 🙂

Beef Sundaes

In honor of Serve It Sunday I thought I’d go with a savory twist on a sundae.  Now, before you wrinkle your nose and think I’ve gone completely off my rocker, it’s just called that because it’s layered much like a dessert sundae would be.  If you’re familiar with the KFC Chicken Bowls, then this recipe will remind you a lot of them, except this is kind of the hot beefcake cousin of that.  *grin*  This recipe has several names and variations in the Midwest and they’re even served at some fairs, so there’s a good chance that some of you will be familiar with these.  The best part is that we found some shortcuts to make this meal super quick and easy, so we can have a hot meal even on my really bad days when it’s a struggle just to get out of bed.  If you’re one of those people that likes to make everything from scratch, look away now.  *laugh*  This recipe is for those people that watch Sandra Lee’s Semi-Homemade.  😉

See, I told you it was savory

See, I told you it was savory

Are you still with me now that you’ve seen that it truly is a savory dish?  *smile*  You’re going to put a scoop or two of mashed potatoes in the bottom of the bowl, sprinkle some corn over that along with some shredded cheddar cheese, and pour some hot topping (gravy) with roast beef right over the top.  Some people add a small cherry tomato on top to complete the whole sundae thing, but I prefer to not mess with this flavor combination.  *laugh*  We take several shortcuts with this meal.  We make instant mashed potatoes to make this super quick, start with a packaged gravy mix, warm up a bag of freezer steamer corn, and even use thick cut lunch meat.  You can make less dishes for yourself if you use packaged shredded cheddar instead of shredding it yourself, too.

So, start your gravy and your mashed potatoes.  I’m not going to post any pictures of making the potatoes since there’s nothing interesting about that, other than for the two of us (one picky eater and one country boy) plus some leftovers we followed the 3-4 servings instructions.  I am going to put a few of the gravy, though, since I found out that some people have never used a gravy mix before.  We love McCormick’s Brown Gravy Mix so much that I buy it in bulk.

Start that Good Brown Gravy

Start that Good Brown Gravy

Any country fans out there?  Do you have “Good Brown Gravy” in your head now?  lol  Anyway…I wanted to make 3 cups of gravy, so I used 9 tablespoons of McCormick’s Brown Gravy Mix (if you’re using the packets I’d follow the instructions on there and make two packets worth), and added a tiny bit of water to the powdered mix.  I whisked it until it created a paste and then slowly whisked in the remaining 2 1/4 cups of hot water.  Creating the paste and then slowly whisking in the remaining water will ensure that you have a smooth gravy.

After whisking water into the paste

After whisking water into the paste

We then chopped up some leftover thick cut roast beef lunch meat, which was then added into the gravy, and simmered the combo to warm the meat up.

Chopped Roast Beef Lunch Meat

Chopped Roast Beef Lunch Meat

Add Meat to the Gravy

Add Meat to the Gravy

While the meat simmered in a delicious bath I steamed a frozen bag of super sweet corn and drained it.  Once the corn and meat are warmed up, it’s time to build your beef sundae.

IMG_1211 IMG_1212

Pour the meat sauce over and dig in!  I don’t add salt since the gravy mix has a sodium kick to it all ready, but the big guy likes to add salt and pepper to his.  The last key tidbit I’ll give is that you have to try and get all of the layers in each bite for the best flavor profile.

Mmm Hot Beef Sundae

Mmm Hot Beef Sundae

The cheese melts into that meat and gravy, then there’s the creamy mashed potato, and a bright pop of sweet corn…a delightful bite and a super easy meal!  I hope you give this recipe a try and enjoy it.  Although I’m obsessed with this flavor combo you can totally change this up so easily to fit the interests of your family.  This is a great dish to sneak in a bit of veggies into, by the way.  *grin*  I wish you a wonderful week and happy pampering.  🙂

Beef Sundae Recipe

Makes about 3 not-overly-healthy sized portions 🙂

3-4 servings of instant mashed potatoes, prepared per package instructions (which calls for water, milk, margarine, and salt)

9 tbsp. McCormick Brown Gravy Mix

2 1/4 cups of hot water

Leftover roast beef lunch meat (I use about 3 cups worth)

One bag of frozen steamer super sweet corn, steamed and drained

1/4 cup shredded cheddar cheese, to taste

Whisk a tiny bit of water into the gravy mix until it creates a thick paste.  Whisk in remaining hot water and bring to a boil over medium heat while stirring frequently.  Reduce the heat and simmer about 3 minutes.

While gravy is simmering prepare the instant mashed potatoes per package instructions.  Chop leftover roast beef lunch meat into bite sized pieces and add to the gravy after it has simmered.  Continue to simmer the gravy combo until the meat is warmed through (about 3-5 minutes usually).

While gravy is finishing steam and drain the corn.

Once the hot ingredients are all heated through build each sundae in a heat resistant bowl, starting with a scoop (or three, per preference) of mashed potatoes.  Sprinkle a handful of shredded cheese and about a quarter cup of corn over the potatoes.  Ladle the gravy and meat mixture over the top.  Add salt and pepper to taste, optional.  Enjoy!