Just a little reminder for my fellow Whovians…

So far no one has commented about the marks on my arm and hand. I think I’m one of the few in my area to wave the nerd flag though, so I’m not too surprised. *laugh*
Just a little reminder for my fellow Whovians…
So far no one has commented about the marks on my arm and hand. I think I’m one of the few in my area to wave the nerd flag though, so I’m not too surprised. *laugh*
How is that for an interesting post title? *grin*
I thought it would be fun to give you a little sneak peek into what is in the works for some new soaps. While I’ve been yoyoing with health issues, medication changes, and taking advantage of energy bursts to do some Spring cleaning, I’ve also been cooking up some inspiration for my business.
First up is something mostly geared to kids, although I think it might be cute to add to my men’s combo, as well.

I found this silicone mold at a reduced price on Amazon and thought that it might produce some really cute soaps. I realized that I don’t have many male friendly soaps, so to speak, and set out to remedy that. What I really like is that the cavities are a decent size, so the soaps will be a realistic size instead of the tiny decorative variety.
Next it’s time for some braaaaaiiiinnnnssss. Sorry, I couldn’t resist dragging that out like my inner monologue did and I obviously couldn’t resist getting the following mold when I ordered the automobiles mold.

I figured that screenshot from the vendor ad gave the best view. They won’t be very big soaps, which works well for this, since I plan to add a bit more soap to them anyway. My morbid creative side really, really wants to drizzle some red soap over it to make it all bloody looking. *laugh* In theory the drizzle might follow along the brain grooves and look really grotesque. *crossing fingers* I think bloody brain soaps would be an awesome addition to my Dark Side soaps (name keeps getting changed – but I basically want a line of products that pertain to skulls, monsters, and supernatural, etc.). I figure that Black Magic, Love Bites, And Malice & Mayhem will fall into this category, too.
Speaking of Malice & Mayhem I haven’t been able to make another batch yet, but thought I’d share my trial run. My hot pink dye speckled on me the first round, so instead I re melted and poured into the Weird Science mold, which has beakers, eye balls, and partial skulls. The second round just don’t have enough pizzazz. I had an image in my mind of some truly hot pink soaps for Mayhem (I have been researching how to get a better black result in soap, so I haven’t attempted the black and glitter Malice soaps yet). As you can see in the next picture neither round came out very flashy.
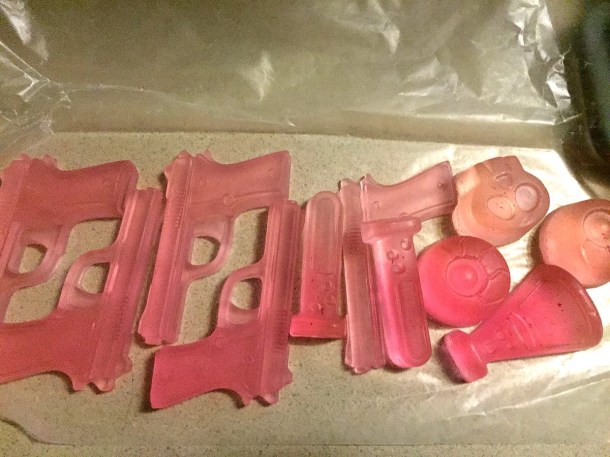
I seriously love how dainty yet fierce the little gun soaps are, though! I think I might end up doing some wacky color combinations for Mayhem instead of a bright pink, since it took a lot of dye to get to these shades, and I don’t want to risk staining customers just because I wanted a brighter pink. My mom and I have been tossing around some ideas for staging the marketing picture for the M&M soaps, and if any of our ideas pan out, this is going to be the most professional business pic I’ve done. *crossing fingers* With better weather coming I look forward to being able to stand for longer periods of time and try out some of the dye tips I’ve found. Hopefully I can make a few variations to show you soon.
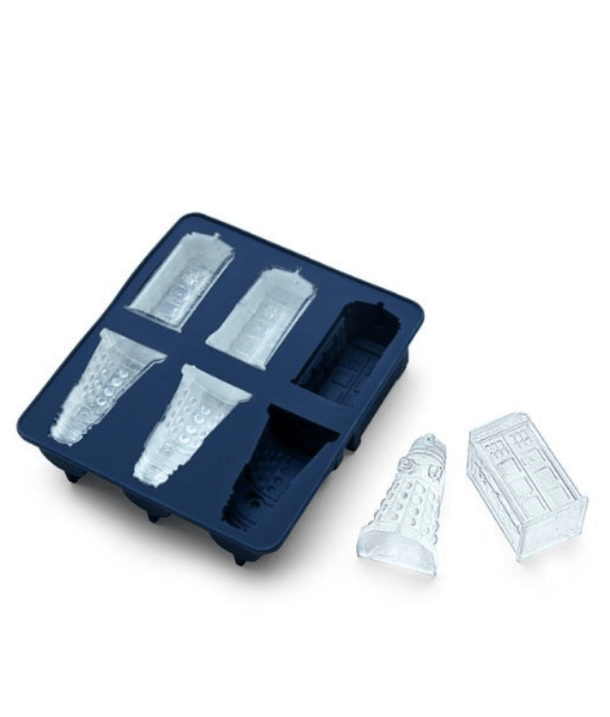
Lastly, I thought I’d see if I can get a little feedback. I’m debating a set of silicone molds I stumbled across while looking at the two that I bought. Sometimes my nerd flag flies so high and proud that it gets in my eyes and I can’t look at things objectively. I’m a little concerned that this might be the case with these molds. Would any of you consider buying Star Wars themed soaps? Or Tardis soaps? Or are these a bit too out there to have a chance at being a popular item?
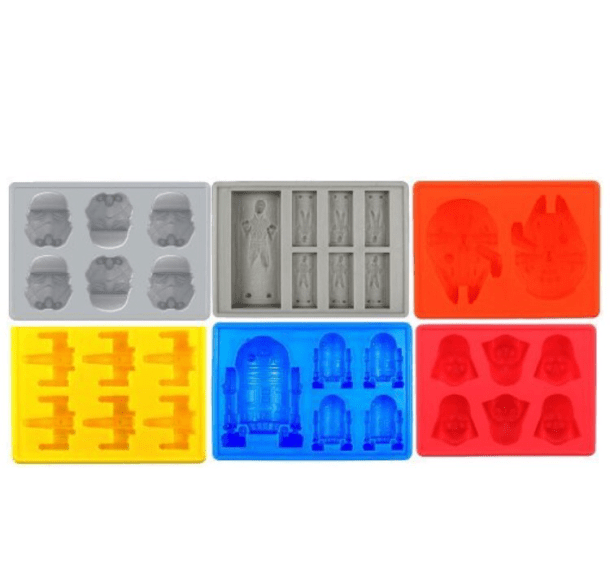
I honestly just don’t know what others might think. I mean, part of what makes my business different is because I try to offer very creative and unusual things that you don’t usually see. I hope that I’m set apart because I will only sell something that I can vouch for (with my sensitivities I am super hard to please when it comes to topical products) and that I do a lot of research to hopefully help others work a little natural pampering into their lifestyle. The fear that I am getting a little too “out there” is growing though, so I figured I’d put the question out there. If you have the time to give me your opinion, I greatly appreciate it!
I hope you all have a very Happy Easter, if you celebrate it. I plan to nibble on some Cadbury Eggs while looking over my color wheel to help decide what I want to try for the Mayhem soap. 🙂
If you’ve been following my blog for the last few months, then you know I’m on a frozen meal prep kick and learning how to come up with energy saving ingredients that allow me to still cook a meal on my bad health days. One ingredient I had trouble with for months was basic diced chicken (in bulk). My crock pot chicken always came out tender, but always shredded instead of holding up to being diced, and I really wanted some diced chicken that I could freeze into portions that didn’t cost an outrageous amount (really grocery stores?! That has to be a massive profit margin!). I tried a lot of variations until I finally came across a post via Pinterest that explained how to get flavorful roasted chicken without being super intimidating. The original post is at Roasted Chicken Breasts and I urge you to read through it if you haven’t mastered chicken yet.
I followed the instructions on the site, although I used Daddy Hinkle’s dry marinade since I have a lot of that on hand (we get a combo pack with the original liquid marinade since that’s the only way it’s available around here and go through the liquid WAY faster lol). I bought a big package of chicken “tenderloins” for a great price at Sam’s Club and it took three batches to cook them all. Oddly enough I had to cook the tenderloins just a bit longer than the breasts in the instructions, but it gave me a time frame to start checking with my meat thermometer. They came out mouthwateringly gorgeous.
While each batch cooked I cooled the previous batch and then diced them up, after I performed some quality control checks. It took eating three before I actually declared this a success. You know, you can’t rush quality control. We all have to fall on our sword sometimes. *grin*
Anyway, one bulk package from Sam’s took about an hour and a half with prep, baking, and cutting, and filled three freezer zip bags, as well as a bag of some solid tenders for lunches in the refrigerator.
These have been SO handy too! I thawed a bag and used half of them in the Frito Supreme dish I previously blogged here. I was able to just warm the pieces up with the wet ingredients and the meal was ready for plating within ten minutes!
I never realized until I read the roasting instructions that I had mostly been over cooking the chicken, which was why I couldn’t get that store bought tenderness when I tried baking. I always use my thermometer, but I was testing WAY too late. Doh! She made a great point about needing to season the chicken, too. I’ve always seasoned the dishes themselves, but it never dawned on me to use the Hinkle’s directly on the chicken in this capacity until I read that post (for shredded crock pot I just do a few bouillon cubes and water, plus a little poultry seasoning, usually). I love that I can use whatever I can tolerate at the moment, too, since I can’t always tolerate the same spices! Bonus: the sliced pieces have been flavorful enough as is to make a healthy topping for Larry’s salad “lunch” at work (what do you call meal break when it’s in the evening, yet not dinner, anyway?). I had never baked meat on parchment paper either and I think that was much better than the usual foil versions I had tried before. It also seems a lot healthier with a better texture, to us at least.
I really wanted to share this information since there are so many other variations out there and this is the first that truly worked for me. This helped us save quite a bit of money, keeps cooked chicken on hand for quick meals, and was so easy that I was able to do it on one of my not-so-good days. A few days later I cooked up a huge package of lean ground beef, unseasoned, that I throughly drained, broke up into pretty small pieces, and froze, too. Having precooked proteins on hand has made cooking during my worst point of the day a lot less daunting, not to mention a lot more cost effective, since I can get some great bulk prices. *happy dance* I can’t just pop on down to the market when I decide to cook, so having things on hand is essential, but can get expensive when you buy them in handy packages at the store. I’m absolutely tickled!
Are you interested in hearing about other hacks that I try? Do you have any other meal “hacks” that have made things easier for you that you wouldn’t mind sharing? My next hack attempt is going to be freezing blueberries. I’ll be able to have them for smoothies even when it’s hard to get good ones at a decent price out in The Midwest. I just love life hacks! 🙂
I thought I’d share this super helpful tip I learned recently. I’ve been trying once a week to do the prep for several meals and have been trying to even do the whole homemade freezer meals thing. I’ve been using bell peppers a bit more than usual due to the meal preps (and because I’m suddenly not intolerant of them like I was, although I so far can only eat green ones). The worst part was that several of the peppers would go bad before the coordinating meals were fixed. I decided to see if it’s possible to freeze them and found tons of variations, so I’m not including any links this time. There are just so many versions and I have no idea who actually figured it out, so I don’t know who to credit. I’m very thankful to everyone else that knew how to freeze bell peppers though! Now I can just pull out the portion I need from the bag and fry them for a few minutes with meat for quick fajitas.
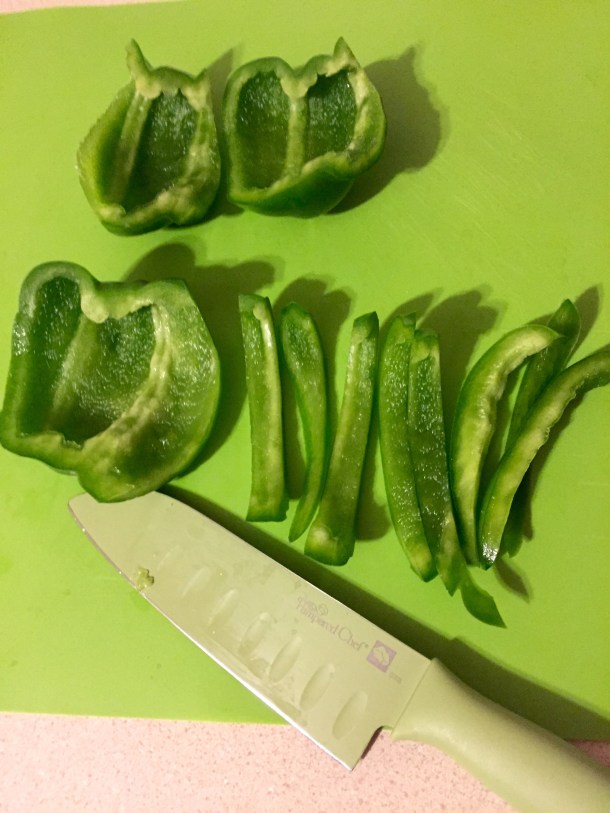
Basically you just prep your peppers, cut in the way you want, flash freeze them, and then you can bag them. There are some handy details I put together from all of the versions, though. First, make sure to dry your peppers after you wash them, before you cut them. You don’t want extra water during the flash freezing. Second (and this I actually learned from Top Chef), you can trim from a pepper in four to five cuts. The key is to start at the top and curve your knife to follow the flesh as you cut down, until you cut through the bottom. Third, try to keep the peppers from touching much, especially if you end up dicing them. That flash freeze will freeze them in clumps and it won’t be so easy to just grab a few. Last, this doesn’t work for raw usage. Once frozen the bell peppers must be cooked. They will be nasty once they thaw if they’re not cooked, so don’t try it. Bonus tip (although I’m still on the fence on this one): supposedly the bell peppers with three points on the bottom instead of four (or more) are sweeter and have a little less acid.
Instructions are basic, but at least I can provide pictures so that you know you’re doing it right. I started off by washing and drying the bell peppers, and then cut them off of the core as described.

Next I sliced mine into thin strips, since I knew that cut would work for my household. They are just the way we like them for fajitas and easy to dice if I want to add into some rice or something.
Cover a cookie sheet with wax paper and lay the sliced/diced peppers out on the paper, touching as little as possible. (This cut is more forgiving, so if they touch it’s not as big of a deal thankfully.)

If needed you can put another sheet of wax paper right on top of those peppers and repeat the process. Keep in mind that it’ll take a lot longer to flash freeze like this. It’s recommended that if you have the room, then lay everything out in a single level for quick and even flash freezing. I don’t have much space to dedicate to whole sheets all laying flat, especially with all of the freezer items I now have, so I had to try stacking. It works for us, but it definitely does take longer, so if you have room, stick to a single layer.
I have no real clue how long it takes to flash freeze. I’ve done this in single layers all the way up to three stacks deep and still haven’t really figured out the right time frame. My recommendation is that if you have the space and don’t mind a little bell pepper aroma for a day, make it easy and then just freeze them (exposed) overnight. Check on them and see if they are frozen through. If you have stacked them, you’ll probably package the stacks at different times, since the bottom ones will need some exposure to flash freeze. Here they are frozen. If you look closely you can see the little frost where the flesh was moist.


Peel them off of the wax paper (they’ll have a little cling) and put them in a freezer zipper bag. I did a whole bag of bell peppers from Sam’s Club, at a super great price, and ended up with three layers. They all fit in a gallon zip bag and I put a pop can beside it so you can see how much frozen bell pepper I have on hand now.
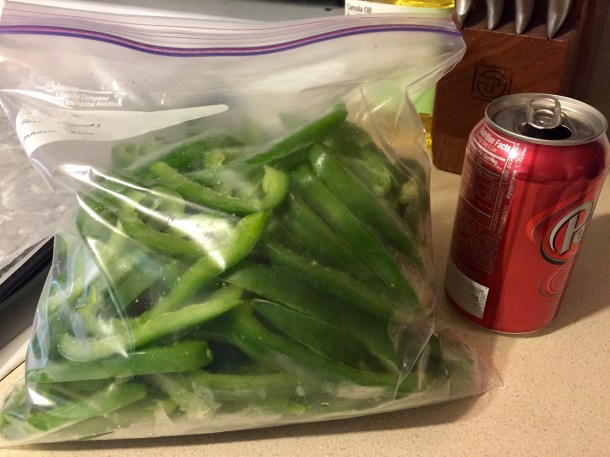
When I make fajitas tomorrow all I’ll have to do is pull out a handful and warm them in a skillet with the cooked, sliced meat for just a few minutes. Easy as can be and no need to cook all of your bell pepper dishes one after the other so that your peppers don’t go bad. *big grin* It’s such a small thing, but it has been a huge help!
If you have any questions, please don’t hesitate to ask, and I’d love to hear about your way if you all ready are a pro at this. 🙂 I’m hoping to discover more tips for meal prep as I get better at the freezer meals.
I haven’t written lately because I’ve actually been enjoying being a little more “normal” than I have been in years (not mentally of course – I’m still pretty much insane probably lol). I’ve filled my time with doing things and then a few marathons to make myself rest, so that I don’t overdo it and get really bad again. The tide began to change two weeks ago.
I saw my Fibro specialist and we went over my abnormal labs, plus went through older labs, etc. Since he’s actually an Infectious Disease doctor he is the one to ask about any wacky things that I might have picked up. He’s so awesome that he actually worked his way through the entire page of stuff I had researched. The best part is that he ruled out everything else except for Hep C, which he forgot that he was going to order labs for (so I’ll get those soon, but he really doubts it anyway). The abnormal labs actually are due to the muscle relaxers, as I had found in clinical trial results, although the reasons for the abnormal results were actually a good sign. The way he said it is that it just shows that my body is actually processing the medicine, although the higher dose is probably why I never had elevated labs before, and that although the labs were abnormal for a normal person we don’t have to worry until it’s many, many times higher than these abnormals. *happy dance* (Back on the muscle relaxers now thankfully! I can’t wait for the involuntary movements to stop again!) Oddly enough no one has ever tested for Hep C despite having several inches deep of lab tests. By the time I saw him I think we all figured everything had been ruled out all ready, so it slipped through. There are enough overlapping symptoms between it and the combination of conditions that I have that there is a slight chance that I have a mild case of it, but it’s most likely just the same old conditions. It’s kind of crazy to feel so happy over having the miserable conditions that I have, but I am so thankful not to be facing new challenges! He thinks that the other doctor’s nurse just isn’t familiar with chronic illnesses like mine, so that’s why she wanted to just blow it off until the next round of labs, and why she focused on the one part that she understood and was instructed to inform me about.
Next, we went through all of the other research. I had learned about a Midwest doctor that believes that most Fibro sufferers actually have black mold in their sinuses and has a very different treatment protocol, etc. As luck would have it my specialist actually knows a lot about this other doctor and knows that there hasn’t been any proof of success. He actually put it really well when he said “If you look for something strange in a group that has problems, then you’re going to find something”. Well, hmm. That’s true. If the black mold in the sinuses truly was the cause, then why hasn’t almost every one of those patients had tremendous successful recoveries? To give my doctor credit he also offered to get the labs and refer me to the other doctor if I’d like to check for myself, but I have no need since his thoughts make a lot of sense to me.
We also agreed on trying two new medications. One is prescription and the other is a supplement. The supplement is 5-HTP, which is a tryptophan in pill form, and helps with mood, appetite suppression, and sleep. As to the prescription, I had compiled a lot of success stories from patients and research, plus even talked to a few friends in the medical field, about Marinol. It’s not a recognized treatment for CFS or Fibro, however there has been a lot of success with it blocking the receptors. Using it for anything beside nausea/appetite is still pretty controversial, especially in the Bible Belt, but he agreed to prescribe it for me to try it for a few weeks. It had to be prescribed to help with the nausea I’ve had from the IBS and sinus stuff, but I don’t care what is said as long as I can get it. I don’t know if it will work for everyone, and it definitely won’t work for anyone that is still working, but so far it’s a huge success story for me. Between the two of them I am sleeping a whole lot, although it’s actually restorative sleep for once. *little chair dance* One of the benchmark symptoms of CFS and Fibro is that sleep is non-restorative, which is part of why we’re so fatigued. True sleep makes such a huge change, let me tell you! I still sleep really odd times, but who cares?! After I’ve been awake for a bit I get these bursts of energy and can get some stuff done. I made a bunch of freezer meal and partial prepped meals, cleaned several rooms, and made some product. The coolest part is that when the Marinol is in effect it somehow stops a lot of the chatter in my brain. At any given point I usually have at least a handful of messages bombarding my brain to say a body part hurts. I get tons of messages about pain that has no reason to exist, then on top of all of the hyper responses from my body I have the real pain messages, plus a lot of random thoughts. I’ve never understood when people talk about having just one thought or even staring into space without a thought. My mind has always been cluttered and busy. The Marinol quiets my brain and almost all of the false pain messages are quiet now. The pain that I experience now almost all has a reason – injuries, overuse, etc. I never realized how tiring it is to have so much input continually being processed until it finally quieted down. It’s been hard to relearn what my limits are without my body continuously complaining and it has been an awesome lesson to learn. I had truly started to believe that things wouldn’t improve again, so this has been a huge sun filled vacation during an ice age. *grin*
Today I started another two week trial of the Marinol and restarted the muscle relaxer. I’m hoping that the next two weeks will be just as successful, although it’d be nice to be awake during lunch a few times. *laugh* Poor Larry didn’t have any lunches made for him lately. It is super hard to fight off the sleepy pull from the medications right now and my eyes feel like sand paper is rubbing over them when I try to fight it. I’m going to just go with the flow for now and enjoy all of this sleep. *grin* Expect to see some freezer meals and prep shortcuts since those have been my current research topics. The next post will be an awesome shortcut that I’ve been absolutely delighted with. 🙂 Anyway, I hope you don’t mind my sharing what’s been going on and I’ll try to post the shortcut later today.
*cheesy grin* I have to say that I am totally loving the names for my new soaps. I finally had a wakeful, energetic day and got all of the last minute touches done, so now the two soaps have gone live on my site. *happy dance* Before I upload the pictures I wanted to say that these are the first product pics taken with my new DIY photo tent box and I am tickled! I still have some more tweaking and definitely a lot of learning to do, but will slowly try to retake pictures of my products. I played with background patterns, colors, and even scene fillers. I kept these backgrounds pretty basic to help make the soaps look even more dramatic. For Love Bites I actually used the back of some Valentine decoration’s packaging. *laugh* I thought that was rather brilliant myself. I had a lot of fun trying different backgrounds for Black Magic and ended up using present tissue paper over a piece of construction paper. I took a plain picture too just to make sure that the new box was actually making a big difference and boy howdy does it! I did very little editing with these and they were taken with my iPhone! Yep, I’m a little proud. lol Without further ado….
A little Black Magic:
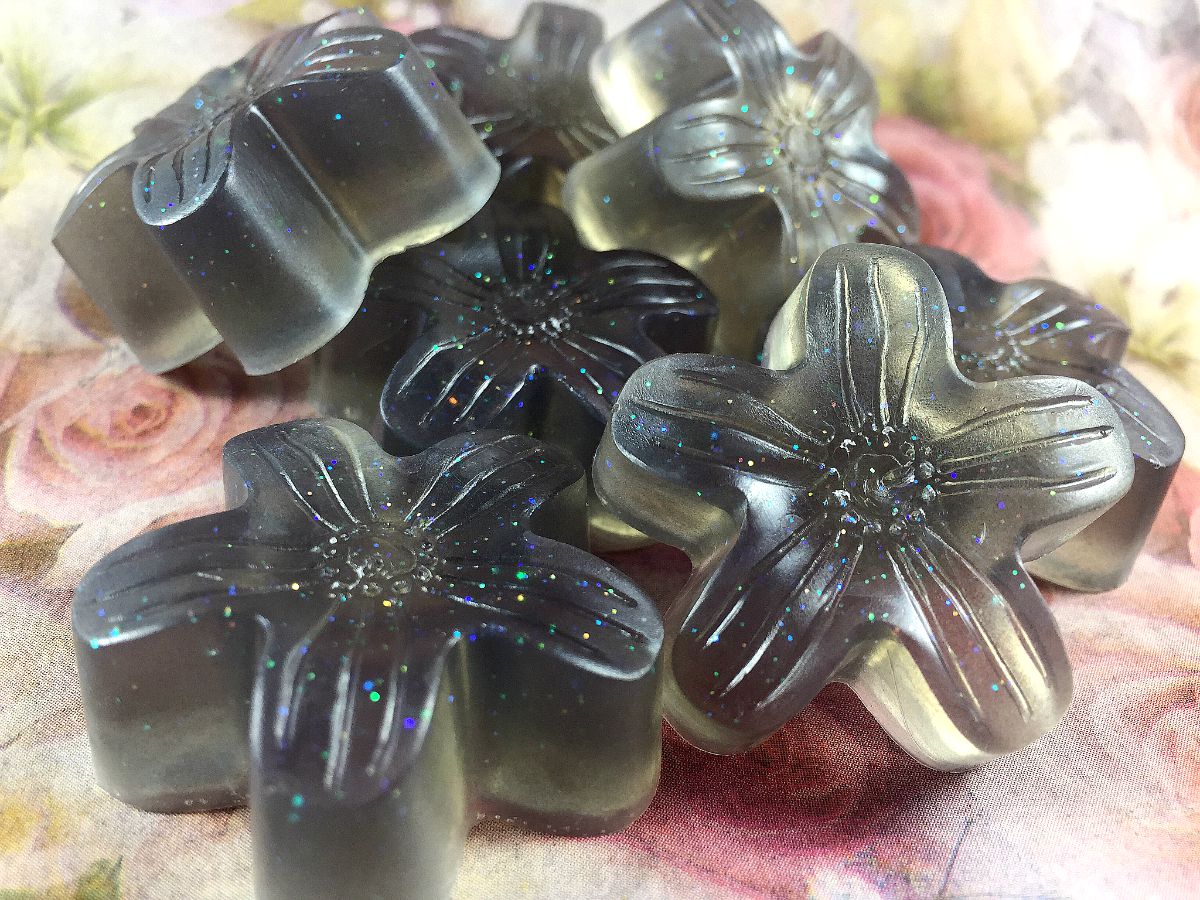
Black Magic Soap
Followed up with some Love Bites:

Love Bites Soap
Both soaps are now up and featured on my site too (way bigger pictures than the others *grin*) on my soaps page (just click the red “soaps” there and it’ll take you, or your friend *elbow nudge*, right to them). It’s amazing how many little details like hyperlinking I can remember when my mind isn’t being pulled a million directions. *laugh* Anyway, I totally love these soaps. I wish they turned out a bit darker since they looked like the perfect soft black when I poured the soaps, but being a little paler helps that glitter really catch the eye. I’m becoming such a glitter fanatic that I might need an intervention. Never would I have expected that of myself.
I had hoped to work on Malice & Mayhem tonight after making a bunch of lotions, but there’s a storm a’brewin’ according to the pain building in my ankle, so I’m going to chill out on the recliner with the fur babies instead. If you feel like letting me know what you think of the new soaps and brighter/clearer pictures I’d love to hear from you. Also, feel free to pin it to Pinterest if you really like them or send a friend the link. *grin* That’s enough shameless attention seeking for tonight, so until next we meet, pamper on. 🙂
I’m finally done researching, dealing, and wrapping my brain around everything. It’s been a long few weeks of dieting, medication withdrawals, fighting two bugs, and recovering from a few injuries. At least I stayed busy, right? *laugh* Plus, you should be proud, because we didn’t make the bloody snowman I found instructions for on Pinterest during either of the snow storms that came through in the meantime. *grin* It’s been SO hard to resist the morbid temptation, so I deserve a lot of credit.
First, I am really sorry that it’s taken me so long to respond to those that wrote to me. I hope that I replied to each comment; if I missed yours, it was not intentional! I want to tell you all that the support shown means the world to me and was a massive help in getting me through to this stage, despite it taking me a while to be able to come back and say so. I have a habit of crawling inside of my mind until I feel like I’m back in control. It’s something I’ve been working to improve, but I’m a work in progress, as they say. *smile* Regardless, thank you so much for the support, encouragement, and just being there.
I found a little light to focus on during my research. I kept researching for a good week after my last post about the possible causes of the liver damage and found that the muscle relaxers that I was on had a very rare instance during two clinical trials of Fibro patients showing liver damage occurring. Very soon after the medication was discontinued and it was fully out of their systems their labs returned to normal. The only thing that had changed in the few months between lab draws was that one of my specialists had doubled the dosage of the muscle relaxer to fully stop most of the involuntary movements and spasms. There is no way to know if I’m in that tiny percentile that may have troubles with anything beyond a minimal dose except by doing exactly what I did – I immediately discontinued the medication, cold turkey (you SO shouldn’t do that without physician approval and I am definitely not recommending it to anyone, but it’s what I needed to do in this situation), so that I would be able to get labs drawn at my next appointment, which is next week. This visit is to my guru, the one doctor that I fully trust, the one that diagnosed me after so many years of I don’t knows. Plus, he’s a take charge kind of guy. He won’t react like the other doctor’s nurse did and say “I don’t know” when I ask him if it could have been that medication, or what to change in my treatment plan, or how to manage the changes of my treatment plan and lifestyle that the nurse demanded. He won’t leave me on an iceberg in the middle of an ocean of fear. He’s pretty awesome. He’s really great about letting me be involved, and about getting involved when I ask him for help, so I have a good feeling that when I tell him about everything he will run follow up labs after the appointment to see if my counts have changed from discontinuing the medication. Even if they haven’t, it was worth the withdrawals and getting the movements back, because I’ve had a few weeks with hope. If it was the medication that had started to cause liver damage, and it has been reversed, then it reduces the likelihood that I am facing any of the scariest disorders, too. If my labs have improved, then most likely I’m just having reactivation of the EBV with progression of my relapse. I never thought I’d be happy for that, but it sure beats the other possibilities!!
I also need his help to keep up these dietary and lifestyle changes. Changing the diet of a regular person is one thing, but I have so many intolerances that it makes this a bit difficult. Add to it that almost everything has to be cooked from scratch now and with Chronic Fatigue it feels like I’m trying to climb a freaking mountain some days instead of just prepping and cooking a meal. I’ve been getting so sick due to reflux and I’ve had a nonstop bloody nose since my last post (small nasal ulcer from botched septoplasty), which has done an amazing job of making me nauseated about 75% of the time. Meh. Plus, limiting my dairy intake has only caused me to become absolutely obsessed with most things dairy. *laugh* We’ve always been big milk drinkers, although Larry has always drank more than me since I’m more of a sipper. Since I decided to use Slim Fast and Special K to keep the good counts up when I can’t eat, and it is SO much easier to figure up how much of each percentage I’ve had for the day then, I can justify having some milk fairly often. It’s been hard to limit my cheese intake, but I don’t crave it nearly as much as I do the milk. I figure I’ve tried, I made some changes that I can deal with, found out that I have some healthier cooking habits all ready (I’ve always trimmed meats really well, etc.), and found that I just can’t do everything that she demanded of me because my body is way more complicated than she thought or assumed or whatever. If she feels I didn’t give it enough of a shot I swear to you I’m going to ask her what her advice is for handling vomiting acid from reflux, and then I might just take her down with my cane. Unicorns might fart glitter too, so I figure that means there’s a slight chance that one of the mean thoughts floating around might actually take place some day. *sassy wink* Anyway…lol I am so exhausted, but I’ve been trying really hard. It’s always been pretty much impossible to get Larry excited over eating chicken anyway, so now that it’s a main protein he’s really not too wound up over the latest menus and changes. Thank goodness for Pinterest and the bazillions of chicken recipes that at least make it look and taste a little different every few days. *laugh* I managed to actually get an “it’s all right” for two of the dishes so far, so I’m learning to celebrate the small successes. And I burned out my crockpot. Seriously. It can now cook 4.5 pounds of chicken on low to so done it shreds itself when you try to pick it up with a fork in just over 3 and a half hours! Dude! So I have a new crock pot on the way next week. I splurged and got the fancy kind that even has a probe on it. I figure if it keeps me from overcooking a roast, then it’s made up the cost of the upgrade all ready. *grin* (No matter what I have to have one item of red meat a week – I mean, I’m in the Midwest! It’s impossible to go without red meat fully and it’s also a very cruel form of torture to limit it, too. Just saying.) By the way, I can’t even fake excitement over another shredded chicken meal. The blahs are worth it to help make meals easier though, since my fatigue has been so insane lately. I trim and prep the chicken breasts when I’m not really bad yet, then the slow cooker cooks them insanely quickly, and now I have precooked protein on hand, so I can get a meal in front of Larry within 20 minutes usually. Someone else will have to prep and clean up if I’m going to have enough energy to make an exciting meal out of it now though. Dishes are only awesome and exciting the first few times when they’re in a small rotation. *laugh* Maybe my failing crock pot will short out and give me super powers, or at least super energy, in the next week. Can’t blame a girl, especially a nerdy girl, for hoping.
As you can see from tonight’s post I get cranky and sassy when I don’t have enough red meat, dairy products, and energy. *wink* I put my crankiness to good use though. I even came up with super sassy ideas that would have worked as Anti Valentine’s themed products, but now they’re just going to be some fun and tongue-in-cheek items since I got too sick to get them done in time to market. I was going to wait to share, but you’ve read enough about the blahs to get some good stuff tonight! First, you’ll have to understand that I’m just not that into much of anything that’s really mushy, super cheerful, bright, or extra sentimental. I’m even making the “somebody farted” face just thinking about the words. To clarify, I can be all of those things (though if they happened at once I’m pretty sure I’d die, possibly from the shock to my system lol), but those moments are pretty widely distributed over my life and mostly avoided. *laugh* I may get all girly about glitter and pink, but add in anything cutesy and the “fart face” kicks in immediately. It’s totally cool that people are into all of it, but it’s just not for me (or especially Larry). And I found out that there are others that aren’t so into it either! (I even follow some Anti Valentine boards on Pinterest. Friends, trust me, there are some hilarious pins on those boards!) In honor of those that are a little edgier, shall we say, I wanted to make black glitter soaps for Anti Valentine’s Day. Mom and I made a batch of daisy soaps, named “Black Magic”, and a batch of skulls and crossbones, which I amusingly named “Love Bites”. I used a clear soap base, then a little new black sparkle soap bar color, and a few generous puffs of iridescent glitter that shimmers throughout the black soaps. Maraschino Cherry with an undernote of chocolate. I love these soaps so much! I’m not sharing pictures quite yet though. I’m hoping to build a photo tent box tomorrow and take pictures of them then, so I didn’t want to give in to temptation and share blah plain pics that won’t capture them as well. (See, I’ve been productive during my time away! I learned how to do photo tent boxes, took up Tai Chi [although I’ve only made it to fifteen minutes so far – but that’s big progress for a fatigued and hurting person], researched alternative causes for the liver damage, made a list of whimsical product names to invent products for, tried about twenty new recipes, and got quite far into my TBR pile!)
I saved the best for last, too!! Malice & Mayhem. Roll that title around in your mind a few times and delight in the perfection of that name. That is the name of my next batch of soaps. I got a silicone mold during my time away of small pistols. I’m going to sell a duo of pistol soaps packaged together with this name. One in black with glitter (can you tell that I LOVE how that combo turned out? Lol) and the other hopefully in hot pink. Malice & Mayhem here for all your gifting needs. *grin* I’m sure I’ll do later batches in some conventional, male friendly, colors too, especially since they’ll be awesome in the Redneck Combo, but this duo is for those sassy ladies out there. I really hope they go over well because I am so incredibly excited about them. The name, the colors, the mold…I figure I have ten months to experiment with the mold and maybe by next February I can do a sassy themed combo with “Love Bites”, “Malice & Mayhem”, and hopefully a few other whimsical and amusing items.
On that bit of cheerfulness I’m going to end my “return” post. *smile* Again, thank you for the support shown and hopefully I’ll have lots more cheerful things to post about this year like Malice & Mayhem! In the meantime, happy pampering. 🙂
I’ve been a bit quiet while fighting a sinus infection, coping with side effects from the antibiotic for said infection, resting a small hernia so that I don’t have to see a surgeon, and then, because I’m so gloriously accident prone, elevating my foot so three newly rebroken toes can heal quickly. My cup overflowed and I had no creativity to chat about. *laugh* However, I wanted to pop on to wish everyone a very happy and healthy New Year full of personal success and joy. And pampering, of course. It’s kind of my job to hope and help you work some pampering into your year. *teasing grin* Hopefully you have a safe and fun celebration however you are ringing in the new year!
Thank you for being there for this year’s journey and for your encouragement! My goals are to blog more consistently and revisit my previous creations to improve their pictures now that I have more experience (plus a better camera and a laptop), so hopefully there will be some fun and exciting posts coming soon! Here’s to hoping 2015 goes better! 🙂


Just in case you’re cramming in some last minute holiday desserts, or just have a sweet tooth driving you nuts like me, I thought I’d share one of my family’s favorite recipes that you can still make in time for the festivities. There are tons of versions and copies of this recipe, so I’m not claiming any new ground here. I do have a few tips though, plus I really want to share such a yummy AND easy enough recipe that even I can do it. If a recipe is Georgia-proof, then I feel it must be shared with the world. *smile* As usual, the easy to copy and paste recipe will be at the bottom, below the pictures and tips.
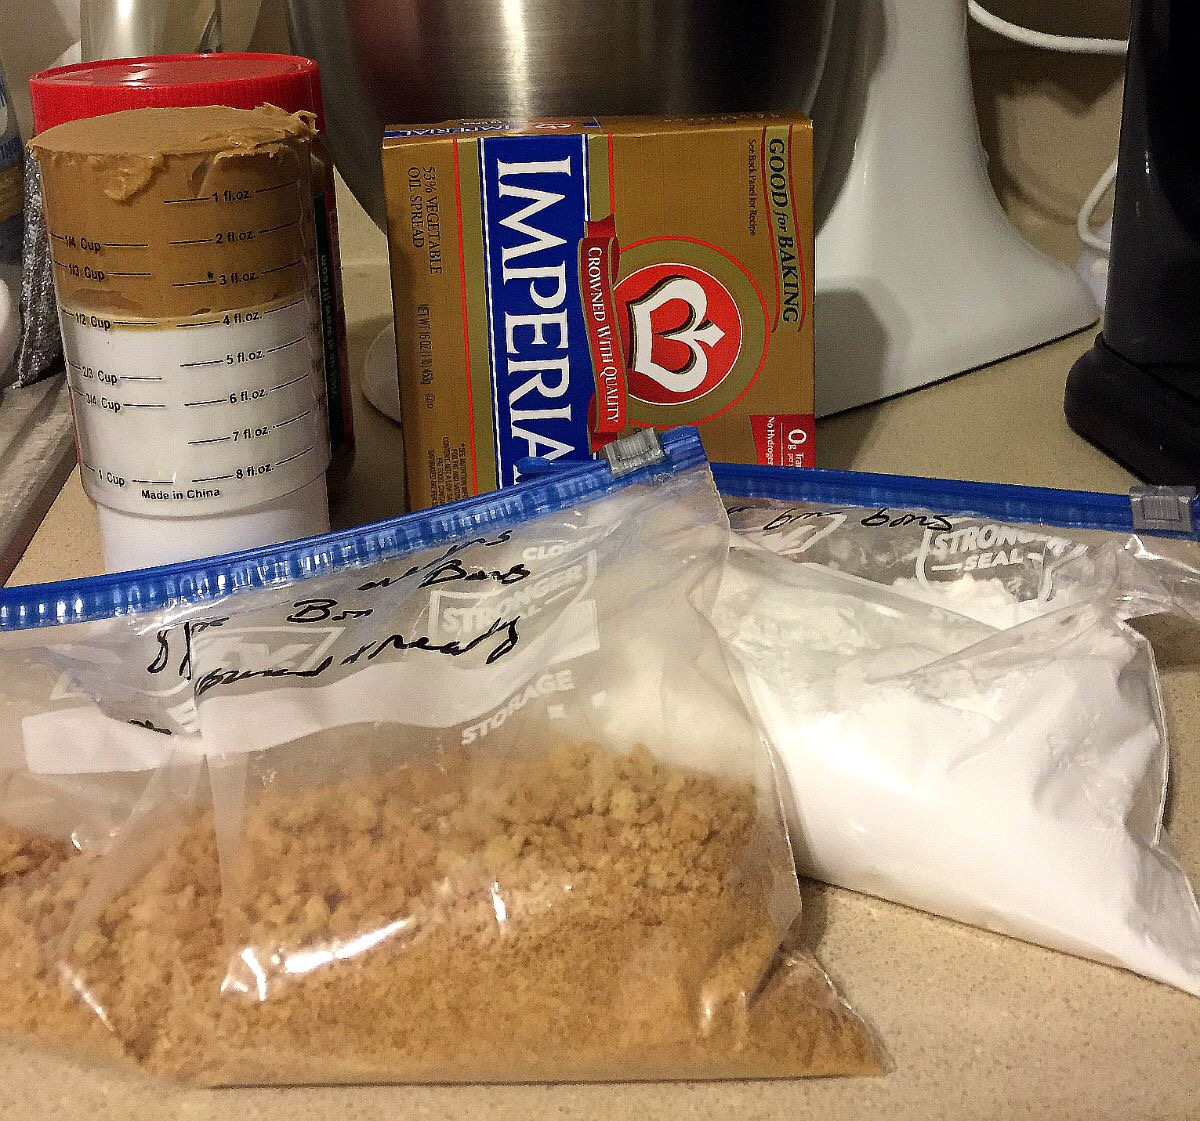
In a food processor or sturdy stand mixer combine crushed graham crackers, peanut butter, powdered sugar, and melted margarine until the mixture is thoroughly mixed.
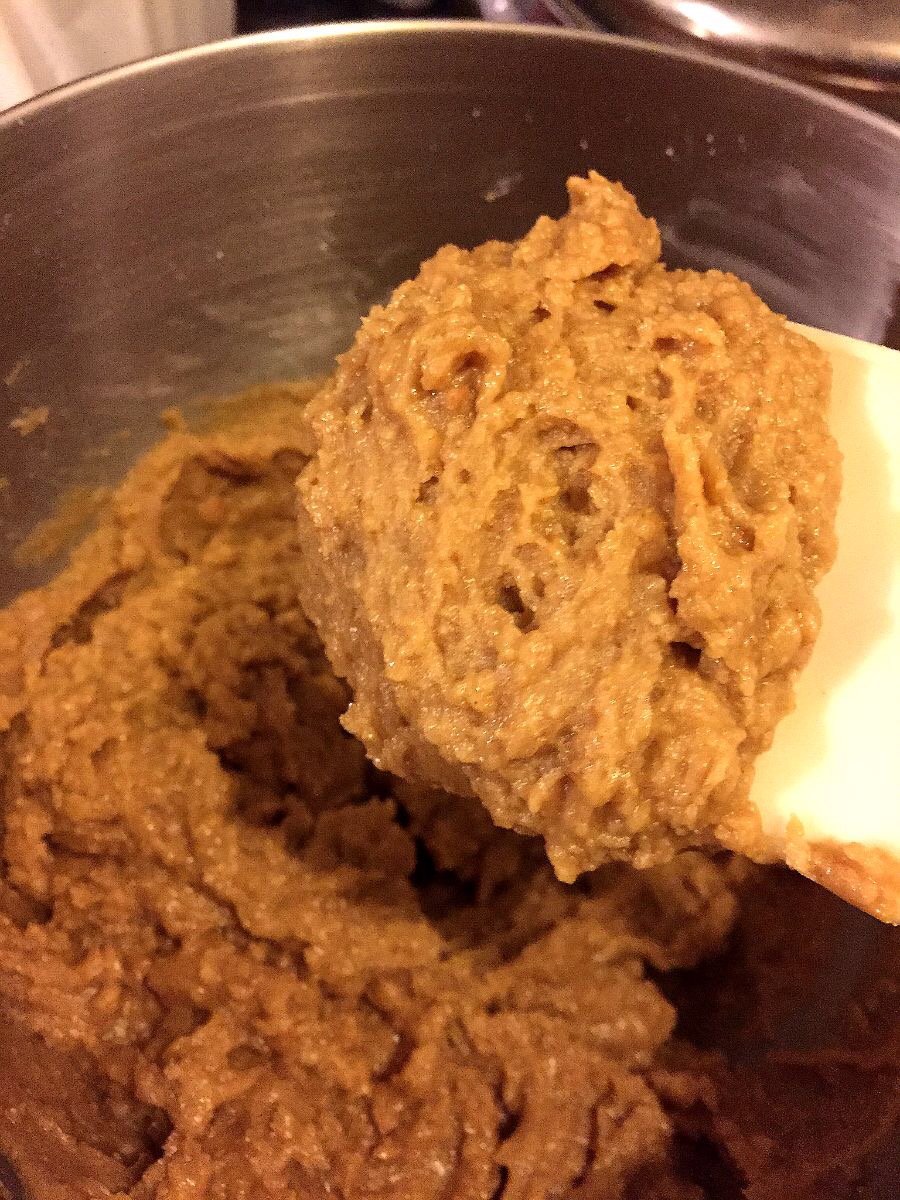
If the mixture seems too crumbly, then add a little more melted margarine. If it’s too creamy to shape, or won’t hold shape, then you can add a little more crushed graham crackers (use caution, since this will change the flavor a little) or you can cover it and let it chill in the refrigerator for a little bit. (Sometimes the room temperature can cause issues, or tiny variations in the ingredients, or just that wild tendency for things to go wrong like I have.)
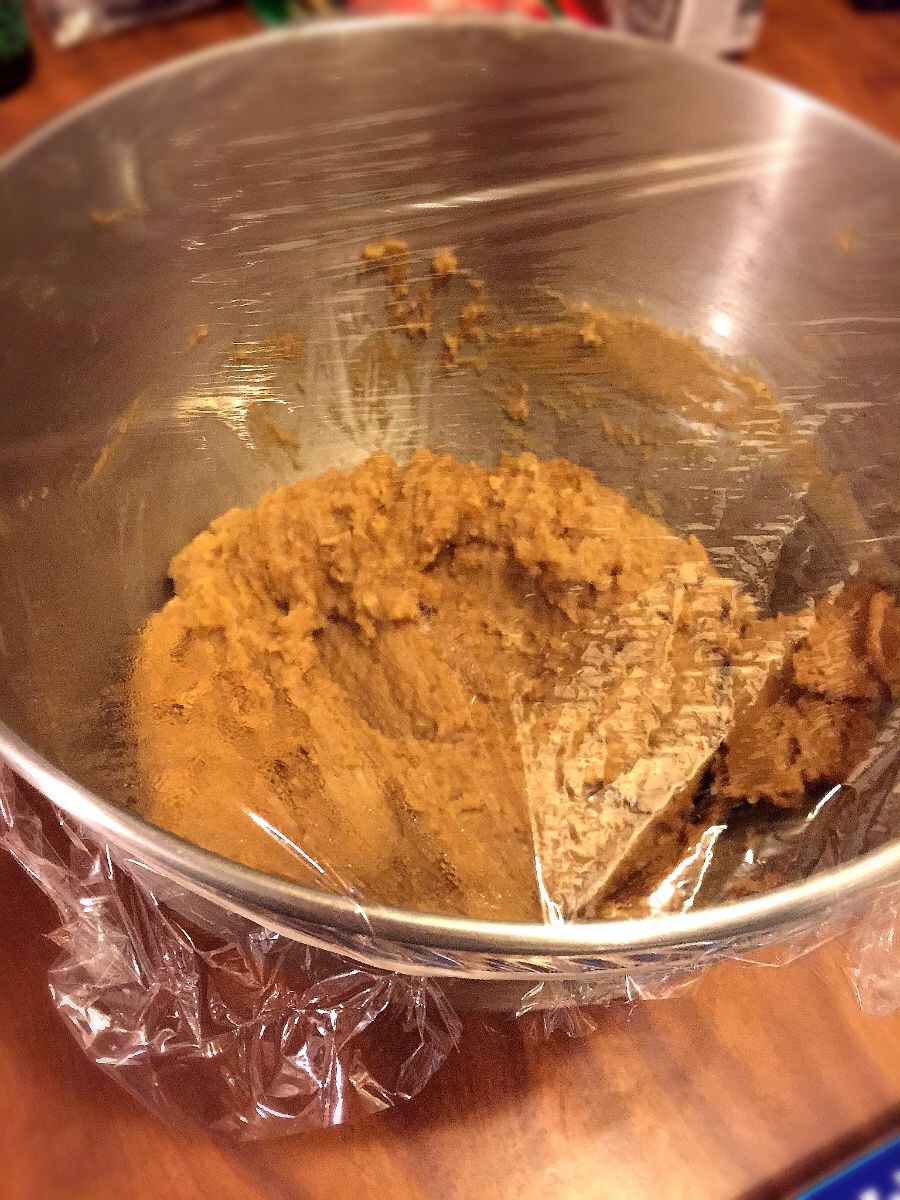
Chilling worked perfectly for me and you can either grab a little out by hand or use a small scoop, like me. The mixture should be thick and hold together pretty well, yet is still pliable, so it can be shaped into balls. Prep a cookie sheet with some waxed paper for easy cleanup. Powder free vinyl gloves work wonderfully, too.
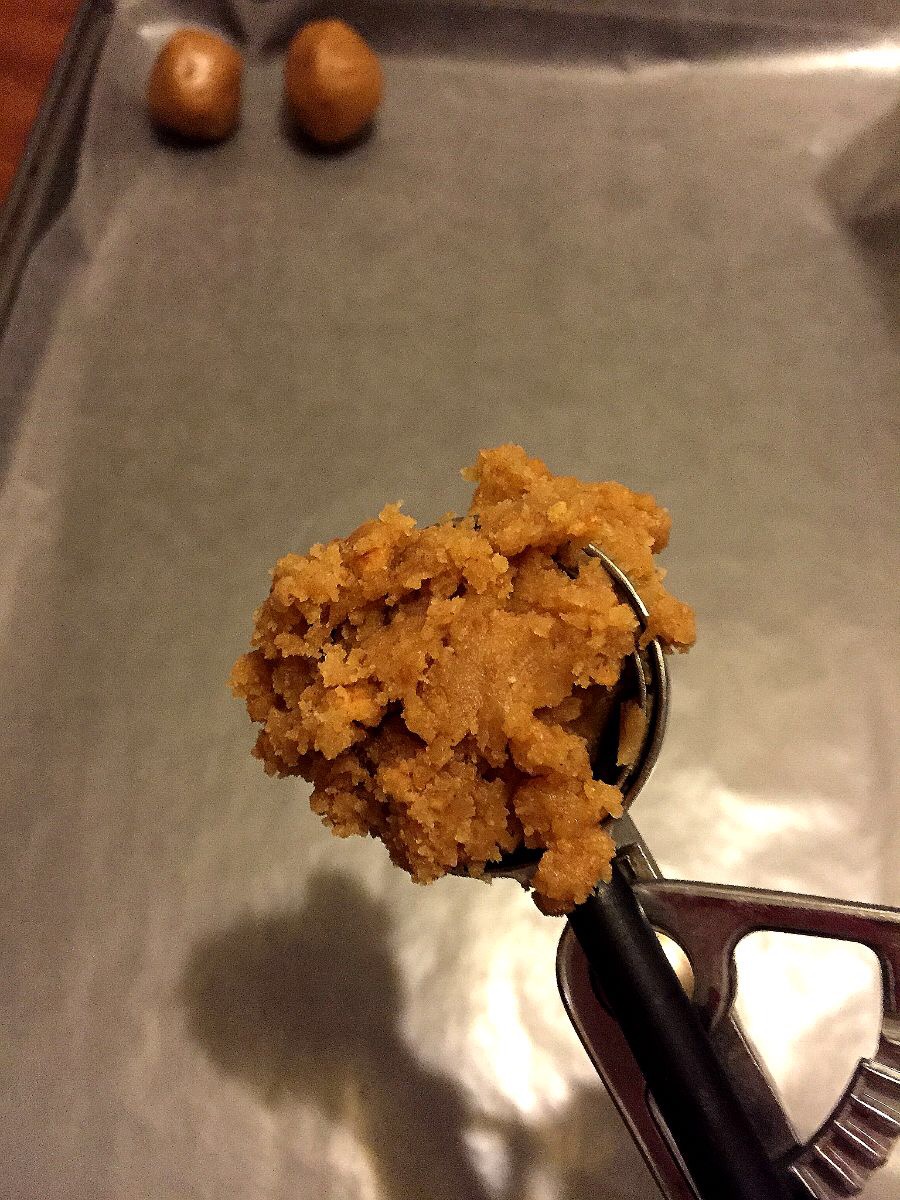
One handy step in making these, other than the scoop taking the work out of trying to keep things somewhat uniform, is to smash the scoop of filling in your hand, and then roll it into a ball between your hands. The smashing seems to help it stick together better and makes rolling a lot easier without crumbs trying to escape.
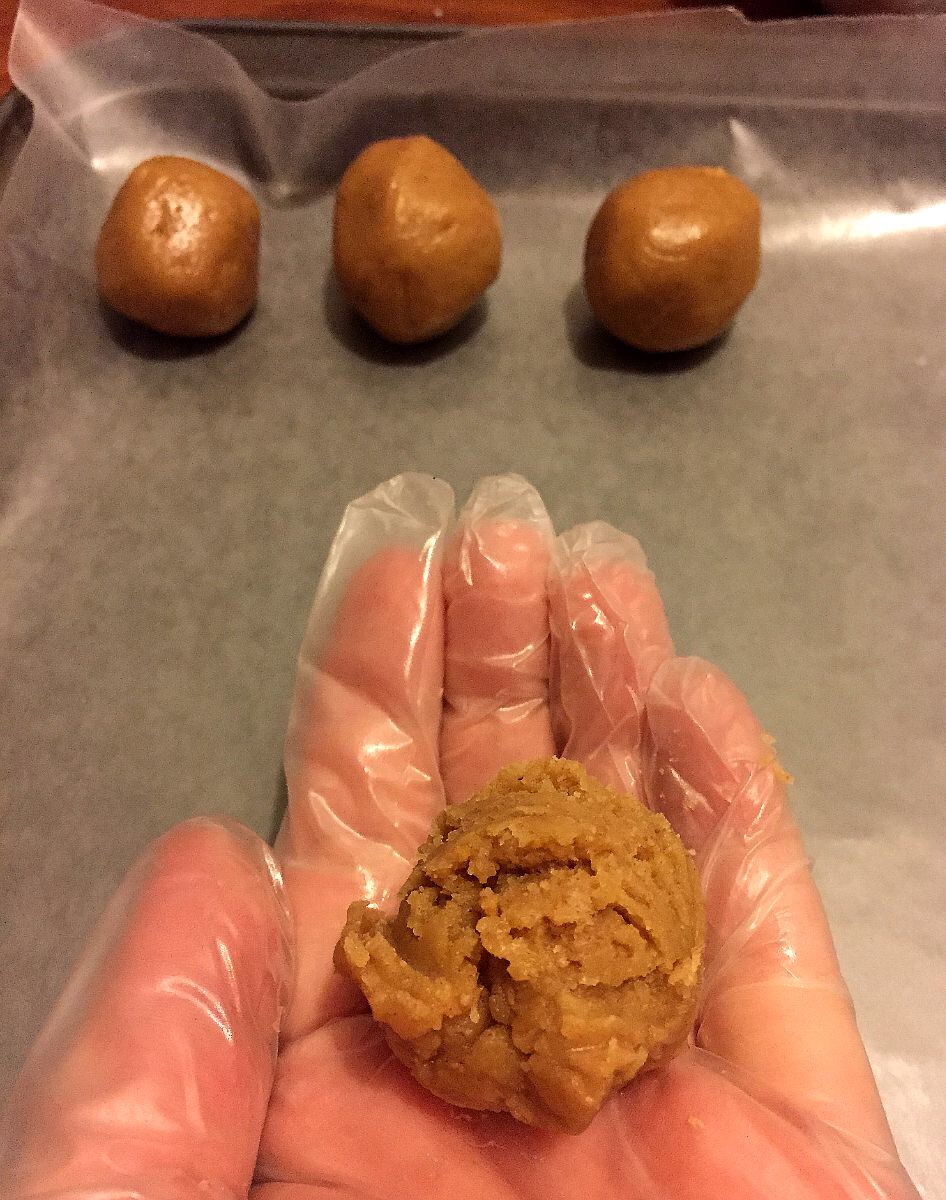
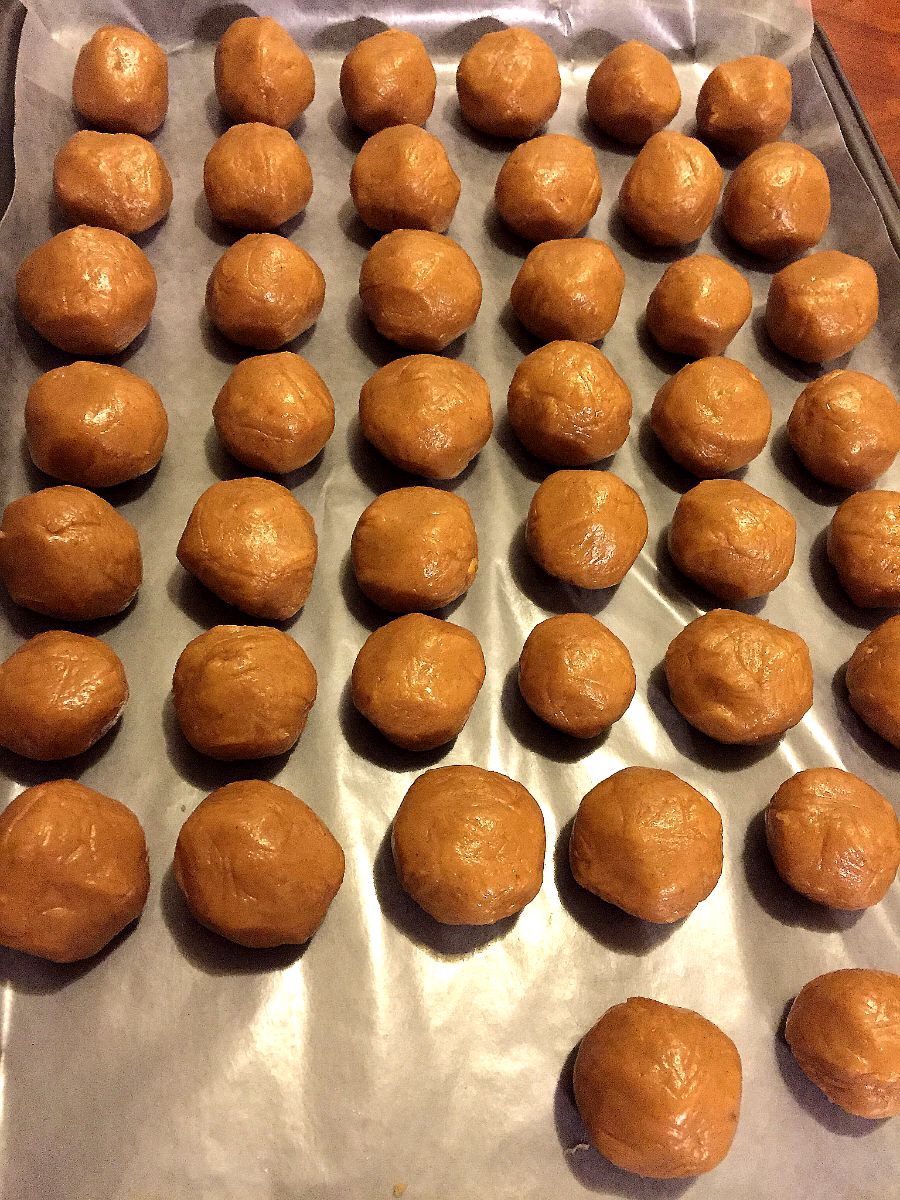
When all of the mixture has been rolled insert a toothpick into each one (unless you prefer to use fondue style dipping tools, then you can skip the toothpicks), cover loosely with a sheet of wax paper, and then refrigerate them for at least two hours. Or set them in an outdoor smoker if you live in the Midwest and it’s December. *laugh*
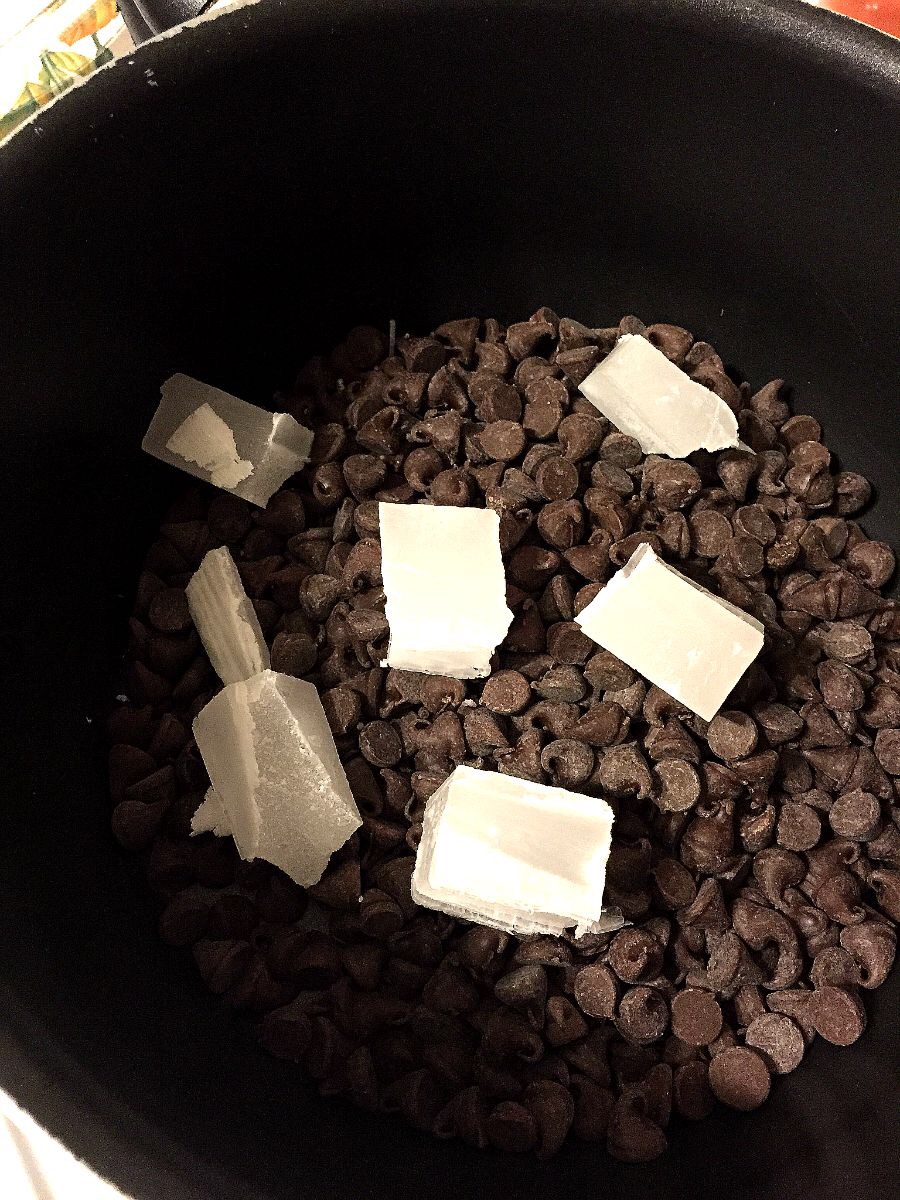
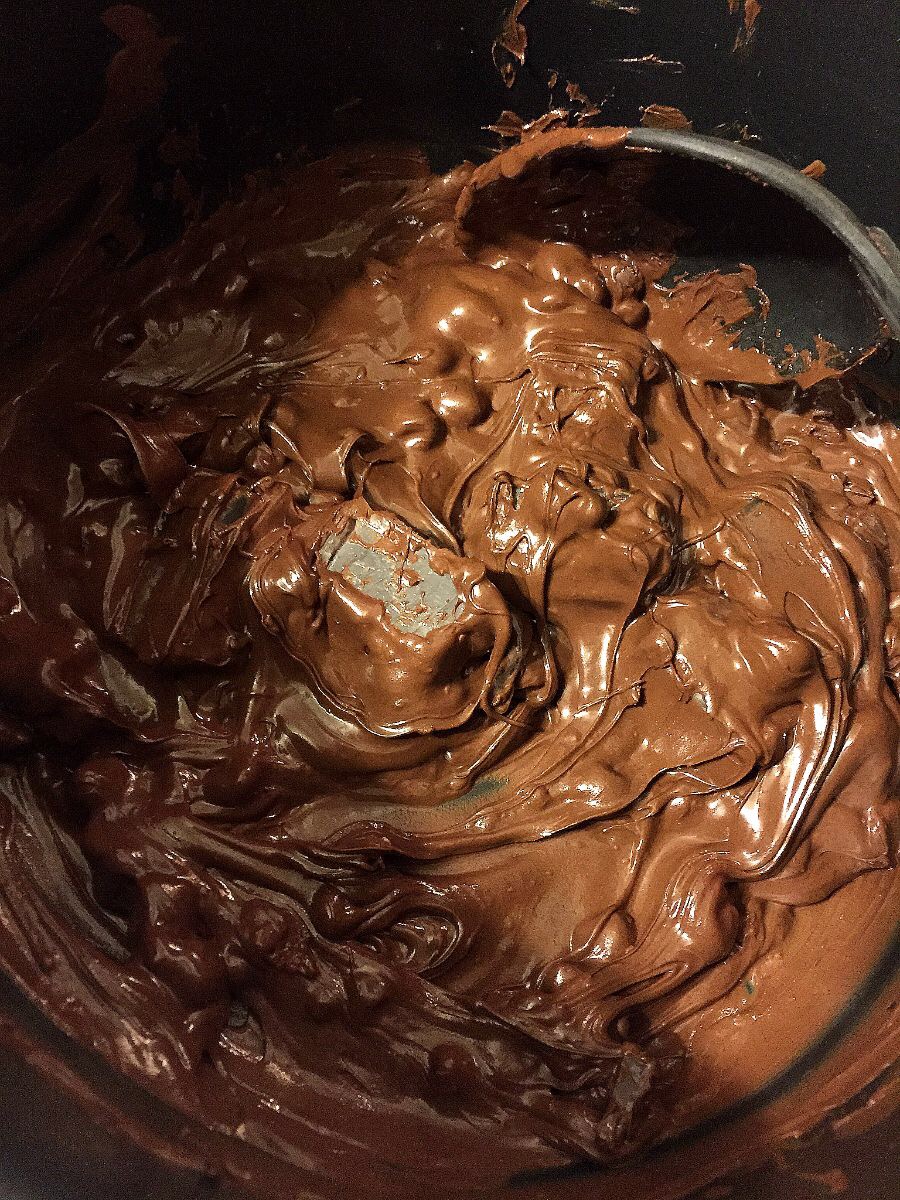
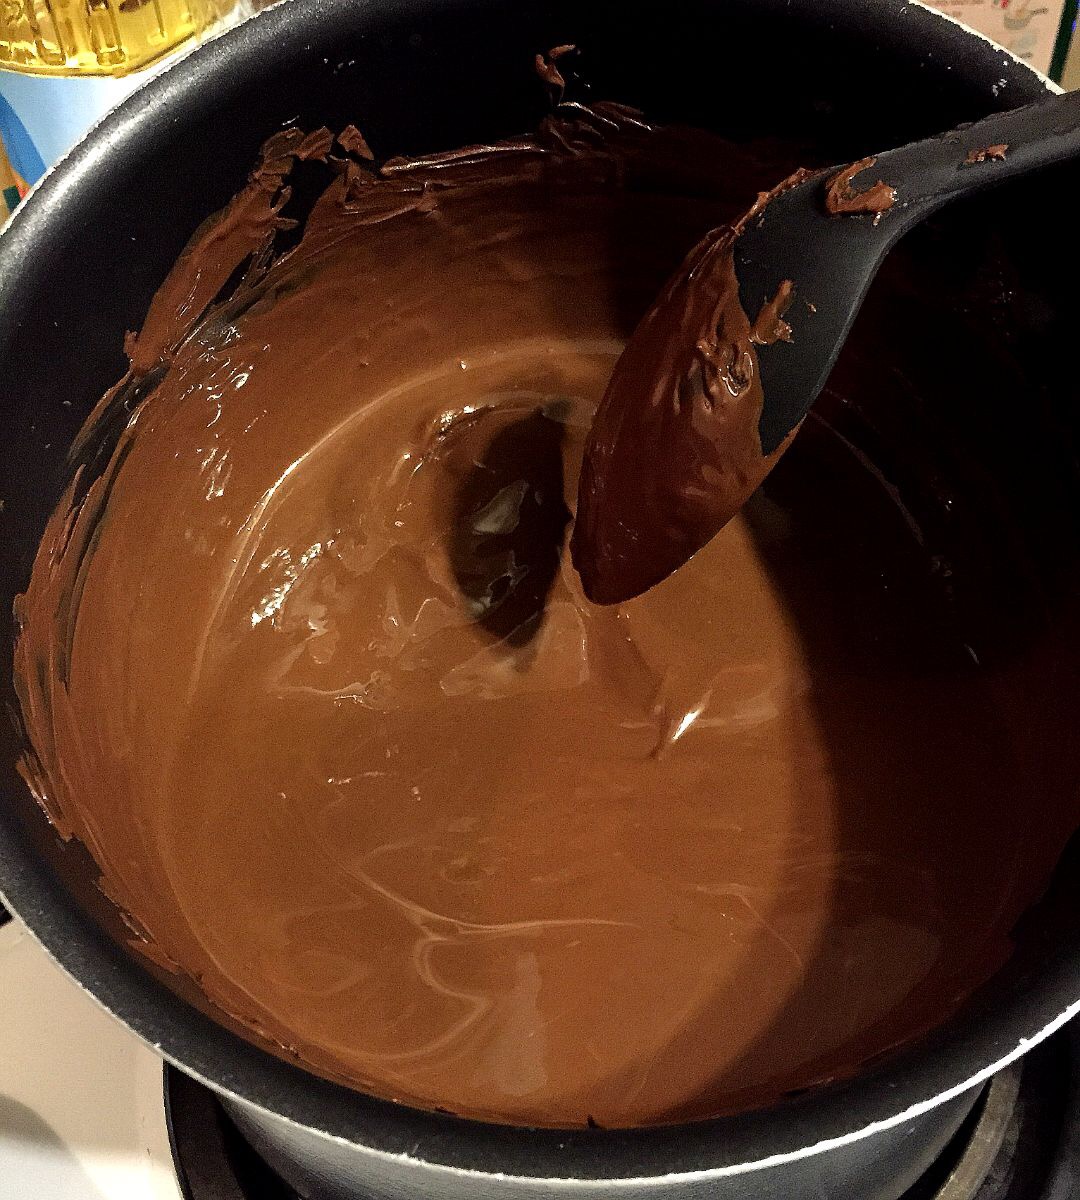
Once they’ve chilled you can start on my favorite part, the chocolate coating. *grin* You’ll need to melt chocolate chips with a little paraffin wax in a double boiler while stirring frequently until it’s melted smooth. If you’re using two saucepans in place of a double boiler, make sure that the top pan does NOT touch the water in the bottom pan, or else the chocolate may scorch or seize. I’ve also found that cutting up the paraffin really cuts down on the stir time and therefore less worry about ruining the chocolate. I didn’t pay close enough attention this round – cut yours to about half the size of what’s in the picture for an even easier experience. (By the way, if the idea of the wax grosses you out, you can totally leave it out. Your Bon Bons won’t have the gloss and harder shell, is all. You’d be surprised how much wax you regularly ingest anyway, though, so this little bit truly isn’t a big deal.)
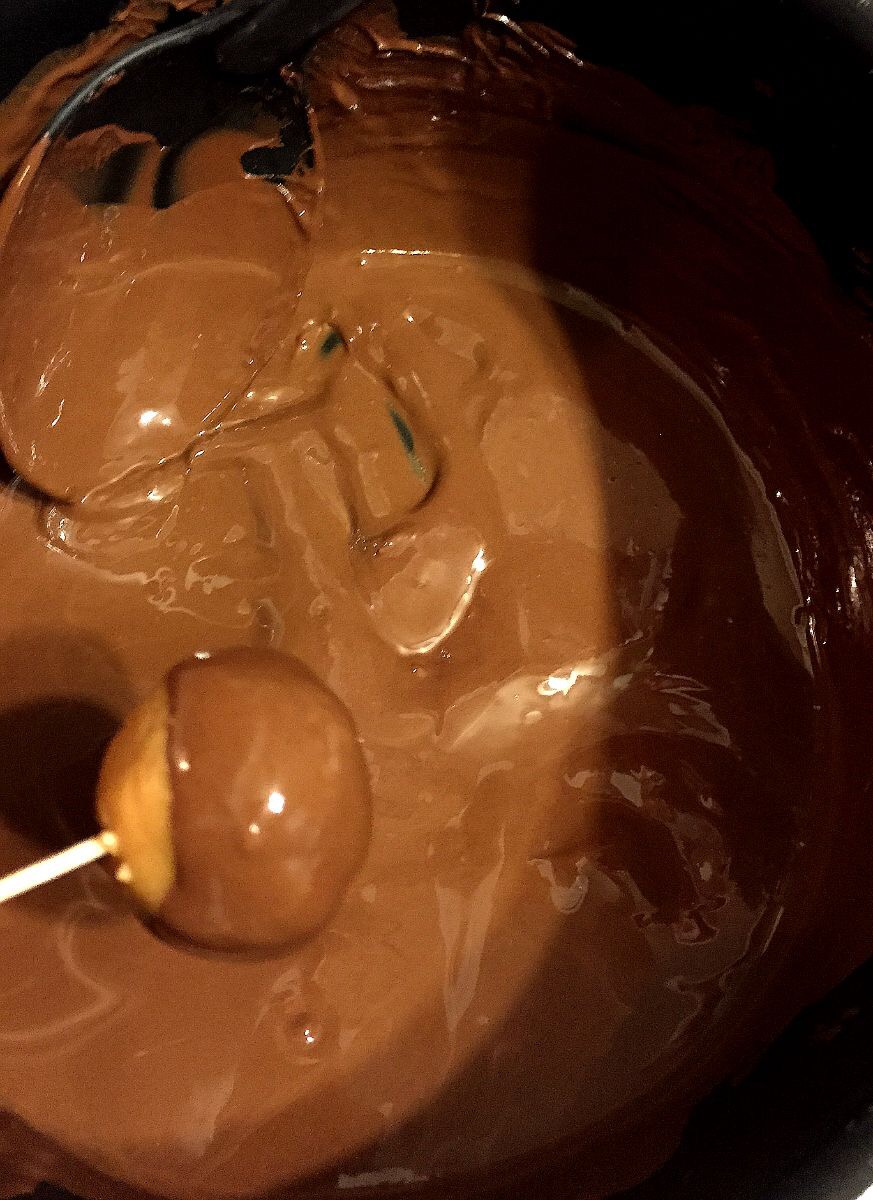
Dip the chilled peanut butter balls into the chocolate, let the excess drip back into the pan, and then place back on your wax paper lined cookie sheet. They can get a little squirrelly when you’re dipping, so you may have to get creative in order to make sure that they’re fully covered. Spin them, swirl with your fondue dipper, pour some over the top with your spoon – whatever it takes. My mom has the spinning toothpick technique down while mine tends to include a little jig (I wish I meant the Bon Bon), swirling the ball with the fondue dipper, and then covering any missed spots by pouring some chocolate from the spoon. You know me, I can’t do anything like a normal person. *grin* That dance is essential for my success for some reason.
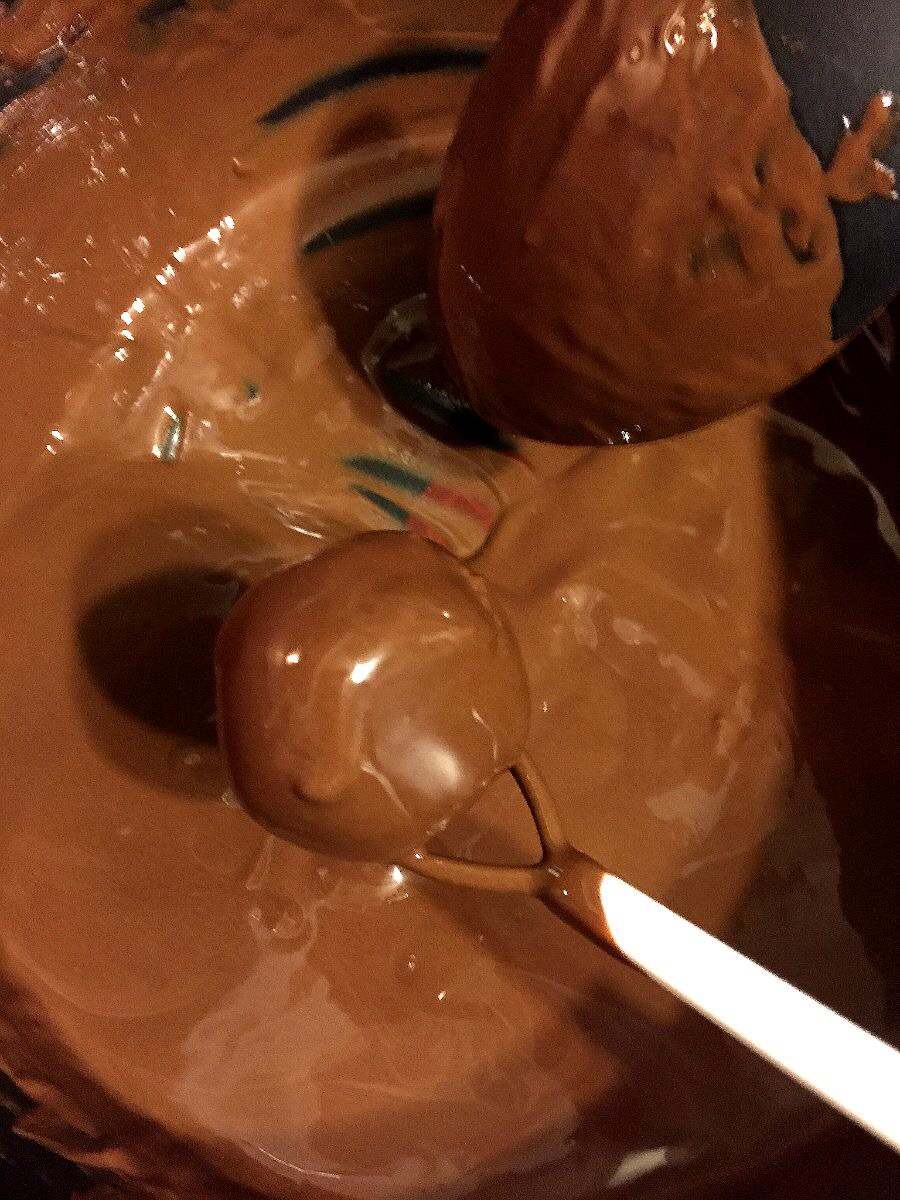
Once the chocolate starts to harden a little you can remove the toothpicks, if used, and I warn you now that usually about half of the toothpicks pull right out as we set down the coated candies, so don’t worry if it happens to you. Shoot, we’ve had the ball slip right off into the chocolate even, so you didn’t do anything wrong. Ahem, back to the recipe…If you want really beautiful Bon Bons (really, the shininess of that chocolate and the allure of peanut butter and chocolate together making yumminess on your tongue isn’t enough for you? I’m all ready happy at this point, but just in case you’re planning a gorgeous spread…), then you can always cover the toothpick holes by spooning a little of the leftover chocolate over them or even by drizzling a contrasting colored melted chocolate over them. The drizzle does double duty – covers the hole and makes them look all snazzy. I don’t do it, but I’ve seen plenty of recipes that call for it. It definitely jazzes them up. I had some issues this round with marks from the fondue tool, plus some hit and runs due to my shaking hand, so there were quite a few to fix before we decided that it’s just for family and gave up. Plus, we wholeheartedly believe in the best part of being the cooks for this treat…if you have leftover chocolate you can just dig in and no one will ever know! *cracking up*
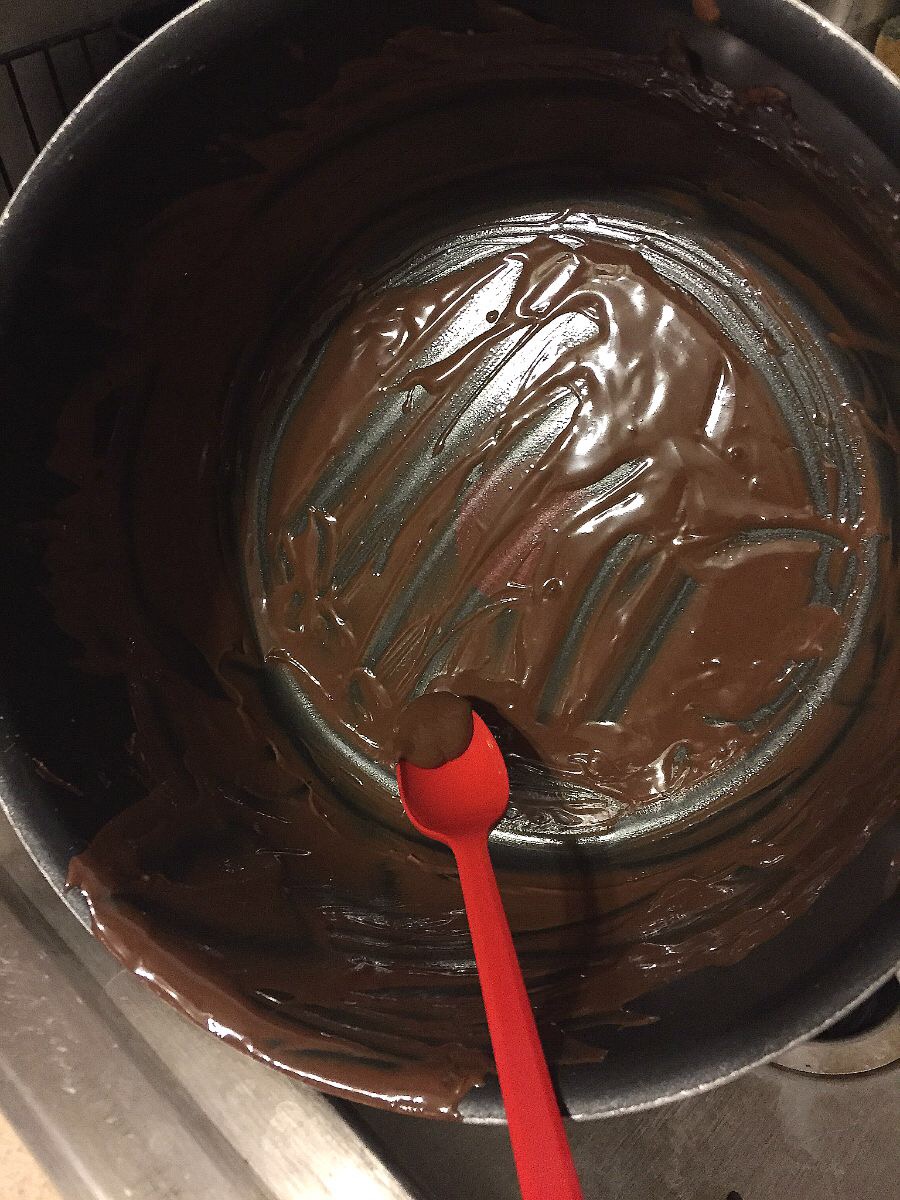
You may still have a healthy bit of chocolate in your pan after everything is coated. Just take a paper plate (or real one if it has a high edge and a dipped center), cover it with some wax paper, and pour the leftover chocolate on there. The high edge of the paper plate keeps the chocolate in a pool in the center and prevents it from running all over, like your hand or refrigerator. I use that second sheet of wax paper that was used to cover the Bon Bons earlier, when they were chilling before the dipping, to pour the leftover chocolate onto actually. If you do it right you can pull up part of that wax paper and cover the chocolate, too. Once the leftover chocolate cools you can nibble on it, use for something else later, or put in the bottom of your cup when you pour hot chocolate or coffee for a little umph. Personally I vote for nibbling. I’ll fight you for a hunk of chocolate any day. *grin*
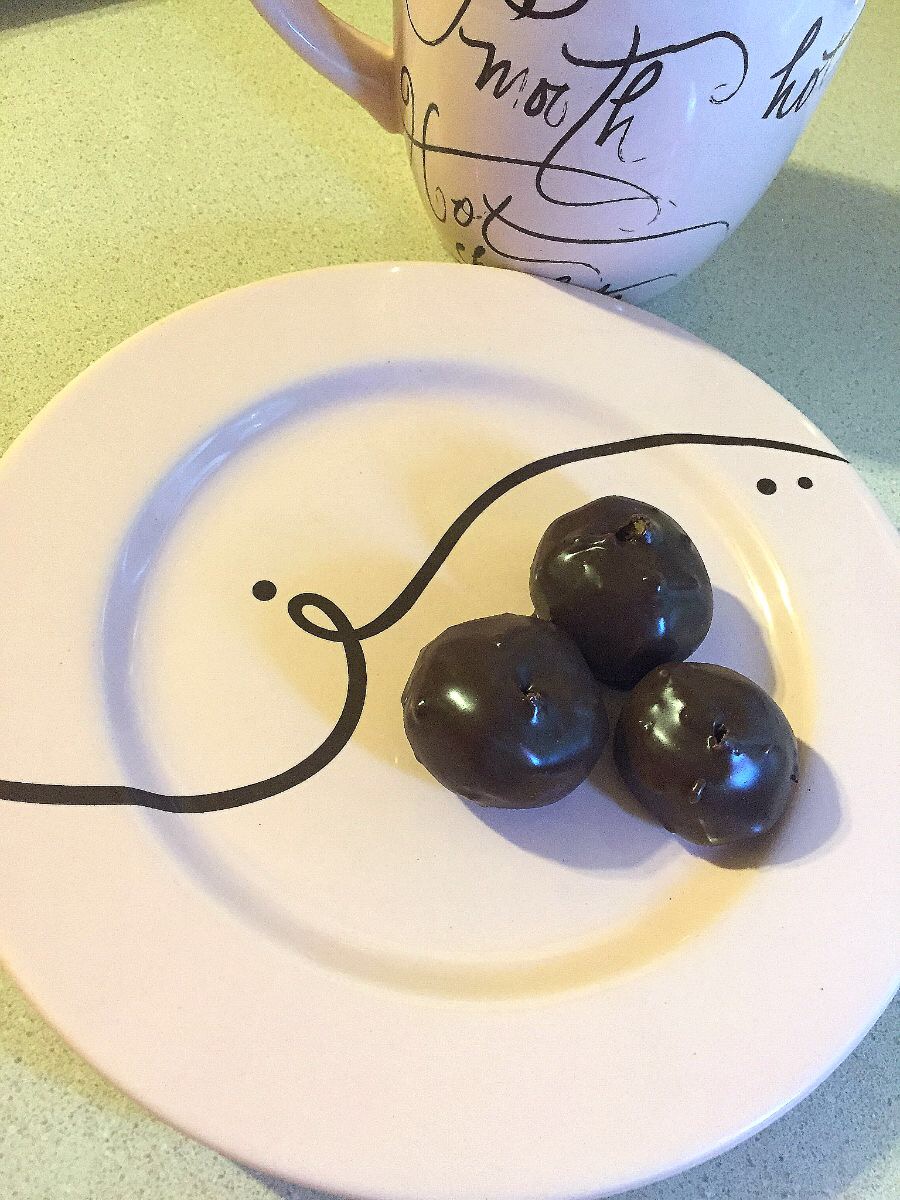
Allow the coated Bon Bons to chill in the refrigerator for at least two hours. They’ll darken, get uber shiny, the flavors will develop, and they’ll have this awesome crunch when you bite into the chocolate shell. I got a little fancy for the final picture for you, fancy for me at least, and put mine on one of my special occasion “chocolate” saucers with a cup of hot chocolate. The Bon Bons look so pretty and are pure bliss in my book.
Make sure to refrigerate until serving and to refrigerate all leftovers. In theory leftovers can be refrigerated for up to two weeks. We’ve never ever ever had leftovers, even when my mom made double batches for bigger family parties, so I can’t give any handy tips for that part of the recipe. *laugh*
The recipe:
Peanut Butter Bon Bons
1 cup crushed graham crackers (you can use the food processor or I find it works just as well to put them in a zipper bag and run my rolling pin over them several times)
1.5 cups peanut butter (some swear by chunky for binding, I prefer using creamy because of the texture)
1 box of powdered sugar (or 16 oz by weight)
1 cup of melted margarine (use the stick margarine, not the tub kind, or else it doesn’t have the right oil percentage)
12 oz semi sweet chocolate chips
Half a bar of paraffin wax , cut into pieces (comes in a box with four bars, found in the canning and baking aisles)
In a food processor or stand mixer combine the first four ingredients until smooth and thoroughly mixed. Scoop mixture and form into a ball, and set on a cookie sheet lined with wax paper. Once all of the mixture has been rolled into balls, insert toothpicks about halfway in each ball if you will be dipping them that way (skip this if you are using fondue style dipping tools). Cover loosely with a sheet of waxed paper and refrigerate for at least two hours. Melt the chocolate chips and paraffin in a double boiler. Dip the chilled balls into the chocolate and coat the entire surface, allow any excess to drip back into the pan, and then place back on the lined cookie sheet. Once all of the Bon Bons are coated and the chocolate has hardened a little, remove the toothpicks, if they were used for dipping. Refrigerate the Bon Bons at least two hours, until fully firm. Serve while still cool. Bon Bons can be refrigerated for up to two weeks.
Hopefully this post takes some of the mystery and nervousness out of making these tasty treats. If you follow my tips then the recipe is pretty foolproof. My pictures are proof. *grin* They sound super complicated, but once you’ve made them a few times, it’s not bad at all, as long as your arm doesn’t wear out quickly. You can always call in some reinforcements to help with the dipping and give your arm a break, like I did. I hope you give these a try and enjoy them as much as my family. I wish you a very merry Christmas and happy pampering! 🙂


