RSS Feed

Monthly Archives: March 2018

Peppermint Bark Recipe by Leah

Peppermint Bark


I sent this Peppermint Bark with my husband to a leadership meeting and to say they were well received would be an understatement!  My husband came home laughing as he told me the reactions.  One gentleman, reaching for a second piece, declared that these are “proof that God loves us”.  Another took a bite and interrupted the meeting to ask who brought them.  The reactions were so good that those that initially declined the offer of a piece ended up eating some.

So rewarding for me.  The best part is that it’s not even complicated to make.  It can be a little pricey because high quality chocolate is a must but I stock up on Ghirardelli baking bars when they go on sale and they work perfectly in this recipe.


Peppermint Bark


INGREDIENTS

24 oz high quality white chocolate, broken in to pieces and divided

12 oz high quality semi-sweet chocolate, broken into pieces

3 tsp vegetable oil

1 tsp peppermint extract, divided

8 regular sized candy canes


PREPARATION

  1. Remove the wrappers from your candy canes and crush.  My favorite method is placing them in a bag and hitting with my rolling pin as it allows me to control the size of the chunks.  Set aside.
  2. Line the bottom and sides of a jelly roll pan with aluminum foil, making sure to smooth out wrinkles.  Set aside.
  3. In a double boiler or microwave* melt 12 oz of white chocolate with 1 tsp of vegetable oil.  Once melted stir in 1/2 tsp peppermint extract.  Pour melted chocolate into the prepared pan and spread into a thin smooth layer.  I find an offset spatula works best for this.  Place the pan in the freezer for about 8 minutes or in the refrigerator for 10-15 minutes; or untl almost completely set.**
  4. Melt the semi-sweet chocolate with 1 tsp vegetable oil.  Pour the semi-sweet chocolate over the white chocolate layer and spread until smooth.  Place back in the freezer for 8 minutes or the refrigerator for 10-15.
  5. Melt the remaining 12 oz of white chocolate and 1 tsp vegetable oil.  Once melted stir in 1/2 tsp peppermint extract.  Pour over the semi-sweet layer and spread until smooth.  Sprinkle with crushed candy canes and very lightly press into the bark.
  6. Freeze or refrigerate the bark until completely hardened.  Use the foil to lift the bark from the pan then peel the foil from the bark.  Allow the bark to sit at room temperature about 15 minutes and cut into squares.


*To melt your chocolate in the microwave use a small heatproof bowl and melt in 15 second increments.  Stir vigorously after each time, making sure to scrape down the sides of the bowl.

**If you allow the layer to set completely before adding the next layer of melted chocolate then the layers will separate upon cooling.


Leahs New Logo

Simple Honey Baked Chicken Recipe by Leah

Simple Honey Baked Chicken

This chicken dish is the very first thing I cooked for my husband as a young bride.  We’d come home from our honeymoon in the beautiful coastal town of Pacific Grove, California.  My husband had to go to work and I remember kissing him goodbye and standing there in our very 1st apartment, not yet fully moved in, and wondering where to start.  “What would a wife do next?”, I thought to myself.  Very happy but a little uncertain I decided to unpack. I opened the first box and there on top was a cookbook, gifted from a family friend in Canada.  She was a member of the Eastern Star organization and her local group of women had collected their favorite recipes and turned it into a cookbook.  What a treasure!  Favorite recipes from experienced women and wives!  This is what a wife does!  I found this recipe, went to the grocery store and made my husband his first home cooked meal as a husband.  It all sounds so sweetly naive now and yet, the day was a precious one, filled with love for my husband and the life we wanted to create together.  There have been many meals since then: some fancy, some simple, some delivered or picked up, some eaten out.  Meals have been shared with friends and family, prepared together, prepared separately and all of these – every single one – have been a demonstration of love and an opportunity to connect as we sit and eat together.  Love is shared in the simple act of preparing a meal to nourish those you love.

This simple chicken dish will always hold a special place in my heart for the memories it brings.  By the way, it tastes good too. ☺

Simple Honey Baked Chicken

INGREDIENTS

2 broiler-fryers or 2 lbs of whatever chicken is on hand

1/2 cup butter or margarine, melted

1/2 cup honey

1/4 cup prepared mustard

1 tsp salt

1 tsp curry powder

PREPARATION

  1. Place chicken pieces in shallow baking pan, skin side up.
  2. Combine butter, honey, mustard, salt and curry powder.  Mix and pour over chicken.
  3. Bake at 350 degrees F for 1 1/4 hours (I find 45 minutes to be long enough) until chicken is tender and nicely browned.

We serve over rice and with whatever green happens to be in season.

Leahs New Logo

A Quick Quote

I (Georgia) know it’s Leah’s post day, but wanted to share a quote from Dr. Perry’s Make It Ultra site. It really speaks to me during our adoption journey, but is inspirational for everyone, so I wanted to share it.

It’s hard sometimes to keep the faith and belief in yourself, especially when your dreams feel so difficult to achieve. I saved this as a favorite picture from my camera roll, so that I have quick access for that extra inspiration I need when my resolve begins to slip a bit.

There are some really great inspirational and educational posts on his site, so I hope you will check out some more of his posts on Make It Ultra (and no, I get nothing for this recommendation, other than feeling good about sharing something uplifting).

A Few New Favorite Things

After being a lot sicker than usual for five months I started thinking about what could be playing with the Fibro to make me even more susceptible to illnesses. I dusted (I admit that I suck at staying on top of that), I used baking soda in the carpet, stayed away from my business shelves in case I had developed an issue with an ingredient…I tested a lot of things. My ability to grip things is getting worse, but caught even me by surprise when I couldn’t hold onto my drink while sitting in bed watching GMM on my phone. (Since my body is irritated by straight water right now, I’ve had to get creative with findings things to drink and Frappuccino became one, unfortunately. Lol) I knew my comforter would need to be washed to get the milk out. I stripped the bed and did a quick half fix to get us by until I built up another spoon to make the bed fully again. When I went to properly make the bed I truly saw the state of our pillow top and it was embarrassing. We had a foam insert inside the pillow top, so I knew that it had to be bad, as well.

I started thinking and realized that we bought the Sleep Number bed with pillow top and foam around 13 years ago. The Sleep Number and bedding was such a blessing as my Fibro pains began, and I truly think the combo gave me a little more time to enjoy having a career and a more active lifestyle. Years later I’m looking down at the bedding and thinking about what has probably developed in bedding that we didn’t realize was so old. With his help we went to straight onto the mattress with a fitted sheet and I knew this wasn’t going to work. Once we got our taxes done and knew we would be covered, I spent a few days researching mattress pads and pillow tops. During all this I realized that my congestion had improved dramatically and that although I was hurting more, I was actually getting better rest (which any Spoonie knows is nearly impossible). Something inside of our old set had gotten bad enough to compromise my system further. I was floored.

Anyway, fast forward to yesterday and five boxes from the mail man, with one being incredibly heavy so he brought it in for me, and a new bed was born. Lol They really need to put warnings on pillow top bags that states there may be an explosion upon exposing to air…I cut open the bag and literally got knocked over as this cushion exploded out and tripled in size immediately. It’s now funny, but was quite startling and irritating. *grin*

I then had to wrestle the mattress pad out of the big and heavy box. It was literally a wrestling match. It won several rounds. After I was pouring sweat and breathing harder than when I box, I managed to get the pad partially up onto a crafting table to air out. It was full on the hardest workout I have ever done. *laugh* As I collapsed into my recliner and stared at the 2″ pad draped over the table in front of me I realized that it was hanging unevenly. Dude. You suck. I kept staring at it while trying to catch my breath, but my OCD started screaming inside of my head. I can’t stand when things aren’t even. Sides have to line up if I can see them (I can’t see his side of the bed from where I am, so our bedding can be high for fun sized me and low for tall him without bothering me thankfully). The right side was at least 6″ longer. When I managed to get back up and try to even it out the doggone table tried to collapse!! L was still sleeping, so I knew I had an hour with this nightmare, and found that if I leaned onto the arm of my recliner with my phone at eye level, watching YouTube, it was all out of sight and my mind could quiet down. But seriously…a freaking piece of bedding got the better of me! After the brother knocked me on my bottom all ready!

Thankfully L got up and drug everything into the bedroom, and we made our revived bed. When we crawled in for a nap before he had to get ready for his shift it was so worth the beat down. There’s a little firmness, but for the most it just cradles all of my trigger points. And I woke up without trying to hack up a lung, too! It took about five minutes to convince ourselves to get out of the cloud of happiness. *grin*

I also ordered a germ guardian air purifier, but just got that running, so I’ll have to give it a thumbs up later on if it proves itself worthy. In the meantime I want to share the links for these two incredible pieces of bedding that quite quickly eased a lot of the extra pain I’ve been suffering from lately.

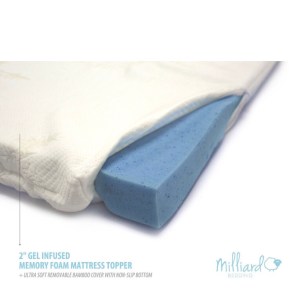
The gel memory foam mattress topper is by Milliard and set us back $124 for the king size.

The pillow top was a hard one for me to decide on honestly. I had a really difficult time deciding between the three I had narrowed it down to, but decided that the hypoallergenic and antimicrobial properties, plus being overfilled if I’m honest, were the winning features. The Leisure Town Mattress Pad Cover was $80.

These are Amazon member prices, of course, and the free shipping for such heavy items is so worth the membership, let alone the sales and shipping frenzy during the holidays, in my opinion.

Kiddo’s room is still the most incredible in our house, but our bed feels like the one I slept in at a Marriott. We got her an incredible bed set, but I have to say, I won’t hesitate to order if she asks for the topper and foam. A two hour nap all ready convinced me (at the time of the writing…I’ll schedule this to post in the morning while I’m still sighing happily in my fluffy bed. *laugh*). These are definitely going to be on my list of favorite things!

Before I go, I want to mention one other thing. I’m hoping that the links I embedded for you actually go to smile.amazon. If you haven’t heard about it, a portion of sales from Amazon, when ordered through the sister site of smile.amazon.com, go to charity. There’s a place in your account where you can pick the charity that you would like to have your percentage donated to. I totally respect that you may have a favorite charity that you would like to support. If you do not, though, it would be absolutely amazing if you would consider helping raise money for KCSL, who is the company Adopt Kansas Kids, our adoption agency, is under. KCSL supports a lot of different areas of the process, including fostering, adoption, training, and parent assistance. I embedded the link if you’d like to read their fast facts and hopefully look around their site a bit. Part of the reason our adoption has had a lot of delays is because there aren’t enough resources to process the less urgent parts quickly. It would mean a lot if we could help raise more for them and help more children who need all of us to advocate for them, not just an overburdened system. Here’s a quick view of the charity screen, although I marked out our part, especially since I don’t need L to see and figure up how much I’ve spent on Amazon. *grin* (Not really; we are open with each other about finances. We are private with public consumption though.)

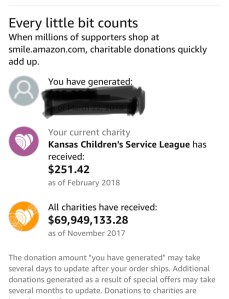
There are a lot of charities being helped, although a lot of people don’t know about it. Although the heavy hitter charities are very worthy, it would be an incredible blessing if you would consider choosing KCSL for your charity. It does nothing for our adoption journey, but every bit truly helps take care of the children. “It takes a village to raise a child” as the proverb goes. I’d be so honored if just one in “my village” will help the children.

Okay, I’m done with the sentimental moment for the week. *grin* If you’d like more information about the products, Smile, or KCSL/Adopt KS Kids, please don’t hesitate to write a comment or email!

Happy pampering (and yes, a comfy bed is totally under the pampering umbrella!)! 🙂

Wandering in SL

Gaming Logo


An adorable lace dress was blogged about on one of my favorite SL blogs, FabFree, the other day.  I couldn’t resist wearing it while wandering the grid on my own the other night, when I couldn’t sleep and needed a distraction from my Fibro flare.  Although I went with the bohemian barefoot feeling, I want to try it out with a country twist to it.  If it looks bad, no one will ever know thankfully.  *laugh*


Bre and L 3 23 18_110b

I discovered a new-to-me pose shop with an incredible sim for photography, so I couldn’t resist a pic with the sweet, lightly moss covered, couples statue.  If you get a chance to check out Luane’s World, I totally recommend it.  When I saw Love’s picture taken here when she blogged about the dress (she’s one of the main FabFree bloggers), I had to see this sim for myself.  Her picture was way prettier, but I’m learning and now that I know about such a gorgeous place, I will be wandering around the sim whenever I want a pretty nature scene.


Bre and L 3 23 18_131

This windlight (WL) is a little darker, which added to the fairy tale feeling in my opinion.  Believe it or not, this incredible scene is actually part of the wooded pathway that Z and I worked on!  We both really like to landscape, although I get antsy to change it up a lot more often than he would prefer, I’m sure.  *grin* It’s hard to change it now, because it is so dang amazing!  I can’t help but totally cheese over how awesome our project turned out.


Bre and L 3 23 18_109

Although I was using an evening WL, and the dress texture distorted due to the pose, it still turned out so pretty that I had to share it.  Again, this is part of our own landscape!


Bre and L 3 23 18_141Bre and L 3 23 18_147

I have so many hairstyles from Truth that I had to see what another one would look like and think this one is even prettier in this instance.  I finally put out this adorable enchanting landscaping scene that came in this month’s DecoCrate, with lit butterflies and soft lights draped from the tree, and mushrooms, grass, and a sleeping deer (not pictured).  I decided to make the bottom picture my desktop wallpaper for Easter.  Since I realized that I had cut out the sweet deer, I got back on and took another picture, which is why I’m in a little sundress and have my Celtic tattoo arm bands.  Sorry for the lack of continuity!

Bre and L 3 23 18_167

I just love this little landscaping piece, so I think when I change up the landscape this will get added to the fairy circle area.  I may be a tough smart aleck, but I have my mushy moments, especially if it has to do with anything Celtic or fairy related.  I blame it on my Irish ancestry.  *grin*


I hope you enjoy seeing a bit of my “other life”.  If any readers are SL users that would like credits, then please let me know and I’ll go back to listing and linking.  On the flip side, if y’all are getting tired of seeing gaming, let me know and I’ll cut back on the sharing.  Since we meet with our social worker on Friday hopefully there’ll be some updates on our adoption journey soon!  *crossing fingers*  If you’re inclined, prayers for progress and in finding Kiddo are appreciated more than words can convey.  In the meantime, I’m hoping I feel inspired and motivated enough to finish updating the website.  I’m honestly so fixated on all my thoughts and hopes for the adoption that my attention seldom lands on my products, unfortunately.  Hopefully we get good news, I can actually stop catching viruses for a bit, and then I can gather up a few spoons-worth to let my creativity come back out to play, since I truly do want to work on the Monster Line.  I wrote it and finishing updating my website down on my to-do spreadsheet (yep, still making the spreadsheets lol), so it’s in writing that I will put my mad scientist gear back on and get back to some fun options for pampering!  🙂

Oklahoma Fried Onion Burgers Recipe by Leah

Oklahoma Fried Onion Burgers


My husband had never had grilled onions on a burger before we met.  He didn’t even know it was an option.  There’s a lot my husband didn’t know about food when we met.  He didn’t even like steak and couldn’t understand why people would pay so much for one at a restaurant.  But that’s a story for another time.  Let’s just say that he came from a home very limited in flavors.

I love a burger with onions.  They’re not complete until they have some in my opinion.  In fact, I have been known to order both grilled and raw onions at the same time when I eat at In & Out.  When I first heard that there was such a thing as Fried Onion Burgers I knew I had to try them.  I really wanted to get a good picture of them for you but it was just too late and too dark and well, we had delicious hot burgers sitting there that needed to be eaten.  So, I suggest googling a picture of Oklahoma Fried Onion Burgers so you can see just how beautiful a juicy burger sitting on top of fried onions can be.


Oklahoma Fried Onion Burgers


Yield: 4 servings


INGREDIENTS

2 large onions (I used yellow), peeled, halved, and thinly sliced

salt and pepper

1 lb ground beef

1 Tbsp butter

1 Tbsp vegetable oil

4 sliced American cheese

mayo, mustard, and pickles for serving

4 hamburger buns, toasted


PREPARATION

  1. Combine the onion slices and 1 tsp of salt in a bowl and toss to combine.  Transfer the onions to a colander and let sit for 30 minutes, tossing occasionally.  Transfer the onions to a clean dish towel, gather the edges together and squeeze out as much liquid as you can from the onions.  Do this over the sink or a large bowl since the onions will have quite a bit of liquid in them.
  2. Divide the onions into 4 separate mounds on a rimmed baking sheet.  Form the beef into 4 lightly packed balls.  Place the beef ballson top of the onions mounds and flatten the beef firmly with your palm so the onions adhere to the beef.  The patties should measure 4 inches in diameter.  Season the beef generously with salt and pepper.
  3. Melt the butter and oil in a 12-inch skillet over medium heat.  Using a large spatula, transfer the patties to the skillet, onion side down.  Cook for 6-8 minutes, until the onions turn a deep golden brown and begin to crisp around the edges.  Flip the burgers, then increase the heat to high and cook until well browned on the second side, about 2 minutes.
  4. Add a slice of cheese to each burger and allow to melt.  Add mayo, mustard and pickles to the top buns, then place each burger on the bottom buns.


Leahs New Logo


Meet Luke

Gaming Logo


I’ve been needing some distraction from real life lately and have overworked my body trying to clean (and get over the continual cycle of getting viruses lol), so I’ve been on the computer a lot lately.  Naturally that means I’ve been on SL a lot lately, since there are so many things to do, especially now that I know about the fun of photography and windlights.  Therefore I’ve had more time to spend with my roommates; Zilch, Sylo, and Luke.  Since Luke can be on a lot I’ve been dragging him around to try out my new photography goodies.


A while back we got partnered on SL (the SL version of married, although they usually last a hot minute and are over lol).  We’re in committed relationships in RL and flirting makes us both uncomfortable, so it seemed like a perfect solution.  We can hang out, take cute or romantic pics without it being questionable, and I get to tell him what to wear.  (Sometimes that would be nice to be able to do in RL, right?  Sometimes you can’t help but raise a brow and wonder if they used to dress like that for dates without you noticing.  *grin*)  Anyway, the arrangement has made things so much easier, since neither of us have to deal with strangers hitting on us, and it’s nice to have a partner to dance with on the rare occasion I want to get all fancy.  He hasn’t been on SL for overly long, so I’m helping him build his inventory with reasonable deals or freebies.  Since there are few male SL blogs it seems like, I am totally encouraging him to post some SL oriented blog posts, in hopes of helping fill that gap (and I pay for my site, so why not share and get my money’s worth?! *laugh*).


Without further ado (and without credits today, sorry!), here’s my smart aleck sidekick…


Bre and L 3 23 18_085

Okay, so maybe we’re both smart alecks.  *grin*


Bre and L 3 23 18_071

I couldn’t resist such a cute shot in the beautiful scene.  I might have to do this one again with formal outfits, because it just seems perfect for a prom-like shot.


Bre and L 3 23 18_057

We had to get a little silly while checking out the mystery section at Backdrop City (this place is constantly expanding and is quickly becoming a favorite place!  (If you want the link, I have it in previous gaming posts, in the credits.  And if you like Luke’s lazy superhero shirt, just grab the *Facepalm Clothing Company* slurl in those posts.)


After I unpacked my March DecoCrate mystery box, which included a cute little stone sitting area with shamrocks in pots, I bullied him into taking a picture of the super cute built in pose of the included bench.

Bre and L 3 23 18_004


If you’d like credits, don’t hesitate to comment and I’ll add them.  I’m just not sure if any SL users are actually reading these posts, so I don’t want to put a long list of details on a post if they’re not useful to others.  *laugh*


I hope you’re having a great weekend!  I think I’ll go bully him into checking out another area of Backdrop with me…

Cherry Apple Gorgonzola Salad Recipe by Leah

Cherry Apple Gorgonzola Salad


Though I’ve only been posting recipes here a short time you probably can tell that we are salad lovers.  They are my go to lunch and my go to veggie side with a meal.  Obviously with a salad you need fresh and tasty greens but that’s only part of it.  The greens provide the most nutrients but they’re also just the base.  To make a salad truly delicious they need to be topped with all kinds of goodies: something savory, something sweet, something crunchy, and don’t forget the cheese!  This is a salad with a combination of all those things and a mild and sweet dressing to boot.


Cherry Apple Gorgonzola Salad


INGREDIENTS

salad

6 oz bag of spring mix salad

romaine head, chopped

4 strips of bacon, cooked and crumbled

1/2 cup dried cherries

large granny smith apple, chopped

1/2 cup candied pecans

5 oz gorgonzola cheese crumbles

sweet balsamic vinaigrette

1/4 cup balsamic vinegar

1/2 cup vegetable oil

1 clove garlic, minced

1/3 cup granulated sugar

1/8 tsp ground mustard

1/2 tsp salt

1/2 tsp fresh ground black pepper


PREPARATION

sweet balsamic vinaigrette

Whisk or blend all dressing ingredients together until the oil and sugar are blended.

salad

In your serving bowl toss together spring mix, romaine, and some of the dressing.  Top with remaining ingredients and pass the dressing along with the salad.


Leahs New Logo

Oregon Trail

When I was in elementary school we would get to play the original Oregon Trail on massive computers and it was the highlight of the week. I got to sit down, pick the supplies and such, and send my little pixel family down the Trail. And they died. They always died. Every so often the livestock would drown while crossing a river, so my little wagon train would too. Sometimes they were hungrier than usual and died of starvation. 9 times out of 10 they’d die from dysentery. Of course I was a smaller version of the nerd that I currently am and had to learn what in the world my little pixels kept dying from. Ew. They died from uncontrollable diarrhea. Seriously?!

Fast forward through my life and whenever I feel like Murphy’s Law is being exceptionally cruel I say “you died of dysentery”. I had to stop watching documentaries about the actual Oregon Trail because my mind automatically went there. So I’d be the crazy person trying to muffle my laughter because every time they talked about the hardships I’d always wonder how many died of diarrhea.

I’ve worked in the medical field, and had to learn a whole lot more to be an advocate for my medical care as someone with a chronic illness must be, and know how life threatening GI issues were and can be. However there’s still a ten year old inside of me that points at the people in the pictures that does the whole Oprah “and you get a car” type of pointing, substituted with “and you got dysentery! And you got dysentery!”. Yeah, I all ready know I often have a morbid sense of humor.

I’ve actually talked about it so much that L had to share a picture with me that he found online. I get this random text from him and it quickly became my phone wallpaper.

This has become my favorite way of beginning or ending text conversations and the ten year old in me grins like the Cheshire Cat. Have fun trying to get this out of your head now. *laugh* It’s especially fun to mentally do the Oprah point when you’re around a crowd of annoying people, like a school function or the doctor’s office when the doctor is running behind. I can guarantee that it really helps if you get anxious around crowds. When, in your mind’s eye, you see half the people holding the seat of their pants after basically getting the worst dose of colon blow ever, it can actually be difficult to not be cheerful.

Hey, dysentery happens, so sometimes you just have to go with the flow. Yep, I felt obliged to go there. Hopefully the new version of the game sells Pepto Bismol.

This post was approved by the juvenile sense of humor hanging out in the back of your mind. 😉

Homemade Salsa Recipe by Leah

Salsa


Salsa and chips.  They make me happy.  Little bits of spicy tomato goodness scooped up on a fried and crunchy tortilla. This recipe for salsa is as quick and easy as it gets.  Don’t forget to allow time for it to chill.


Salsa


yield: 5 cups


INGREDIENTS
28 oz can whole tomatoes and juice

10 oz can Rotel, drained

1 lime, juiced

1 jalapeno, seeded

3 cloves garlic, smashed and halved

1/2 medium white onion

1 tsp salt

1/4 tsp pepper

1/2 tsp sugar

1/2 tsp cumin

handful cilantro, rinsed and dried


PREPARATION

Dump all ingredients in a food processor and pulse until no large chunks remain.  Chill 2 hours.


Leahs New Logo

%d bloggers like this: